Build User Detection and Message Persistence using Ember.js

Good News! We've launched an all new Chat Resource Center.
We recommend checking out our new Chat Resource Center, which includes overviews, tutorials, and design patterns for building and deploying mobile and web chat.
Let's say you want to build a secret chatroom for you and your peers. In this blog post, that's actually what we're going to do. We'll build a quick and easy chat application, and enable users to see who is on the channel, and who is offline. This ensures that no unauthorized users on in the secret chatroom. And we'll do it all using Ember.js.
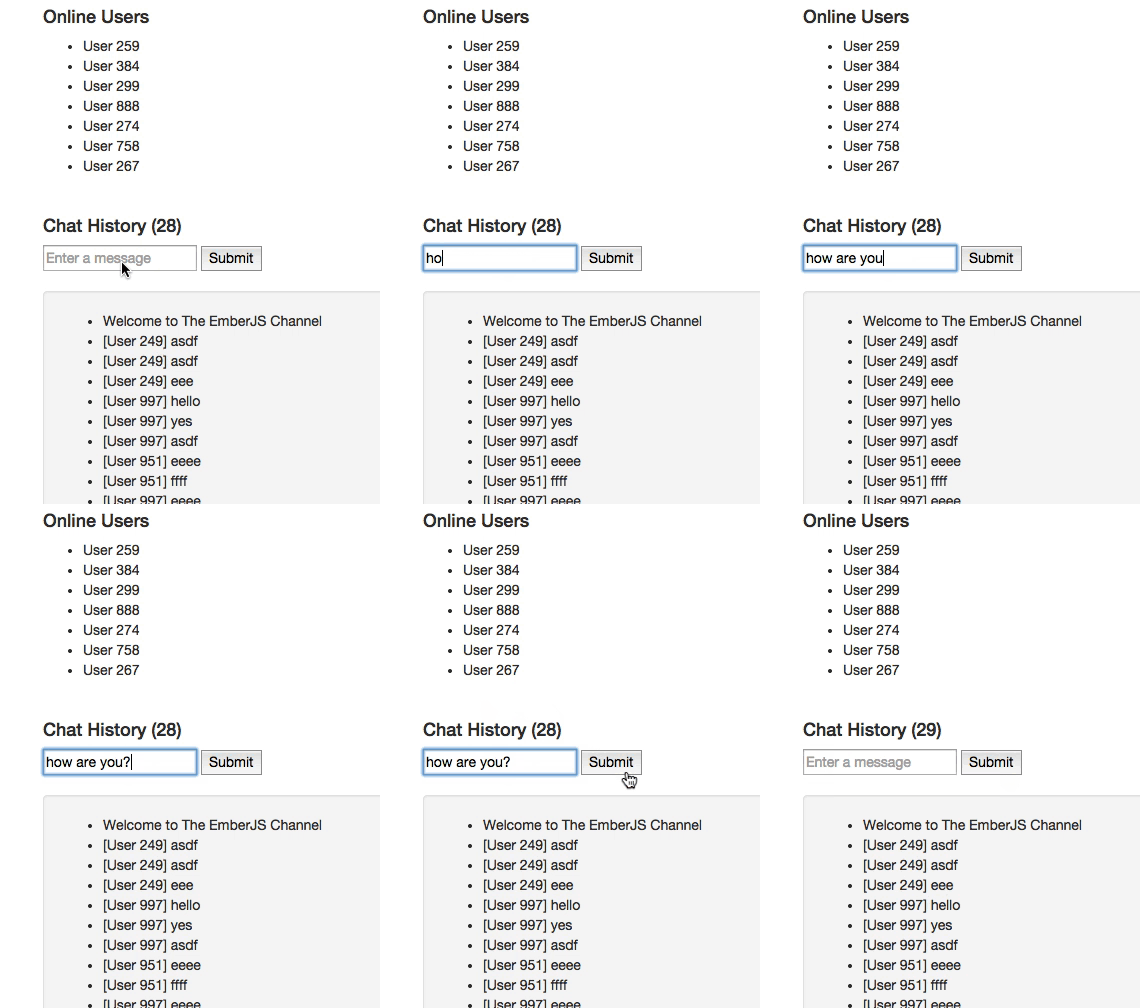
The end result will look something like this:

This tutorial will walk you through implementing user detection and message persistence functionality, using Presence and Storage & Playback, all in a real-time chat application built with Ember.js.
This example just scratches the surface of what you can do with the power of the PubNub Data Stream Network. Have an idea? Join our rapidly growing.

For this blog post, we’ll presume you are somewhat familiar with the ideas from the PubNub Ember.js SDK, at least enough to get started.
Here are some supplemental resources:
- Code Pen for the PubNub Ember.js Chat Application
- Zero to Ember.js in 60 Seconds: Ember Made Easy
- Ember.js 101: From Zero to Ember in PubNub Seconds
If you've read some of the previous posts, you can skip down to “The Good Stuff: Introducing Message and Presence Events” header, and pass over the quick recaps. If not, the quick recaps are what you need to get started.
Quick Recap: Intial Set Up
You’ll first need to sign up for a PubNub account. Once you sign up, you can get your unique PubNub keys in the PubNub Admin Dashboard. To test a live version of this app, clone the Code Pen code, and enter your unique PubNub keys on the PubNub initialization.
Here are the script includes you’ll need to get started:
Quick Recap: The HTML View
Let’s look at the necessary code for the HTML view. This will display the app’s functionality through the browser. For a simple chat application, we’ll want to see all the current users, an input box to send new messages, and a count and list of messages sent.
First, define the Ember.js Application:
Display a list of all online users:
Display the chat history length:
Provide an input box for new messages:
Display the chat history:
That was easy, right?
Quick Recap: Initializing the Ember.js Application with PubNub
It is very easy to create a new Ember.js application.
We’ll need to assign each user and id when they enter the channel. For the sake of simplicity, we’ll assign a random number for each id.
In order to take advantage of the PubNub Data Stream Network, we must initialize it first.
You should replace demo with your own subscribe and publish credentials from your PubNub account. Take note that you should never publish your keys to a public code base.
The main:pubnub object is fully initialized and available for injection into the controller.
Now, we can access the PubNub service anywhere from our controller with this.get('pubnub'). There are certain cases, like nested closures, where you might need to use var self = this outside of the closure.
Quick Recap: Setting Up a Channel
The next step involves creating a new channel. The channel name and initial message can be customized to your preferences. We also set up a dynamic collection for users and messages.
Defining the PubNub service, the channel, and this will provide some simplicity for us later.
Subscribing to the channel is trivial with the emSubscribe method. After this is complete, the app registers $rootScope with PubNub.on.
The Good Stuff: Introducing Message and Presence Events
Add new messages to the messages list by registering for message events with emMsgEv.
Add new users to the list of users currently in the channel by registering for presence events with emPrsEv.
Pre-Populate the user list with users that are already in the channel with emHereNow.
Populate message history in the channel. You can customize the number of messages to populate with the count number.
Set up an Ember Action to publish a message with the emPublish method, passing in the user id, channel, and message. You can also send structured data as JSON objects. The PubNub library will automatically serialize and deserialized those objects for you. Very cool!
Wrapping Up Ember.js
In this blog post, we had fun showing you a how to integrate user detection and message persistence in your Ember.js app with the PubNub Ember.js library. We hope you find this information to be useful — it is really cool to see the number of PubNub and Ember.js applications growing!

The PubNub API has many more features we didn’t cover in this blog post, but which are explained in detail in the GitHub API Guide and Reference. The documentation walks you through additional topics which really enhance your real-time-enabled web application. In future blog posts, we’ll cover other features of the PubNub Ember API. In the meantime, please give the Ember.js integration a try, have fun, and reach out if you have ideas visit GitHub pubnub/pubnub-ember. Or, if you need a hand, help@pubnub.com!