DIY Dashboard Camera 'Dashcam' with Raspberry Pi - 1/2
Since the Raspberry Pi was released in 2012, the capabilities of low-power, low-cost embedded computing devices have grown tremendously. It is now quite common to see smart devices (thermostats, lighting, locks, cameras) in homes as well as real-time updates in industrial settings such as package delivery services. As ride sharing services like Uber and Lyft gain popularity and autonomous vehicles loom closer on the technical horizon, the most important applications of mobile devices in smart car settings are becoming clearer and clearer.
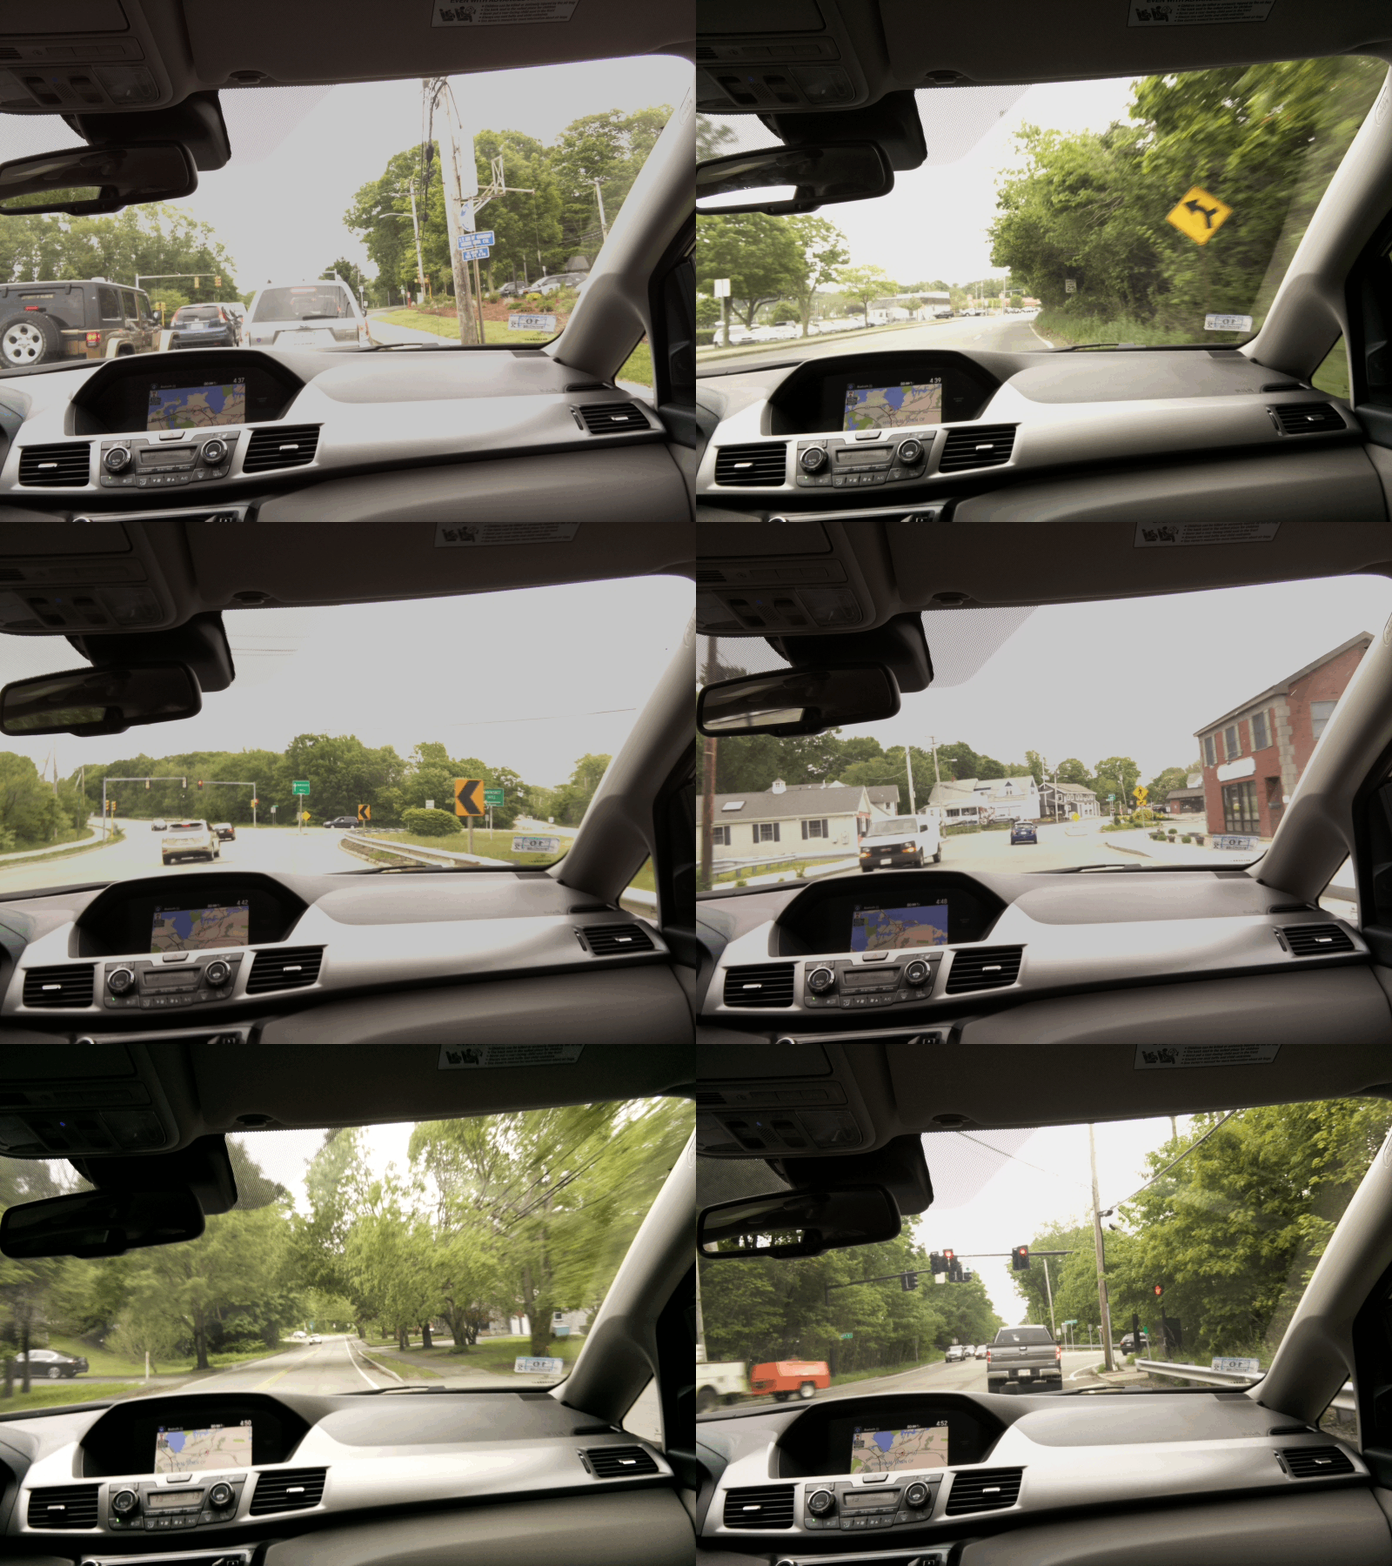
In this blog entry, we create a DIY “always on” live dashboard camera broadcast using the Raspberry Pi 2 Model B and the Raspberry Pi 8MP Camera Module. With this platform, we can broadcast high- or low-quality images at a fixed interval and have them immediately picked up by our receiver user interface (which we’ll cover in Part Two).

When designing a live dashboard camera, the first technical hurdle is ubiquitous network connectivity. As 4G/LTE permeates throughout the United States, most drivers have Internet access in their vehicles via an embedded hotspot (such as OnStar Wifi), portable hotspot (such as a Verizon MiFi), or personal hotspot using a smartphone (such as the iPhone 6S or Nexus 6P).
The second technical hurdle is availability of sensors and control in vehicle setting. Power is already relatively easy using a car charger with micro-USB plug and/or a USB battery pack. As platforms like Raspberry Pi, Arduino and Tessel have matured over the past few years, the availability of low-cost sensors with easy configuration has become more and more widespread. It is now very easy to acquire and set up Wifi, Bluetooth Low Energy (BLE), Camera and GPS connectivity on embedded computing platforms.
The last major hurdle (one which is still being addressed as a strategic challenge of these platforms) is the difficulty of programming embedded devices. Of the three platforms previously mentioned, Tessel is the most user-friendly because it uses a JavaScript interface that most developers can easily manage. Arduino tends to be more challenging because it involves coding in C or C++. Raspberry Pi is my personal favorite because it runs a full Linux ARM distribution, enabling the developer to choose JavaScript (node.js), Python, C/C++, or even Erlang based on the use case (other languages such as Ruby, R and Go are also readily accessible).
So, given all these tools and techniques, we can assemble a complete platform for vehicle-based computing within a couple hours. Although our first application is a connected camera feed, it is easy to imagine extending it with GPS location and speed data for geolocation and geofencing, or even advanced image processing capabilities such as facial recognition or license plate recognition. It’s also worth mentioning that once you have a self-contained platform with network and power, you can also apply it to use cases such as wearable or drone-based cameras.
What You’ll Need
The Mobile Platform:
- Raspberry Pi 2 Model B (we’ll be testing with Raspberry Pi 3 Model B soon!)
- Micro SD Card (to hold the OS distribution, programs and photos)
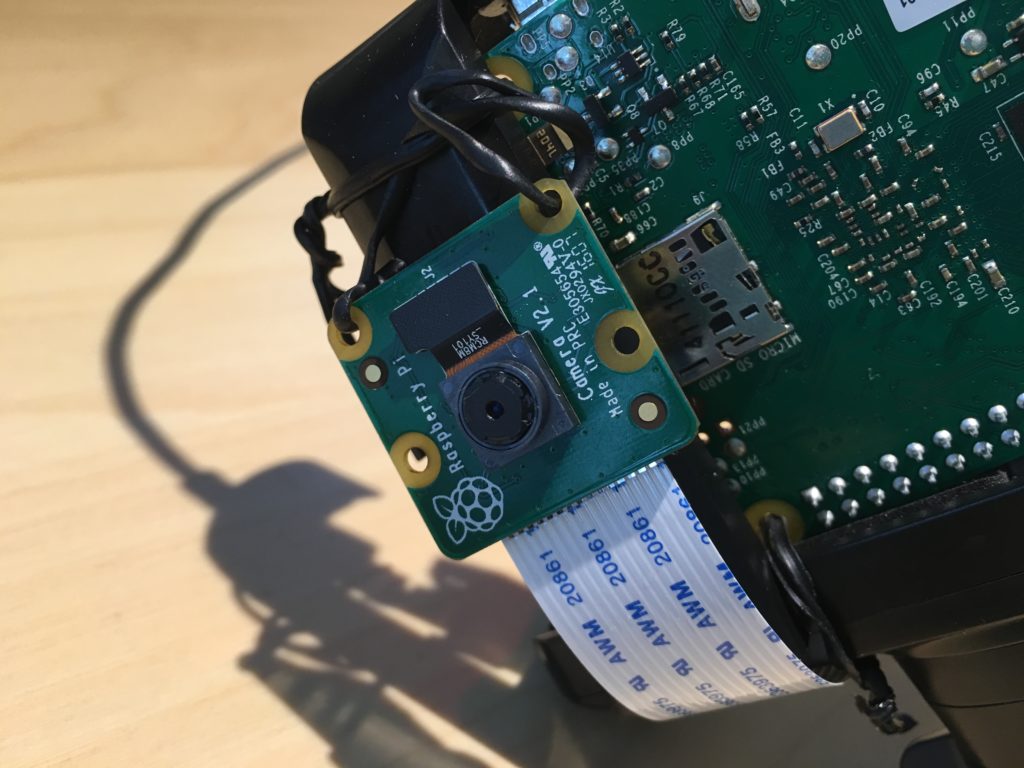
- Raspberry Pi 8MP Camera Module or Raspberry Pi 8MP Night Camera Module
- USB Wifi Adapter (we use a tiny Netgear USB wifi adapter)
- Network Access (via a vehicle, portable or phone hotspot)
- Power (car charger with micro-USB plug and/or a USB battery pack)
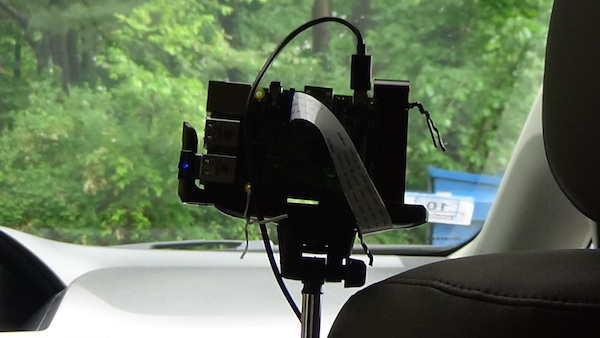
- Mounting (as fervent believers in minimalism, we use an old selfie stick with twist ties)
These will also come in handy for Assembly and Configuration:
- TV or Monitor with HDMI input (or DVI-to-HDMI adapter)
- USB keyboard
- USB Mouse (if using XWindows desktop on the Pi)
- Wired ethernet cable (for initial download/update of the OS distribution for added security and to avoid mobile data charges)
Assembling the Platform
The first step is to install the OS distribution on the micro SD card. We recommend the Raspbian distribution (which comes ready-to-install on the NOOBS micro-SD card listed above), although Snappy Ubuntu by Canonical for Raspberry Pi is also becoming a popular option. We followed the process from this tutorial & video.
Once the OS is installed, we’ll want to make sure it’s up-to-date:
sudo apt-get update
sudo apt-get dist-upgrade
IMPORTANT! For security purposes, we very strongly recommend configuring and updating the Raspberry Pi on a wired network and changing the default “pi” user password using the raspi-config program.
The next step is to configure the WiFi access. In our case, the Netgear adapter is automatically detected by the Linux distribution, so we just need to provide the correct settings in /etc/wpa_supplicant/wpa_supplicant.conf. We originally discovered this configuration through this tutorial.
network={
ssid="YOUR_NETWORK_NAME"
psk="YOUR_NETWORK_PASSWORD"
}
The last step is to attach the Raspberry Pi Camera Module and enable it using raspi-config. There is an excellent video here which is worth at least a thousand words. Once that’s set, enabling the camera is a snap using the raspi-config program (you’ll need to reboot the Pi to pick up the changes).

Once the camera module is all set, you can test it out using the command line raspistill -o test.jpg. If everything is working correctly, you’ll see the camera’s view flash on the screen, and a new JPG file created with the photo image.
Installing Node.JS
We followed the instructions from this tutorial, worked for us!
Here’s the details:
# get the files
wget https://nodejs.org/dist/v4.4.5/node-v4.4.5-linux-armv7l.tar.gz
tar -xvf node-v4.4.5-linux-armv7l.tar.gz
cd node-v4.4.5-linux-armv7l
# Copy to /usr/local
sudo cp -R * /usr/local/
Installing Node Modules
We install node modules from the command-line using npm. In our case, it’s pretty easy because we just need the PubNub library for real-time data streaming.
npm install pubnub
If all goes well, you should see NPM output showing pubnub and its required libraries being installed. That’s it!
Getting your PubNub Keys
If you haven’t already, create a free developer account at PubNub and create a new app (which will include your unique publish and subscribe keys). You’ll be able to run all the examples out-of-the box, plus much much more.
Dashcam Code
The dashcam code is pretty lightweight, weighing in at ~65 lines of JavaScript code (CoffeeScript aficionados will see an opportunity to shave at least another 5-10 lines off of that). We create a file called dashcam.js in the home directory of the pi user.
The basic flow is:
- Set up an interval timer with an image callback (in our case, every 10s)
- The image callback:
- Spawns a process to run “raspistill” with the desired parameters
- On process completion, read the image file, create a data URI, and split it into chunks (PubNub’s max message size is 32k)
- Publish each chunk on the specified PubNub channel
Alternatively, we could publish the content to a cloud provider such as Cloudinary, Amazon S3, or Google Cloud Storage. In this case, we decided to publish image chunks directly to PubNub because we love the idea of having the content in-line and ready for browsers to display, plus the added control of using PubNub’s built-in encryption and/or Access Manager in the future if we want to restrict permissions in one place.
Ok, with that said, here’s the code (also available as a gist for your convenience):
var CHANNEL, CHUNK_SIZE, CLIENT_NAME, H_RES, PHOTO_INTERVAL, V_RES, child, fs, imageCallback, pn, pnCfg;
fs = require('fs'); // included with nodejs
child = require('child_process'); // included with nodejs
CLIENT_NAME = 'dashcam-001';
CHANNEL = 'dashcam-demo';
CHUNK_SIZE = 1024 * 28;
PHOTO_INTERVAL = 10000;
H_RES = (400).toString();
V_RES = (300).toString();
pnCfg = {
    publish_key: 'YOUR_PUB_KEY',
    subscribe_key: 'YOUR_SUB_KEY',
    uuid: CLIENT_NAME,
    ssl: true
};
pn = (require('pubnub')).init(pnCfg);
process.on('SIGINT', function() {
    console.log('Dashcam Stopped');
    return process.exit();
});
imageCallback = function() {
var args, fname, spawn, ts;
ts = new Date().toISOString().replace(/[:\-]/g, "").replace(/\.\d{3}/g, "");
fname = "photo/image_" + ts + ".jpg";
args = ['-w', H_RES, '-h', V_RES, '-o', fname, '-t', '1', '-vf'];
spawn = child.spawn('raspistill', args);
return spawn.on('exit', function(code) {
    var buffer, content, i, imagePt, imgLen, msg, total;
    buffer = fs.readFileSync(fname);
    content = "data:image/jpeg;base64," + buffer.toString('base64').replace(/
/g, "");
    total = Math.ceil(content.length / CHUNK_SIZE);
    console.log(CLIENT_NAME + " publish: " + fname);
    i = 0;
    while (i < total) {
        imgLen = i < total - 1 ? CHUNK_SIZE : content.length % CHUNK_SIZE;
        imagePt = content.substring(i * CHUNK_SIZE, (i * CHUNK_SIZE) + imgLen);
        msg = {
            uuid: CLIENT_NAME,
            ts: ts,
            i: i,
            n: total,
            imgPart: imagePt
        };
        i += 1;
        pn.publish({
            channel: CHANNEL,
            message: msg
        });
    }
});
};
setInterval(imageCallback, PHOTO_INTERVAL);
console.log('Dashcam Starting');
Phew! That was a mouthful. Let’s look at the code one piece at a time.
First off, we declare our variables, include our Node.JS required libraries (fs & child_process built-ins and the PubNub add-on library), and set configuration variables for client name, channel name, image size, etc. We also initialize the PubNub object for access to the PubNub data stream network. In this case, we provide a subscribe key as well as a publish key even though the app is only publishing pictures at this time. It is easy to imagine a case where subscribing to messages is also useful (for example, to receive updates from other vehicles in the area or central HQ). Finally, we install a SIGINT handler so that it’s possible to terminate the program using CTRL-C from the command line.
var CHANNEL, CHUNK_SIZE, CLIENT_NAME, H_RES, PHOTO_INTERVAL, V_RES, child, fs, imageCallback, pn, pnCfg;
fs = require('fs'); // included with nodejs
child = require('child_process'); // included with nodejs
CLIENT_NAME = 'dashcam-001';
CHANNEL = 'dashcam-demo';
CHUNK_SIZE = 1024 * 28;
PHOTO_INTERVAL = 10000;
H_RES = (400).toString();
V_RES = (300).toString();
pnCfg = {
    publish_key: 'YOUR_PUB_KEY',
    subscribe_key: 'YOUR_SUB_KEY',
    uuid: CLIENT_NAME,
    ssl: true
};
pn = (require('pubnub')).init(pnCfg);
process.on('SIGINT', function() {
    console.log('Dashcam Stopped');
    return process.exit();
});
Next, we set up the image callback. It’s a function that gets the current timestamp and spawns a process to take the photo using the Raspberry Pi Camera module. Once the photo is created, it reads the file into a byte buffer and converts it into a base64 string as part of a data URI that we’ll publish to the PubNub channel. We break the image data URI into 28k chunks because the PubNub data stream network is built for messages under 32k (at least at the time of this writing). Each image chunk is tagged with the CLIENT_NAME for identification as well as its position “1 of 5” in the overall data URI.
imageCallback = function() {
    var args, fname, spawn, ts;
    ts = new Date().toISOString().replace(/[:\-]/g, "").replace(/\.\d{3}/g, "");
    fname = "photo/image_" + ts + ".jpg";
    args = ['-w', H_RES, '-h', V_RES, '-o', fname, '-t', '1', '-vf'];
    spawn = child.spawn('raspistill', args);
    return spawn.on('exit', function(code) {
        var buffer, content, i, imagePt, imgLen, msg, total;
        buffer = fs.readFileSync(fname);
        content = "data:image/jpeg;base64," + buffer.toString('base64').replace(/
/g, "");
        total = Math.ceil(content.length / CHUNK_SIZE);
        console.log(CLIENT_NAME + " publish: " + fname);
        i = 0;
        while (i < total) {
            imgLen = i < total - 1 ? CHUNK_SIZE : content.length % CHUNK_SIZE;
            imagePt = content.substring(i * CHUNK_SIZE, (i * CHUNK_SIZE) + imgLen);
            msg = {
                uuid: CLIENT_NAME,
                ts: ts,
                i: i,
                n: total,
                imgPart: imagePt
            };
            i += 1;
            pn.publish({
                channel: CHANNEL,
                message: msg
            });
        }
    });
};
Whoa! That was a lot of code there. The toughest bit is doing the chunking – if you are taking tiny image thumbnails (say, 160×120 grayscale) and converting to PNG, then the chunking becomes unnecessary. Similarly, if you upload the photos to a cloud provider and publish URLs, then the PubNub messages just need to include the URL to the content.
Finally, we set up an interval timer that will execute the image callback every 1000ms (10s). We output a log message to let the user know the program has started running.
setInterval(imageCallback, PHOTO_INTERVAL);
console.log('Dashcam Starting');
Ok, now that you understand the code, it’s super-easy to run it! Just log into the Raspberry Pi and use the following commands from the pi user’s home directory.
If you haven’t already, create a photo directory to hold images:
mkdir photo
Then, run the dashcam using this command:
node dashcam.js
If all goes well, you’ll start seeing messages like this.
Dashcam Starting
dashcam-001 publish: photo/image_20160616T154338Z.jpg
dashcam-001 publish: photo/image_20160616T154348Z.jpg
dashcam-001 publish: photo/image_20160616T154358Z.jpg
dashcam-001 publish: photo/image_20160616T154408Z.jpg
dashcam-001 publish: photo/image_20160616T154418Z.jpg
dashcam-001 publish: photo/image_20160616T154428Z.jpg
dashcam-001 publish: photo/image_20160616T154438Z.jpg
dashcam-001 publish: photo/image_20160616T154449Z.jpg
dashcam-001 publish: photo/image_20160616T154459Z.jpg
dashcam-001 publish: photo/image_20160616T154509Z.jpg
dashcam-001 publish: photo/image_20160616T154519Z.jpg
Hey, nicely done there – you’re broadcasting live images!

What’s Happening Under the Hood
So, what’s happening under the hood here? PubNub is providing our dashcam application with real-time data streaming around the globe – each message will be received by any subscribers within 250ms of being sent. It’s pretty amazing to say that with PubNub’s scalability, it doesn’t matter if you’re tracking one vehicle or one million vehicles, and/or have one listener or tens of millions of camera feed subscribers.
We hope you enjoyed this blog entry and caught a glimpse of the power available in the Raspberry Pi 2 platform when combined with PubNub real-time data streaming capabilities. Stay tuned for the next segment where we hook up the data receiver and AngularJS-based camera viewer web app!
Resources
- https://www.raspberrypi.org/
- https://www.raspberrypi.org/products/raspberry-pi-2-model-b/
- https://www.raspberrypi.org/products/raspberry-pi-3-model-b/
- https://www.raspberrypi.org/products/camera-module-v2/
- https://www.raspberrypi.org/products/pi-noir-camera-v2/
- https://www.raspberrypi.org/help/videos/
- https://projects.raspberrypi.org/en/projects/getting-started-with-picamera
- https://weworkweplay.com/play/automatically-connect-a-raspberry-pi-to-a-wifi-network/
- https://blog.wia.io/installing-node-js-v4-0-0-on-a-raspberry-pi
- https://developer.mozilla.org/en-US/docs/Web/HTTP/Basics_of_HTTP/Data_URIs
- https://admin.pubnub.com/signup
- www.pubnub.com/docs/sdks/javascript/nodejs/
- www.pubnub.com/docs/sdks/javascript/
- www.pubnub.com/products/security-overview/
- www.pubnub.com/products/access-manager/
- https://www.raspberrypi.org/blog/facial-recognition-opencv-on-the-camera-board/
- https://barclaysapps.wordpress.com/2014/07/06/openalpr-install-for-rpi-and-udoo-and-tre-and-yun/
- https://www.arduino.cc/
- https://tessel.io/