DIY Pokemon Go App with Android Push Notifications
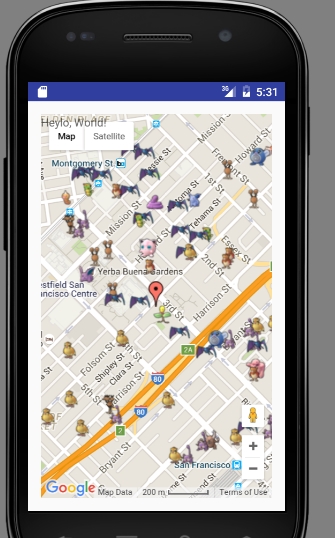
In this second Android blog post, I will hop on the Pokemon Go bandwagon and go over how to make a Pokemon Go map app with PubNub Android push notifications using one of the many unofficial Pokemon Go APIs maintained on GitHub. This tutorial requires you to run a remote server using Ngrok, and you have to change the ngrok url in your Android file each time you run it. Though this API is no longer maintained, hopefully it inspires you to work on a similar project, maybe with PubNub's own Project EON for the map, or something else with Android Push Notifications. The sky is the limit, so (Pokemon) GO!

Pokemon Go API (Unofficial)
The API is no longer maintained, but this tutorial follows these directions here on GitHub. The installation takes quite a bit of time, especially if you don’t have pip, python, and some of the other dependencies previously installed.
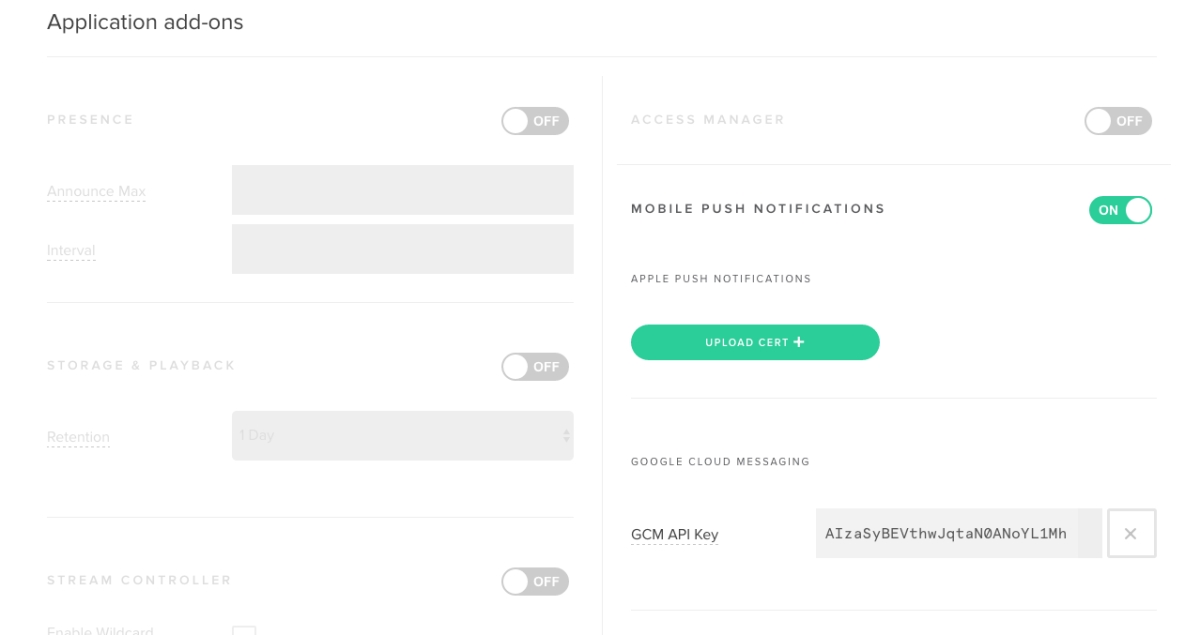
Enable Mobile Push Notifications for PubNub
Go to the PubNub Developer’s console, choose your app, and select the add-on that says “mobile push notifications.”

Android Manifest File
In your Manifest file, you need to give lots of permissions because this app uses the internet and webviews, your current location, Google Play Services, and PubNub. These permissions include Internet, Access_Fine_location, and Access_Coarse_Location,and RECEIVE. Additionally, it uses WAKE_LOCK so the screen stays on while lots of data is fetched from the server, and C2D_Message, which stands for Cloud to Device, for push notifications.
Google Play Services
You will also need to go into Android SDK Manager to add Google Play Services, and add the following line to the corresponding XML file:
<meta-data android:name="com.google.android.gms.version"
  android:value="@integer/google_play_services_version" />
You will need this for Android push notifications.
Android Files
In your MainActivity Java file, you will inject JavaScript into a localhost page. There are default web settings set each time you create a webView, and you will set them in onCreate().
There, set the following settings to be true: setBuiltInZoomControls (should the webView use built-in zoom mechanisms?), setJavaScriptEnabled(can JS be run in the webview?), setLoadsImagesAutomatically (should the webview load image resources automatically?), setDomStorageEnabled (are DOM storage APIs enabled? *only relevant for HTML5 sites), setSupportZoom (should you be able to use gestures on-screen to zoom in or out?), setBuiltInZoomControls(you can set which gestures to use to zoom in or out), and setAllowUniversalAccessFromFileURLs (sets whether or not JavaScript can be used to access content from any origin within a file scheme URL–in this case, from ngrok), and then set setDisplayZoomControls to be false.
webView.setScrollBarStyle(View.SCROLLBARS_INSIDE_OVERLAY);
webView.setWebViewClient(new lizzieBrowser());
String ngrokUrl = Uri.parse("http://8186d16e.ngrok.io").toString(); //will change each time ngrok changes, runs
webView.loadUrl(ngrokUrl);
Here, you’re setting the URL that will be loaded in the webview.
WebViewClient
Now, it is time to create your webviewclient–in this tutorial, it is called LizzieBrowser. All you need to do here is to return false in shouldOverrideUrlLoading. Because WebView automatically loads the url, so there is no need to call view.loadUrl(url) in shouldOverrideUrlLoading().
private class LizzieBrowser extends WebViewClient {
   @Override
   public boolean shouldOverrideUrlLoading(WebView view, String url) {
       return false;
   }
   @Override
   public void onPageFinished(WebView view, String url) {
       super.onPageFinished(view, url);
   }
}
That sets up your webview! Next up, we have Android push notifications with PubNub.
Android Push Notifications with PubNub
To get started with PubNub’s Android Mobile Push Gateway, create a Java file called GcmBroadcastReceiver, and one called GcmIntentService. These both have to do with Google Cloud Messaging, the third-party mobile push notification service used for this tutorial.
WakefulBroadcastReceiver
The difference between just plain BroadcastReceiver and WakefulBroadcastReceiver is that with the latter, it is guaranteed that the CPU will stay awake until completeWakefulIntent is fired (this is done in GcmIntentService.)
GcmBroadcastReceiverwake_lock permission. The function should look like this:
public class GcmBroadcastReceiver extends WakefulBroadcastReceiver {
   @Override
   public void onReceive(Context context, Intent intent) {
       ComponentName comp = new ComponentName(context.getPackageName(),
               GcmIntentService.class.getName());
       startWakefulService(context, (intent.setComponent(comp)));
       setResultCode(Activity.RESULT_OK);
   }
}
SetComponent(comp) sets the component to handle the intent. SetResultCode() is for when there are multiple broadcast receivers which will have to handle the GCM messages one at a time, one after another. If you only have one broadcast receiver, then that line of code does not matter much.
GcmIntentService
A lot happens in this GcmIntentService file, so brace yourself.
Forward Messages to Android Device via GCM
InstanceID instanceID = InstanceID.getInstance(this);
String token;
try {
   token = instanceID.getToken(getString(R.string.gcm_defaultSenderId),
           GoogleCloudMessaging.INSTANCE_ID_SCOPE, null);
} catch (Exception e) {
   System.out.println(e);
}
That creates and updates registration tokens you need to register an Android app with GCM connection servers in order to receive messages.
Once the message is received, you fire off the notification, in sendNotification().
private void sendNotification(String msg) {
   NotificationManager mNotificationManager = (NotificationManager)
           this.getSystemService(Context.NOTIFICATION_SERVICE);
   PendingIntent contentIntent = PendingIntent.getActivity(this, 0,
           new Intent(this, MainActivity.class), 0);
   NotificationCompat.Builder mBuilder =
           new NotificationCompat.Builder(this)
                   .setContentTitle("PubNub GCM Notification")
                   .setStyle(new NotificationCompat.BigTextStyle()
                           .bigText(msg))
                   .setContentText(msg);
   mBuilder.setContentIntent(contentIntent);
   int NOTIFICATION_ID = 1;
   mNotificationManager.notify(NOTIFICATION_ID, mBuilder.build());
}
PendingIntent is used to describe both an intent and its targeted action it will perform. You could use Notification.Builder, which was added in Android 3.0 Honeycomb (API 11), instead of NotificationCompat.Builder. However, if you want to use older SDKs, NotificationCompat is the way to go.
Next up, you must register the device which is to receive the push notifications. First, you must check if Google Play Services is set up for your project. If it is, check to see if there is an existing registration ID currently in shared preferences, and if not, you need to get a registration ID.
When you successfully run the client app, you need to initialize an InstanceID. With this, you will then generate a registration token which is sent to the server and used to send messages to the installed app. A new token will be generated if the app is uninstalled or the token is compromised. This registration token is what allows the client app to receive messages from the server.
public String getRegistrationToken() {
   try {
       InstanceID instanceID = InstanceID.getInstance(this);
       String token = instanceID.getToken(GoogleCloudMessaging.INSTANCE_ID_SCOPE, null);
       return token;
   }
   catch (Exception e) {
       return "Could not get registration token";
   }
}
PubNub Configuration
PNConfiguration pnConfig = new PNConfiguration()
       .setSubscribeKey("your-subscribe-key")
       .setPublishKey("your-publish-key");
private final PubNub pb = new PubNub(pnConfig);
Methods on this PubNub Object
Next, you will need to call the addPushNotificationsOnChannels() method on this instance of a PubNub object, and then later, when you unregister from the notifications, you will call removePushNotificationsFromChannels(). For more information, visit the PubNub Java v4 SDK.
Ngrok
To run this API in your Android webview, use Ngrok. It creates secure tunnels to a localhost, giving a URL that you use to run in your Android WebView. For this demo, I ran a local server with <em which was on localHost:8000, and then in a separate Terminal tab, called ngrok http 8000. It would give me a URL like http://dd40ede6.ngrok.io, which I would put in MainActivity.java, as the URL passed to webView.loadUrl().
With both of those servers running, you could then call this, after cd’ing into the PokemonGo subdirectory.
Google Maps API key

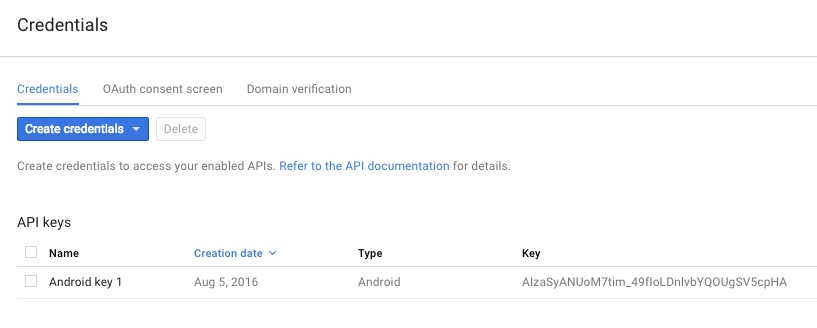
You need a Google Maps API key.
Pokemon Go Username + Password
If you don’t have a Pokemon Go username and password already, you can get those on the Pokemon Go website.
Run the Pokemon Server
To run the Pokemon Go API, run this: python runserver.py -u pokemon-go-username -p pokemon-go-password -st 10 -k google-maps-api-key-password -l “location-ie-San Francisco”.
Conclusion
There are many places that could give you trouble in this project. In my experience, they are most likely to come in the Manifest file, or with an API key (there were many!), or in one of the servers. It was also annoying when the Gradle file took forever to build (this may have been because I had some extra files that I had started out with, then stopped using when I switched map-based project ideas), and how the API was spotty (but so good when it worked!).
Questions? Comments? Find me on Twitter @lizziepika!