Getting Started with Magic Leap and Unity - Developer Guide
The much-hyped Magic Leap One has taken the AR world by storm. In a nutshell, the Magic Leap One headset overlays digital objects on the physical world, creating another dimension to computing where digital respects the physical thanks to augmented reality.
The possibilities of augmented reality are endless and exciting. Now is the time to get involved while the technology is still in its infancy and posed to become a fundamental technology. And the good news is, Magic Leap is investing in their developer community, and it's something we're excited to be a part of.
This is part one of our Magic Leap series. Check out the other posts Controlling Internet-connected Devices with Magic Leap Hand Gestures and Create a Multiplayer Augmented Reality Game with Magic Leap and Unity.
Why PubNub and Magic Leap?
Developers have been building multiplayer games and other multi-user experiences with PubNub for years, and we definitely see AR as next on the horizon. PubNub is a natural fit in the AR world. Our technology is what can power the real-time interaction between AR headsets or physical objects in the same location, or even across the Earth.
For example, when a Magic Leap user throws a ball in the virtual world, that motion is synchronized in real time across every other connected user. Or if a user uses a hand gesture to turn on a light, PubNub is sending the message to that light to turn on.
Multiuser experiences, or the relationship between the AR headset and the physical world around us, is where PubNub is required and excels. Which brings us to this getting started tutorial, and upcoming, more advanced tutorials in the future.
Tutorial Overview
In this tutorial, we'll walk through how to:
- Install the tools for Unity Video Game Engine development for Magic Leap
- Integrate the PubNub Unity SDK and publish a “Hello World” message
- Use the Magic Leap Remote and iterate in the simulator or on a device
- Build and run apps on the Magic Leap One device.
Be aware that the Magic Leap SDKs are changing as new features are added and some parts of this tutorial may change. The following steps were tested with Lumin SDK Version 0.17.0 and Unity Version: 2018.1.9f1-MLTP8.1.
Requirements
There are a few requirements before you can get started:
- You’ll need a Magic Leap One (or you can just use the simulator).
- Become a Creator.
- A PubNub account (always free).
- Once you sign up, you can get your unique PubNub keys from the PubNub Admin Dashboard.
Install Lumin SDK and Unity Magic Leap Test Preview
- Sign into your Creator account and get the Lumin SDK and Unity by downloading the Magic Leap Package Manager.
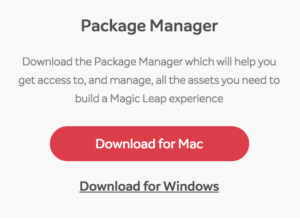
- Run the Package Manager Installer. After installing, start the Magic Leap Package Manager application.
- Sign into your Magic Leap account.
- Select the Lumin SDK and the Magic Leap Unity Package for install. Apply the changes.
- Download the Magic Leap Technical Preview Installer and install the Unity Editor (Download link is at the bottom).

- See the Installing and Configuring Unity guide from Magic Leap for more information about how to install Lumin SDK and the Unity Magic Leap Test Preview.
Create a New Unity App for Magic Leap
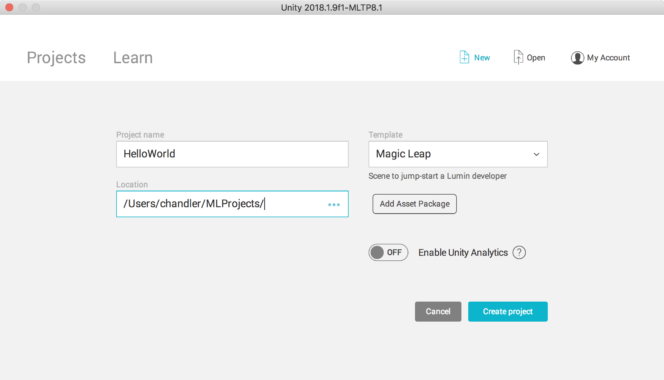
- Start Unity and create a new project.
- Change the product name, set the template to “Magic Leap”, and set the location for your project. Create the project.
- Click “File” and then “Build Settings”.
- In the “Platform” section:
- Close the window.
- See the Configuring a Magic Leap Project in Unity guide from Magic Leap for more information on creating a new Unity app for Magic Leap.
Integrating PubNub Into a Unity Project.
- Clone or download the PubNub Unity SDK.
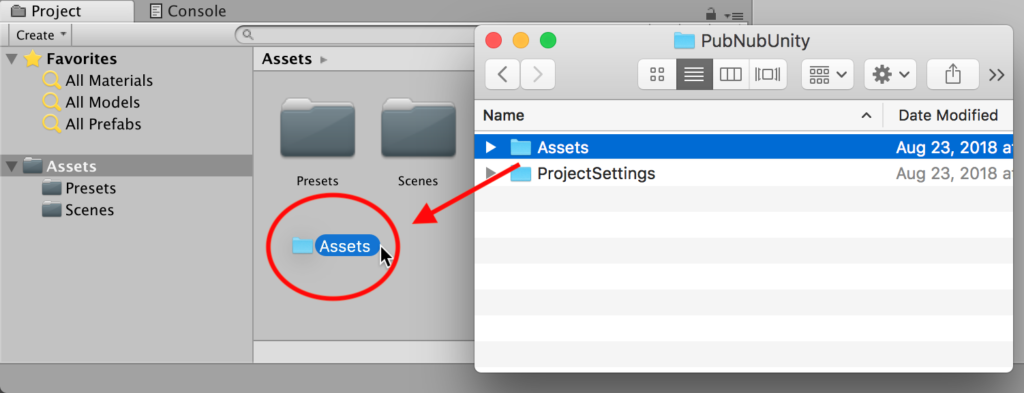
- Inside the “PubNubUnity” directory you should see another directory called “Assets”. Drag the “Assets” directory into the “Assets” directory of your unity project. Ignore the console errors for now.
- Navigate inside the “Assets/Serialization” directory and then edit the “JSONSerializer.cs” script so that the second line is commented and the third line is uncommented. Save the file. The top of the file should look like this:
#if((!USE_JSONFX_UNITY_IOS) && (!USE_MiniJSON))
//#define USE_JSONFX_UNITY_IOS
#define USE_MiniJSON
#endif
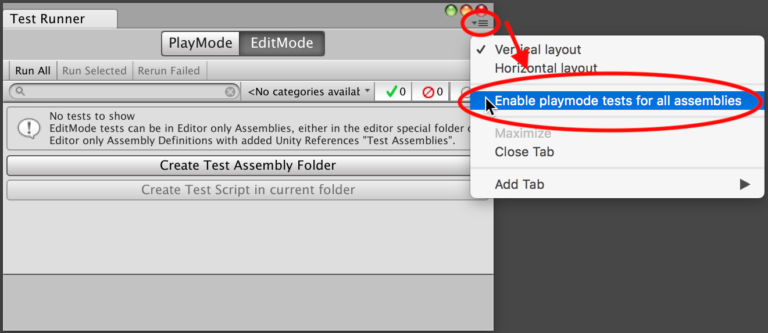
- Click “Window” and then “Test Runner”.
- Click on the dropdown menu in the top right corner and enable playmode tests. Close the window.
- Click “Edit”, “Project Settings”, and then “Player”.
- In the Inspector click “Settings for Lumin OS”.
- Expand “Publishing Settings” and check the box next to “Internet”.
- Expand “Other Settings” and change the “Scripting Runtime Version” to “.NET 4.x Equivalent”. Restart the editor. The console errors resulting from importing the PubNub Unity SDK should now be gone.
- Click on “Main Camera” in the project hierarchy.
- Click “Add Component”, scroll to the bottom of the list, and click “New script”. Name the script “HelloWorld”.
- Edit the script and paste the code below. This script imports the PubNubAPI, configures a connection to PubNub, and sends a “HelloWorld” message to the “MagicLeap” channel once per second.
using System.Collections; using System.Collections.Generic; using UnityEngine; using PubNubAPI; public class HelloWorld : MonoBehaviour { public static PubNub pubnub; private float sendTimeController; // Use this for initialization void Start () { PNConfiguration pnConfiguration = new PNConfiguration(); pnConfiguration.PublishKey = "YOUR_PUBNUB_PUBLISH_KEY_HERE"; pnConfiguration.SubscribeKey = "YOUR_PUBNUB_SUBSCRIBE_KEY_HERE"; pnConfiguration.Secure = true; pubnub = new PubNub(pnConfiguration); } // Update is called once per frame void Update () { if (sendTimeController <= Time.deltaTime) { // Restrict how quickly messages are sent. pubnub.Publish() .Channel("MagicLeap") .Message("HelloWorld") .Async((result, status) => { if (!status.Error) { Debug.Log(string.Format("Publish Timetoken: {0}", result.Timetoken)); } else { Debug.Log(status.Error); Debug.Log(status.ErrorData.Info); } }); sendTimeController = 1.0f; // Restrict how quickly messages are sent. } else { sendTimeController -= Time.deltaTime; // Update the timer. } } } - Get your unique PubNub keys from your PubNub Admin Dashboard. If you don’t have a PubNub account, sign up for a PubNub account for free.
- Go to your PubNub Admin Dashboard, create or select your app, and then create or select a keyset.
- Replace “YOUR_PUBNUB_PUBLISH_KEY_HERE” and “YOUR_PUBNUB_SUBSCRIBE_KEY_HERE” with your Publish Key and Subscribe Key.
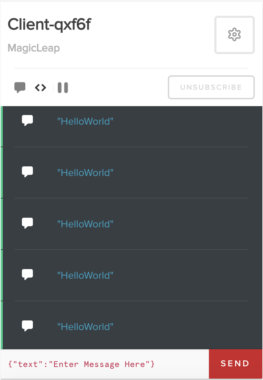
- Click “Debug Console” and create a client with “Default Channel” set to “MagicLeap”. Keep this window open when you test your app. The “HelloWorld” messages from the app will be received by this client.

Using the Magic Leap Remote and Play Mode
See the Launch Magic Leap Remote and Play Mode with Magic Leap Remote guides from Magic Leap for more information about using the Magic Leap Remote.
-
You can change your code and see the results immediately while in play mode.
-
If you do not have a device, play mode simulates the Lumin SDK API layers and composites the graphics with input from a virtual room.
-
If you do have a device, play mode simulates the Lumin SDK API layers and then streams the rendered frames to the headset display.
Windows
- In Windows Explorer, navigate to the “VirtualDevice\bin\UIFrontend” directory inside your Lumin SDK location.
- Double-click “MLRemote.exe”.
macOS
- In Finder, navigate to the “VirtualDevice/bin/UIFrontend” directory inside your Lumin SDK location.
- Double-click “Magic Leap Remote.app”.
Iterate on the Simulator
- Click “Start Simulator”.
- In the Simulator window, click the “Load Virtual Room” button on the toolbar.
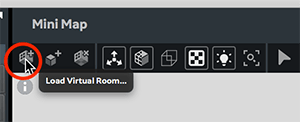
- Navigate to VirtualDevice\data\VirtualRooms\ExampleRooms and then open an example room file.
Iterate on Device
- Connect a device to your computer over USB.
- The device should appear in the Magic Leap Remote window.
- Click “Start Device”.
Start Play Mode
There is no UX for this app as this post focuses on getting started creating an app, sending messages to PubNub, and running an app. You won't see anything if you look around in the simulator on a device. However, messages are being sent to PubNub while the app is running. See the Tutorial List from Magic Leap for projects that take advantage of the features offered by Magic Leap APIs.
To use the Magic Leap Remote you will need to enable Magic Leap zero iteration mode. In Unity click “MagicLeap” and then “Enable Zero Iteration”. Restart the editor.
- Go back to your Unity project.
- Click “Edit” and then “Play”.
- The app should start on the simulator or on the device. You should see debug messages from successful publishes to PubNub in the console in Unity.
- Go to the Debug Console you started earlier in the PubNub Admin Dashboard. You should see “Hello World” being printed once per second.
Testing On A Magic Leap Device
There is no UX for this app as this post focuses on getting started creating an app, sending messages to PubNub, and running an app. You won't see anything if you put the headset on. However, messages are being sent to PubNub while the app is running. See the Tutorial List from Magic Leap for projects that take advantage of the features offered by Magic Leap APIs.
See Deploying a Unity App to the Device from Magic Leap for more information about deploying an app a device.
- You'll first need to follow the steps from Magic Leap to set up your device for development.
- Connect a device to your computer over USB.
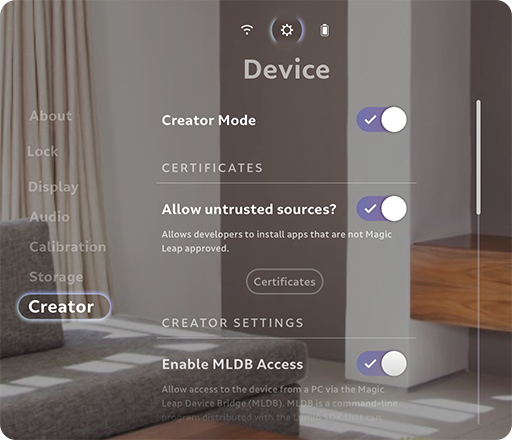
- On the device navigate to “Settings”, “Device”, and then “Creator Mode”.
- Select the following:
- Enable Creator Mode – Make Creator Mode options available for selection.
- Allow Untrusted Sources – Install apps signed with a development certificate.
- Enable MLDB Access – Allow Magic Leap Device Bridge to connect to your device.
- Navigate to the Magic Leap Creator Portal and click “Publish” and then “Certificates”.
- Click “Create Certificate” or “Add New”.
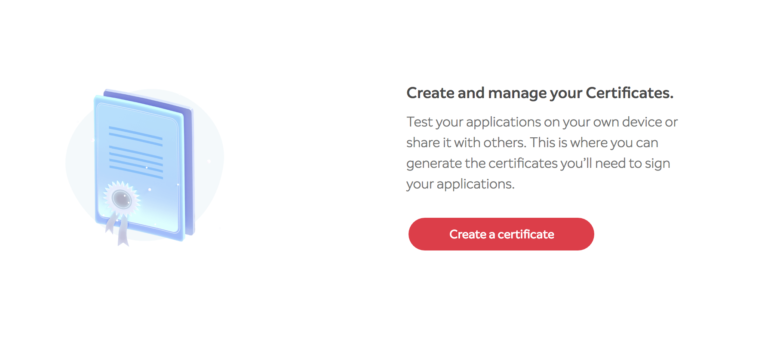
- Enter a name for the certificate and click generate. The “privatekey.zip” file will download. You can only download the private key at this step. You must generate a new certificate if you misplace this file.
- The certificate takes a few minutes to generate. Refresh the page until the certificate status changes from “pending” to “active”.
- When the certificate has generated, click the download button next to your certificate to download the file.
- Extract the private key from the “privatekey.zip” file and move the “.privkey“ and “.cert” files into the same folder.
- Go back to your Unity project.
- Click “File” and then “Build Settings”.
- Check the box next to “Sign Package”.
- Close the window.
- Click “Edit”, “Project Settings”, and then “Player”.
- Expand “Publishing Settings” and set the path to “ML Certificate” to point to the certificate you downloaded.
- Connect your device to your computer.
- Click “File” and then “Build and Run”.
- Save the .mpk. Unity will transfer the app to the device when the build has completed.
- Put on the device.
- The first time you install an app with your Magic Leap developer certificate, you are prompted to accept the certificate on the device.
- If you do not accept the certificate, your app won't install.
- If you take too long to put on the device, the prompt will dismiss itself, and your app won't install.
- Go to the Debug Console you started earlier in the PubNub Admin Dashboard. You should see “Hello World” being printed once per second.

Have suggestions or questions about the content of this post? Reach out at devrel@pubnub.com.
This is part one of our Magic Leap series. Check out the other posts Controlling Internet-connected Devices with Magic Leap Hand Gestures and Create a Multiplayer Augmented Reality Game with Magic Leap and Unity.


