When Arduino released the MKR1000, they answered the wishes of developers everywhere who wanted a WiFi-enabled board without the added size and hassle of operating a WiFi shield. With its compact size and built-in WiFi capabilities, the MKR1000 is a perfect addition to almost any IoT project. In this tutorial, I’ll walk you through setting up the board, connecting it to a WiFi network, publishing data using PubNub, creating an access point, using flash storage, and operating a watchdog timer. Let’s get started!

The full code repository is available on GitHub.
Setting Up the MKR1000
In order to take full advantage of the MKR, you’ll first need to complete a few steps to get everything properly installed.
Installing Software and Libraries
First things first, make sure you have the latest version of the Arduino IDE installed. Once that’s done, you’ll need to install the MKR1000-compatible WiFi101 library. To do this, go to Sketch > Include Library > Manage Libraries. Search for WiFi101 and click Install to use it in your projects.
Connecting to PubNub
If you plan on publishing data with your MKR, you’ll also need to install and tweak the PubNub library. Do this by navigating to the PubNub Arduino documentation page and downloading the library, then open it up on your computer. To make it compatible with the MKR1000, you’ll need to change a couple of lines in the library. First, open PubNub.h and switch the comments for the Ethernet and WiFi lines, as shown below.
//#define PubNub_Ethernet
#define PubNub Wi_Fi
Next you’ll need to change the line that includes the WiFi library so that it includes WiFi101 instead.
#elif defined(PubNub_WiFi)
#include <WiFi101.h>
Now you’re all set to use PubNub in any of your Arduino projects!
Selecting the Correct Board
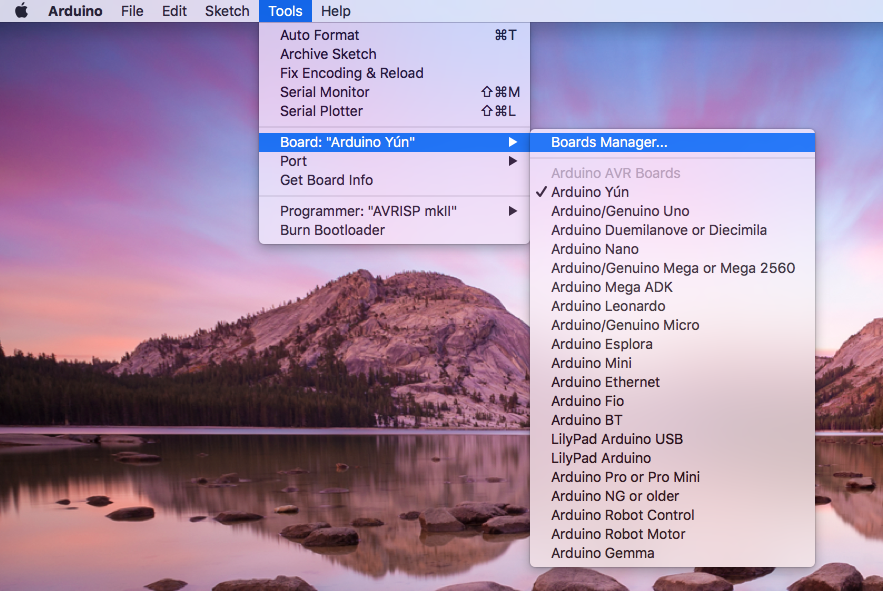
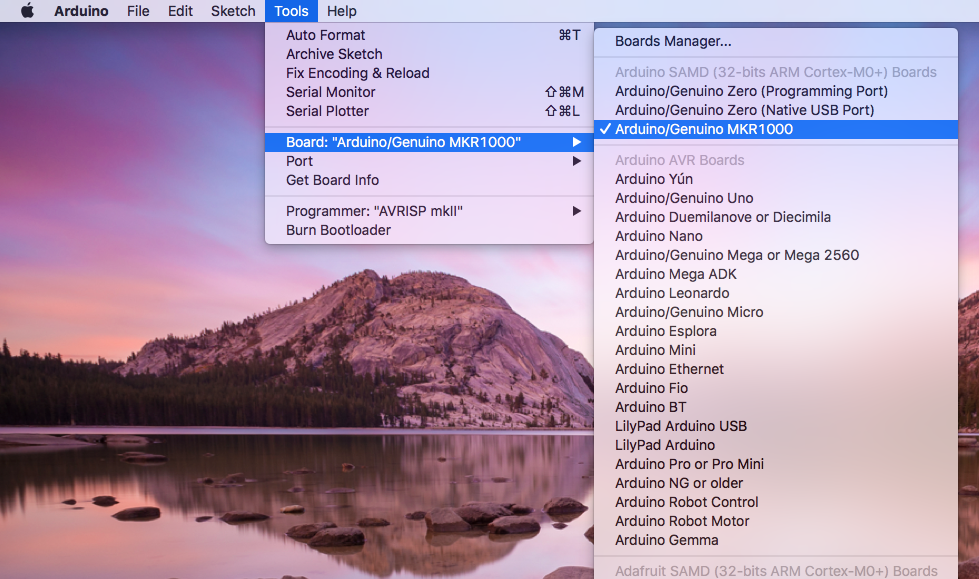
To select the right board, go to Tools > Board > Boards Manager and select the box that says Arduino SAMD Boards (32-bits ARM Cortex-M0+). After pressing Install, go back to Tools > Board and select Arduino/Genuino MKR1000. Next, use a micro-USB to connect your device to the computer. If you’re working on a PC, you’ll be prompted to install a driver for the MKR1000 – do it. If you’re working on a Mac, there’s no driver installation necessary.


Connect the MKR1000 to WiFi
As WiFi connectivity is one of the major selling points of the MKR1000, it’s probably going to be the feature that you use most often in your projects. Luckily, it only takes a couple steps to fully connect your board to the web.
Establishing a WiFi Connection
In any sketch in which you plan on using the WiFi capabilities of the MKR, you’ll need to include the WiFi101 library at the top of your code, as that’s the library that handles all of the WiFi functionality. At the same time, input your network id and password as variables and set your initial WiFi status as idle.
#include <SPI.h>
#include <WiFi101.h>
char ssid[] = "network-id";
char pass[] = "network-password";
int status = WL_IDLE_STATUS;
In void setup(), you need to initialize your WiFi connection. Throughout this process, it’s helpful to include print statements so that you can monitor the progress of your WiFi connection.
void setup() {
    Serial.begin(9600);
    While (status !=WL_CONNECTED) {
        Serial.print("Attempting to connect to network…");
        status = WiFi.begin(ssid, pass);
        delay(1000);
        }
    Serial.print("SSID:");
    Serial.println(WiFi.SSID());
}
Now you can open the console and run the sketch. If you see your SSID printed on the screen, you’ve successfully connected to WiFi.
Using PubNub to Publish Data
Now that you have a WiFi connection set up, it’s easy to send and receive messages on your MKR using PubNub’s network.
Setting Up PubNub
First, you need to include the PubNub library, as well as input your publish and subscribe keys at the top of your code. Next, define the channel you’re going to use for your project.
#include <PubNub.h>
char pubkey[] = "Enter-your-pubkey";
char subkey[] = "Enter-your-subkey";
char channel[] = "channel";
Next, initialize PubNub in void setup().
PubNub.begin(pubkey, subkey);
JSON Message Formatting
Most messages sent through PubNub are in the form of a JSON, so when sending data you’ll want to format it appropriately. To do this, I recommend using a couple helper functions to help turn your data into messages. The first one is commonly used to convert floats into strings, which is necessary if you’re hoping to send any data that is originally collected as a float.
char *dtostrf (double val, signed char width, unsigned char dec, char *s) {
   char m[20];
   sprintf(m, "%%%d.%df", width, dec);
   sprintf(s, m, val);
   return s;
 }
The other function is helpful for joining long strings together, which is necessary to create a JSON.
char longString[100];
char *joinStrings(char* string1, char* string2, char* string3) {
    longString[0] = 0;
    strcat(longString, string1);
    strcat (longString, string2);
    strcat (longString, string3);
    return longString;
}
Using both of those functions, you can convert your data from a float into a JSON ready to be published to your channel.
char msg[200];
dtostrf(data, 7, 2, msg);
char *json = joinStrings("{\"Data\":\"", msg, "\"}}");
Publishing Data from the MKR1000
Now that you know how to format your data properly, it’s very simple to publish the message to your channel. You simply have to create a client and use the publish() function. As a debugging tool, it’s also useful to print the message to the console and add a delay.
WiFiClient *client = PubNub.publish(channel, json);
while (client->connected()) {
 char c = client->read();
 Serial.print(c);
}
client->stop();
delay(1000);
Creating an Access Point
Another handy feature of the MKR1000 is that it can operate as an access point, creating a specialized network that only one other device can connect to. To do this, you’ll need to create a server, initialize the access point and send HTML data to create a webpage.
Setting Up the Access Point
To create the access point, you first need to create variables declaring the server, the SSID of the network you’re creating, and the initial wifi status.
WiFiServer server(80);
char ssid[] = "MKR1000";
int status = WL_IDLE_STATUS;
Next you’ll want to create a function that prints out the status of your access point.
void printStatus() {
  Serial.print("SSID: ");
  Serial.println(WiFi.SSID());
  IPAddress ip = WiFi.localIP();
  Serial.print("IP Address: ");
  Serial.println(ip);
  long rssi = WiFi.RSSI();
  Serial.print("signal strength (RSSI):");
  Serial.print(rssi);
  Serial.println(" dBm");
  Serial.print("To connect, join the network and open a browser to http://");
  Serial.println(ip);
}
Then in void setup() you can create your access point and print status updates to the console.
void setup() {
  delay(1000);
  Serial.begin(9600);
  Serial.print("Creating access point named: ");
  Serial.println(ssid);
  if (WiFi.beginAP(ssid) != WL_CONNECTED) {
    Serial.println("Creating access point failed");
    while (true);
  }
  server.begin();
  printStatus();
}
HTTP Request Communication
Now it’s time to start sending and receiving data through the access point. After defining the client, you need to create a string to hold the data coming in, then read that data one byte at a time. If there’s a blank line in the data, that means that the client HTTP request has finished, so it’s your turn to send a response.
void loop() {
  WiFiClient client = server.available();
  if (client) {
    Serial.println("New Client");
    String line = "";
    while (client.connected()) {
      if (client.available()) {
        char c = client.read();
        Serial.print(c);
        if (c=='
') {
          if (line.length() == 0) {
             client.println("HTTP/1.1 200 OK");
             break;
          }
          else {
              line = "";
          }
        }
        else if (c != '') {
          line += c;
        }
      }
    }
    client.stop();
    Serial.println("Client Disconnected");
  }
}
Setting Up the HTML Page
If you noticed in the code above, you haven’t actually sent anything of value to the client yet, so it’s time to change that. By writing HTML code directly to the client, you can create an interactive webpage from which to collect data. There are different forms in which you can write the code, but I like to do it with individual print statements for better visualization. Here, I’m creating a text input field and a button that prints data to the console, but feel free to customize it with whatever HTML code you need.
if (line.length() == 0) {
              client.println("HTTP/1.1 200 OK");
              client.println("Content-type:text/html");
              client.println();
              client.println("");
              client.println("");
              client.print("Data:");
              client.print("<input id=\"data\"/><br>");
              client.print("<button type=\"button\" onclick=\"SendText()\">Enter</button>");
              client.println("</body>");
              client.println("<script>");
              client.println("var data = document.querySelector('#data');");
              client.println("function SendText() {");
              client.println("nocache=\"&nocache=\" + Math.random() * 1000000;");
              client.println("var request = new XMLHttpRequest();");
              client.println("netText = \"&txt=\" + \"?\" + data.value + \",&end=end\";");
              client.println("request.open(\"GET\", \"ajaz_inputs\" + netText + nocache, true);");
              client.println("request.send(null)");
              client.println("data.value=''}");
              client.println("</script>");
              client.println("</html>");
              client.println();
              break;
}
And there you have it! You’ve now turned your Arduino MKR1000 into an access point through which you can send and receive data.
Using Flash Storage
Because the MKR1000 doesn’t have EEPROM (Electrically Erasable Programmable Read-Only Memory), it can be helpful to know how to store data in flash storage. To do this you can use a library called FlashStorage.h which can be downloaded through the Github repository. After including the library at the top of your sketch, using it is easy. Just declare the type of data that you want to store and assign it to a variable.
#include <flashstorage.h>
FlashStorage(storage, String);
After that, you can read and write to flash storage with just one line of code for each process.
void loop() {
  if (storage.read() == "") {
    storage.write("This is now in storage.");
  }
}
Resetting the MKR1000
Another handy feature of the MKR1000 is the ability to do a software reset of the device or put it to sleep for a short amount of time using a watchdog timer (WDT). To do this, you need the Adafruit_SleepyDog.h library, which you can download from Adafruit's Github page. Include the library at the top of your code, and then use any command you need in your program. To shut down your device, enable the watchdog with either a specific number of milliseconds or allow it to choose the maximum for your device.
int countdownMS = Watchdog.enable(1000);
int maxCountdownMS = Watchdog.enable();
After that time runs out, your device will stop running unless you reset the timer. You can use this to make sure your MKR doesn’t get stuck in an infinite loop, because if for some reason it never gets to the reset() call, it will shut down.
Watchdog.reset();
You can also completely disable the watchdog if you no longer want to use it after a specific section of code.
Watchdog.disable();
If you want to simply put your device to sleep to save power without completely turning it off, you can set the watchdog to sleep for either a specific amount of time or your device’s max.
int sleepMS = Watchdog.sleep(3000);
int maxSleepMS = Watchdog.sleep();
Moving Forward with the MKR1000
Now that you know how to use more of the cool features on this tiny new Arduino board, you’re ready to get to work on your own projects! If you want, you can get started with this MKR1000 tutorial on creating a distributed temperature monitoring system. Whatever your plans are, get ready to incorporate the MKR into anything in the IoT universe, and keep on the lookout for additional tutorials and feature walkthroughs as I learn how to do more and more things with this little board.