Instant Push for iOS/Android from a React Native App
Push Notifications are a great way to get attention when your app isn't open. In this tutorial we'll implement remote push notifications for both iOS and Android in a React Native app. We are going to be using a PubNub powered IoT smart button and a Smart Doorbell app built in React Native. However, you can use this tutorial to enable Push Notifications in any React Native app.
Getting Started with React Native Push Notifications
IoT Smart Button with Arduino and PubNub (not required)
First, you'll need to build your own PubNub powered IoT smart button to use with this tutorial. 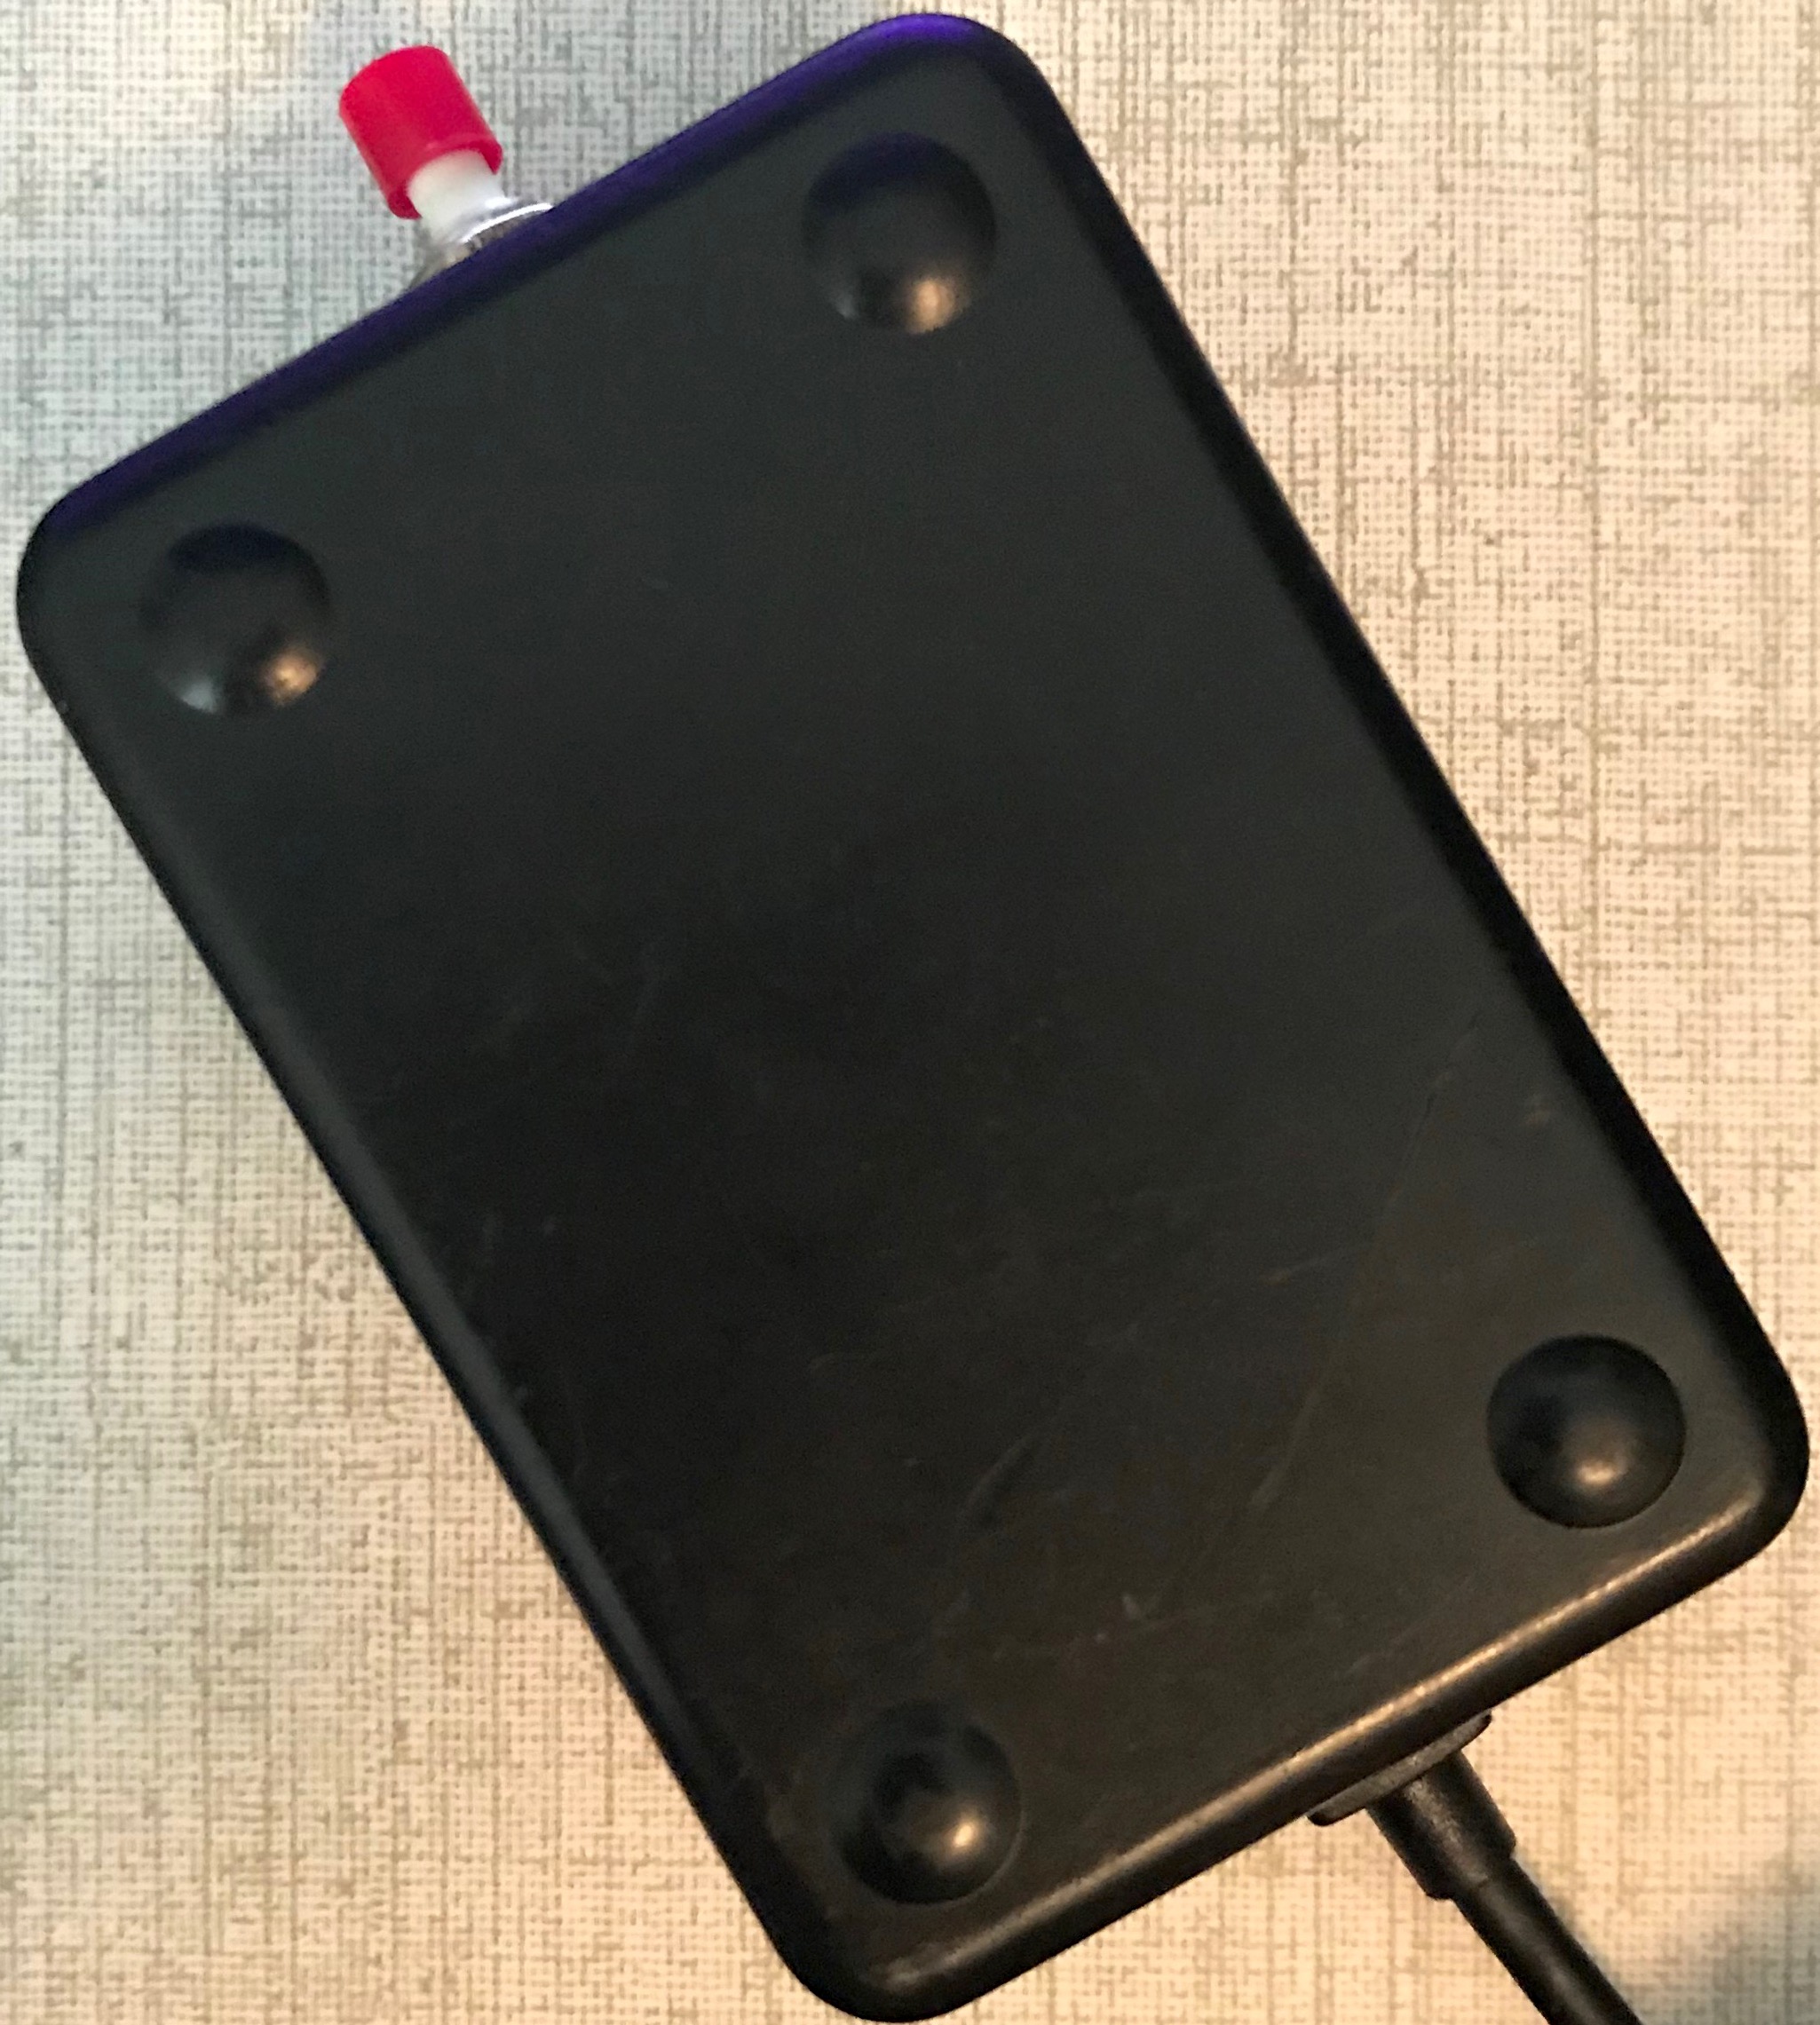 I've put together a guide to build your own IoT smart button.
You only need two hardware components:
- A push button.
- A MKR1000 development board.
Build your button by following the guide.
Smart Button React Native App
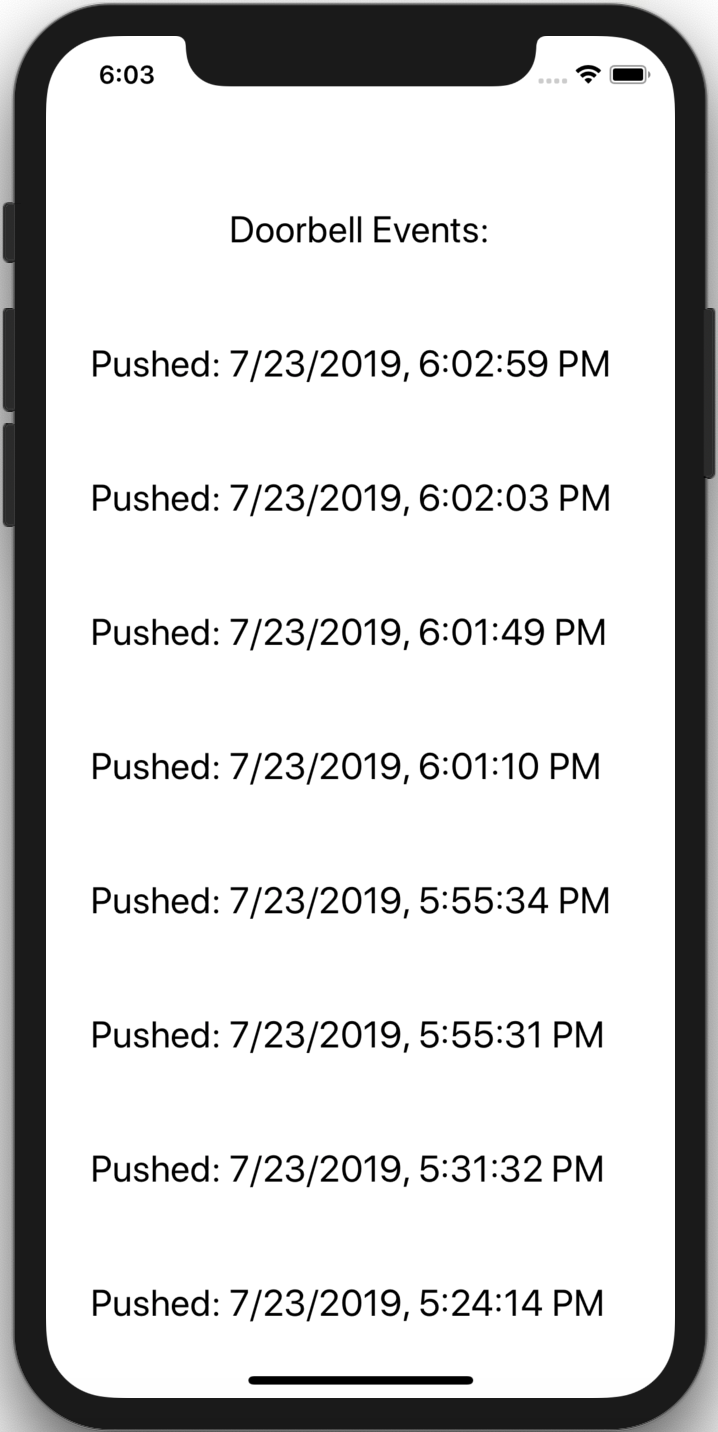
Next, you'll need to complete the tutorial for building a Smart Doorbell app in React Native that tracks the history of the smart button press events. The app works on both iOS and Android.
Build the Smart Doorbell app by following the tutorial.
iOS Developer Account
- iOS development requires building on macOS.
- iOS push notifications require paid enrollment in the Apple Developer Program. You need to do this to get mobile push notification API keys. Also, you must do this in order to publish apps in the App Store.
PubNub Account
You’ll need to sign up for a forever free PubNub account. Once you sign up, you can get your unique PubNub keys from the PubNub Admin Dashboard.
Configure React Native Push Notifications
Use the React Native command line interface to install the React Native Push Notifications library from your terminal. Make sure you're in the same directory as your app.
npm install --save react-native-push-notification
react-native link
iOS Push Notifications
If you are only developing for Android, you can skip this section for integrating iOS push notifications.
Open the Xcode project located in the “ios” directory of the app project. Sign in into Xcode with an Apple ID that has paid enrollment in the Apple Developer Program by clicking “Xcode” and selecting “Preferences”. At the top of the window, select Accounts. Click on the “+” on the lower left corner and select “Apple ID” as the type of account.
Go to general settings for your project by main project file (the one that represents the .xcodeproj with the blue icon) in the Project Navigator.
Set the Bundle Identifier to a unique string, such as “com.[company].pushapp”. Make sure your Apple developer account or team is selected under the Team dropdown. Allow Xcode to automatically manage signing. Repeat this step for the Tests target in your project.
Go back to the general settings for your project and click on “Capabilities”. Set the switch for “Push Notifications” to “ON”.
Link the PushNotificationIOS library. Refer to the React Native Manual Linking Guide for more information about linking libraries with native capabilities.
- Right click on “Libraries” in the Project Navigator. Click “Add Files to [Project Name]” and add “node_modules/react-native/Libraries/PushNotificationIOS/RCTPushNotification.xcodeproj”.
- Go to the general settings for your project and select “Build Phases”.
- Under “Link Binary With Libraries” drag in “libRCTPushNotification.a” from inside “Libraries/PushNotificationIOS/RCTPushNotification.xcodeproj/Products/” .
- Add
#import <React/RCTPushNotificationManager.h>to the top of “AppDelegate.m”. - In your AppDelegate implementation register for notifications and handle notification events.
// Required to register for notifications
 - (void)application:(UIApplication *)application didRegisterUserNotificationSettings:(UIUserNotificationSettings *)notificationSettings
 {
  [RCTPushNotificationManager didRegisterUserNotificationSettings:notificationSettings];
 }
 // Required for the register event.
 - (void)application:(UIApplication *)application didRegisterForRemoteNotificationsWithDeviceToken:(NSData *)deviceToken
 {
  [RCTPushNotificationManager didRegisterForRemoteNotificationsWithDeviceToken:deviceToken];
 }
 // Required for the notification event. You must call the completion handler after handling the remote notification.
 - (void)application:(UIApplication *)application didReceiveRemoteNotification:(NSDictionary *)userInfo
                                                        fetchCompletionHandler:(void (^)(UIBackgroundFetchResult))completionHandler
 {
   [RCTPushNotificationManager didReceiveRemoteNotification:userInfo fetchCompletionHandler:completionHandler];
 }
 // Required for the registrationError event.
 - (void)application:(UIApplication *)application didFailToRegisterForRemoteNotificationsWithError:(NSError *)error
 {
  [RCTPushNotificationManager didFailToRegisterForRemoteNotificationsWithError:error];
 }
 // Required for the localNotification event.
 - (void)application:(UIApplication *)application didReceiveLocalNotification:(UILocalNotification *)notification
 {
  [RCTPushNotificationManager didReceiveLocalNotification:notification];
 }
Go to the Apple Developer Portal and click “Certificates, IDs & Profiles”.
Click on “Keys” and add a new key by clicking on the “+” button in the upper right. Select the “APNs” toggle on the key creation page and enter a name. Click “Continue” and “Confirm”. Download your key and record the Key ID so you can use it later.
Get your Team ID by clicking on your team name in the upper right, then select “View Account”. Record the Team ID so you can use it later.
Go to your PubNub Admin Dashboard, select your app, and then select your keyset. Scroll down to “Mobile Push Notifications”, enable the Mobile Push Notifications add-on, and upload the key file you obtained from the Apple Developer Portal. Enter your Key ID and Team ID. Save your changes.
Android Push Notifications
If you are only developing for iOS, you can skip this section for integrating Android push notifications.
Firebase Cloud Messaging (FCM) is a rebranding of Google Cloud Messaging (GCM) and there is no functional difference to handle it in PubNub. PubNub server still expects a “pn_gcm” as part of the payload.
Add permissions at the top of “android/app/src/main/AndroidManifest.xml”.
<uses-permission android:name="android.permission.WAKE_LOCK" />
<permission
   android:name="${applicationId}.permission.C2D_MESSAGE"
   android:protectionLevel="signature" />
<uses-permission android:name="${applicationId}.permission.C2D_MESSAGE" />
<uses-permission android:name="android.permission.VIBRATE" />
<uses-permission android:name="android.permission.RECEIVE_BOOT_COMPLETED"/>
Add configuration in “android/app/src/main/AndroidManifest.xml” within and at the top of <application ....>.
<receiver android:name="com.dieam.reactnativepushnotification.modules.RNPushNotificationPublisher" />
<receiver android:name="com.dieam.reactnativepushnotification.modules.RNPushNotificationBootEventReceiver">
    <intent-filter>
        <action android:name="android.intent.action.BOOT_COMPLETED" />
    </intent-filter>
</receiver>
<service android:name="com.dieam.reactnativepushnotification.modules.RNPushNotificationRegistrationService"/>
<service
    android:name="com.dieam.reactnativepushnotification.modules.RNPushNotificationListenerService"
    android:exported="false" >
    <intent-filter>
        <action android:name="com.google.firebase.MESSAGING_EVENT" />
    </intent-filter>
</service>
Please consult our documentation for Android Mobile Push Notifications for additional screenshots and details for this step
Go to the Firebase console.
Add a new project and then click “Add Firebase to app”.
Enter the package name and click “Register app”. You can find the package name for your app at the top of “android/app/src/main/java/com/[YourAppName]/MainApplication.java”
Download the config file in your Android app module root directory. The file should be located in “android/app/”. Do not add the Firebase SDK.
Go to your PubNub Admin Dashboard, select your app, and then select your keyset.
Scroll down to “Mobile Push Notifications”, enable the Mobile Push Notifications add-on (if not already enabled), and enter the API key for the app you just created in the Firebase console. You can find your API key (listed as Server key in the Firebase console) by going to “Project Overview” in the left sidebar, click on the kebob menu button (“⋮“) located at the top right of your app's metrics, click on “Settings”, and select the “Cloud Messaging” tab. Additionally, Record the Sender ID so you can use it later.
Get Token and Add Device to Channel
Import push notifications and PubNubReact (if you haven't already) in “App.js”.
import PushNotificationIOS from 'react-native';
var PushNotification = require('react-native-push-notification');
import PubNubReact from 'pubnub-react';
Add or edit the constructor inside the App component and before the render() function. Inside is where PubNub is initialized and where mobile push notifications are configured and initialized.
constructor(props) {
    super(props);

    this.pubnub = new PubNubReact({
      publishKey: 'YOUR_PUBNUB_PUBLISH_KEY_HERE',
      subscribeKey: 'YOUR_PUBNUB_SUBSCRIBE_KEY_HERE'
    });
    this.pubnub.init(this);

    PushNotification.configure({
      // Called when Token is generated.
      onRegister: function(token) {
          console.log( 'TOKEN:', token );
          if (token.os == "ios") {
            this.pubnub.push.addChannels(
            {
              channels: ['smart_buttons'],
              device: token.token,
              pushGateway: 'apns'
            });
            // Send iOS Notification from debug console: {"pn_apns":{"aps":{"alert":"Hello World."}}}
          } else if (token.os == "android"){
            this.pubnub.push.addChannels(
            {
              channels: ['smart_buttons'],
              device: token.token,
              pushGateway: 'gcm' // apns, gcm, mpns
            });
            // Send Android Notification from debug console: {"pn_gcm":{"data":{"message":"Hello World."}}}
          }
      }.bind(this),
      // Something not working?
      // See: https://support.pubnub.com/hc/en-us/articles/360051495432-How-can-I-troubleshoot-my-push-notification-issues

      // Called when a remote or local notification is opened or received.
      onNotification: function(notification) {
        console.log( 'NOTIFICATION:', notification );
        // Do something with the notification.
        // Required on iOS only (see fetchCompletionHandler docs: https://reactnative.dev/docs/pushnotificationios)
        // notification.finish(PushNotificationIOS.FetchResult.NoData);
      },
      // ANDROID: GCM or FCM Sender ID
      senderID: "sender-id",
  });
}
Get your unique PubNub keys from your PubNub Admin Dashboard. If you don’t have a PubNub account, sign up for a PubNub account for free. Replace “YOUR_PUBNUB_PUBLISH_KEY_HERE” and “YOUR_PUBNUB_SUBSCRIBE_KEY_HERE” with your Publish Key and Subscribe Key.
Replace “sender-id” with the Sender ID you obtained previously from the Firebase console.
Refer to the React Native Push Notifications repo for more information about configuration options with Push Notifications.
The app is now ready to receive push notifications on the ‘smart_buttons' channel that our smart button uses.
Building and Testing
You should test notifications for both Android and iOS on a physical device. However, if you want to test your app on an Android Virtual Device or in the iOS Simulator you can refer to the React Native Getting Started guide.
Testing on an iOS Device
Plug your iOS device into your Mac and open the Xcode project located in the “ios” directory of the app project.
You will need to register your device for development if this is your first time running an app on your iOS device with Xcode. Open “Product” in the menu bar and then click “Destination”. Select your device from the list and Xcode should register your device for development.
Navigate to general settings for your project by main project file (the one that represents the .xcodeproj with the blue icon) in the Project Navigator. Make sure your Apple developer account or team is selected under the Team dropdown. Allow Xcode to automatically manage signing. Repeat this step for the Tests target in your project.
Click “Run” (⌘R) in the Product menu. The app will launch on your device shortly.
See the Running on Device guide for iOS if you have trouble installing onto your device or for information on how to build your app for production.
Testing on an Android Device
Most Android devices can only install and run apps downloaded from Google Play by default. Enable USB Debugging on your device to install the app during development.
Enable USB debugging on your device by first enabling the “Developer options” menu. Go to “Settings” and then “About Phone”. Tap the Build number row at the bottom seven times. You should get a message that the menu is available. Go back to the main settings menu and tap “Developer options” to enable “USB debugging”.
Connect your Android device to your Mac and run react-native run-android inside the app project folder. The app will launch on your device shortly.
See the Running on Device guide for Android if you have trouble installing onto your device or for information on how to build your app for production.
Sending Push Notifications
You can send push notifications using PubNub by publishing a PubNub message with push notification keys to the channel or channels that the devices were added to.
- Associated APNS devices will receive only the data within the
pn_apnskey.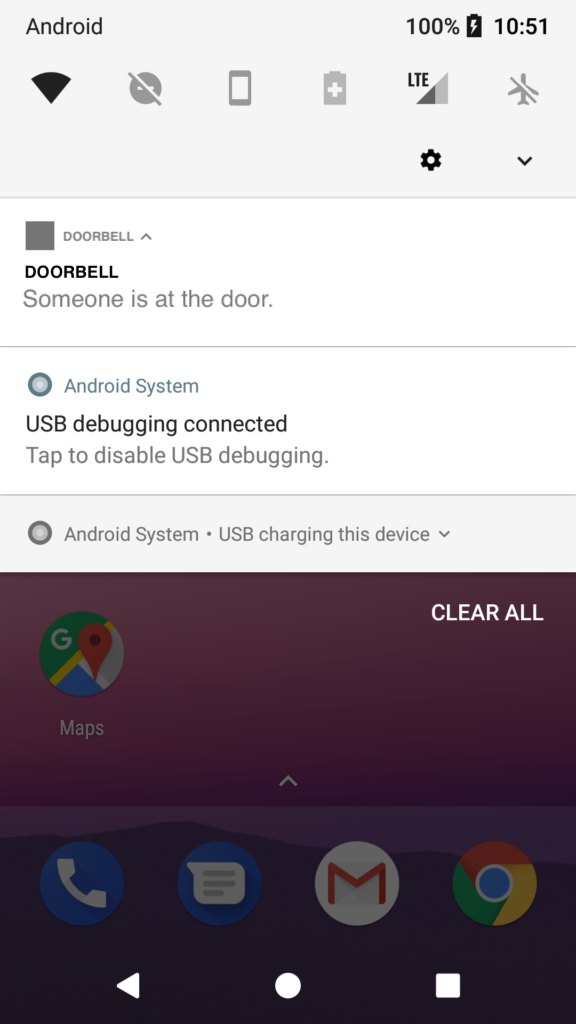
- Associated GCM/FCM devices will receive only the data within the
pn_gcmkey. - Native PubNub subscribers will receive the entire object literal, including the
pn_apnsandpn_gcmkeys.
In this tutorial you registered the device to the “smart_buttons” channel. Any messages sent to the channel with pn_apns or pn_gcm keys will also be sent as a push notification to registered devices.
You can test push notifications with the PubNub Debug Console from within the PubNub Admin Dashboard.
Go to your PubNub Admin Dashboard, select your app, and then select your keyset. Click “Debug Console” and create a client with “Default Channel” set to “smart_buttons”. With the client you just created you can send a notification to your device by sending a message containing the pn_apns or pn_gcm keys.
Try sending this message:
{
  "event": {
    "button": "pressed"
  },
  "pn_apns": {
    "aps": {
      "alert": "Someone is at the door."
    }
  },
  "pn_gcm": {
    "notification": {
      "body": "Someone is at the door."
    }
  }
}
Refer to the troubleshooting guide if you have issues sending push notifications.
Send Push Notifications From the Smart Button
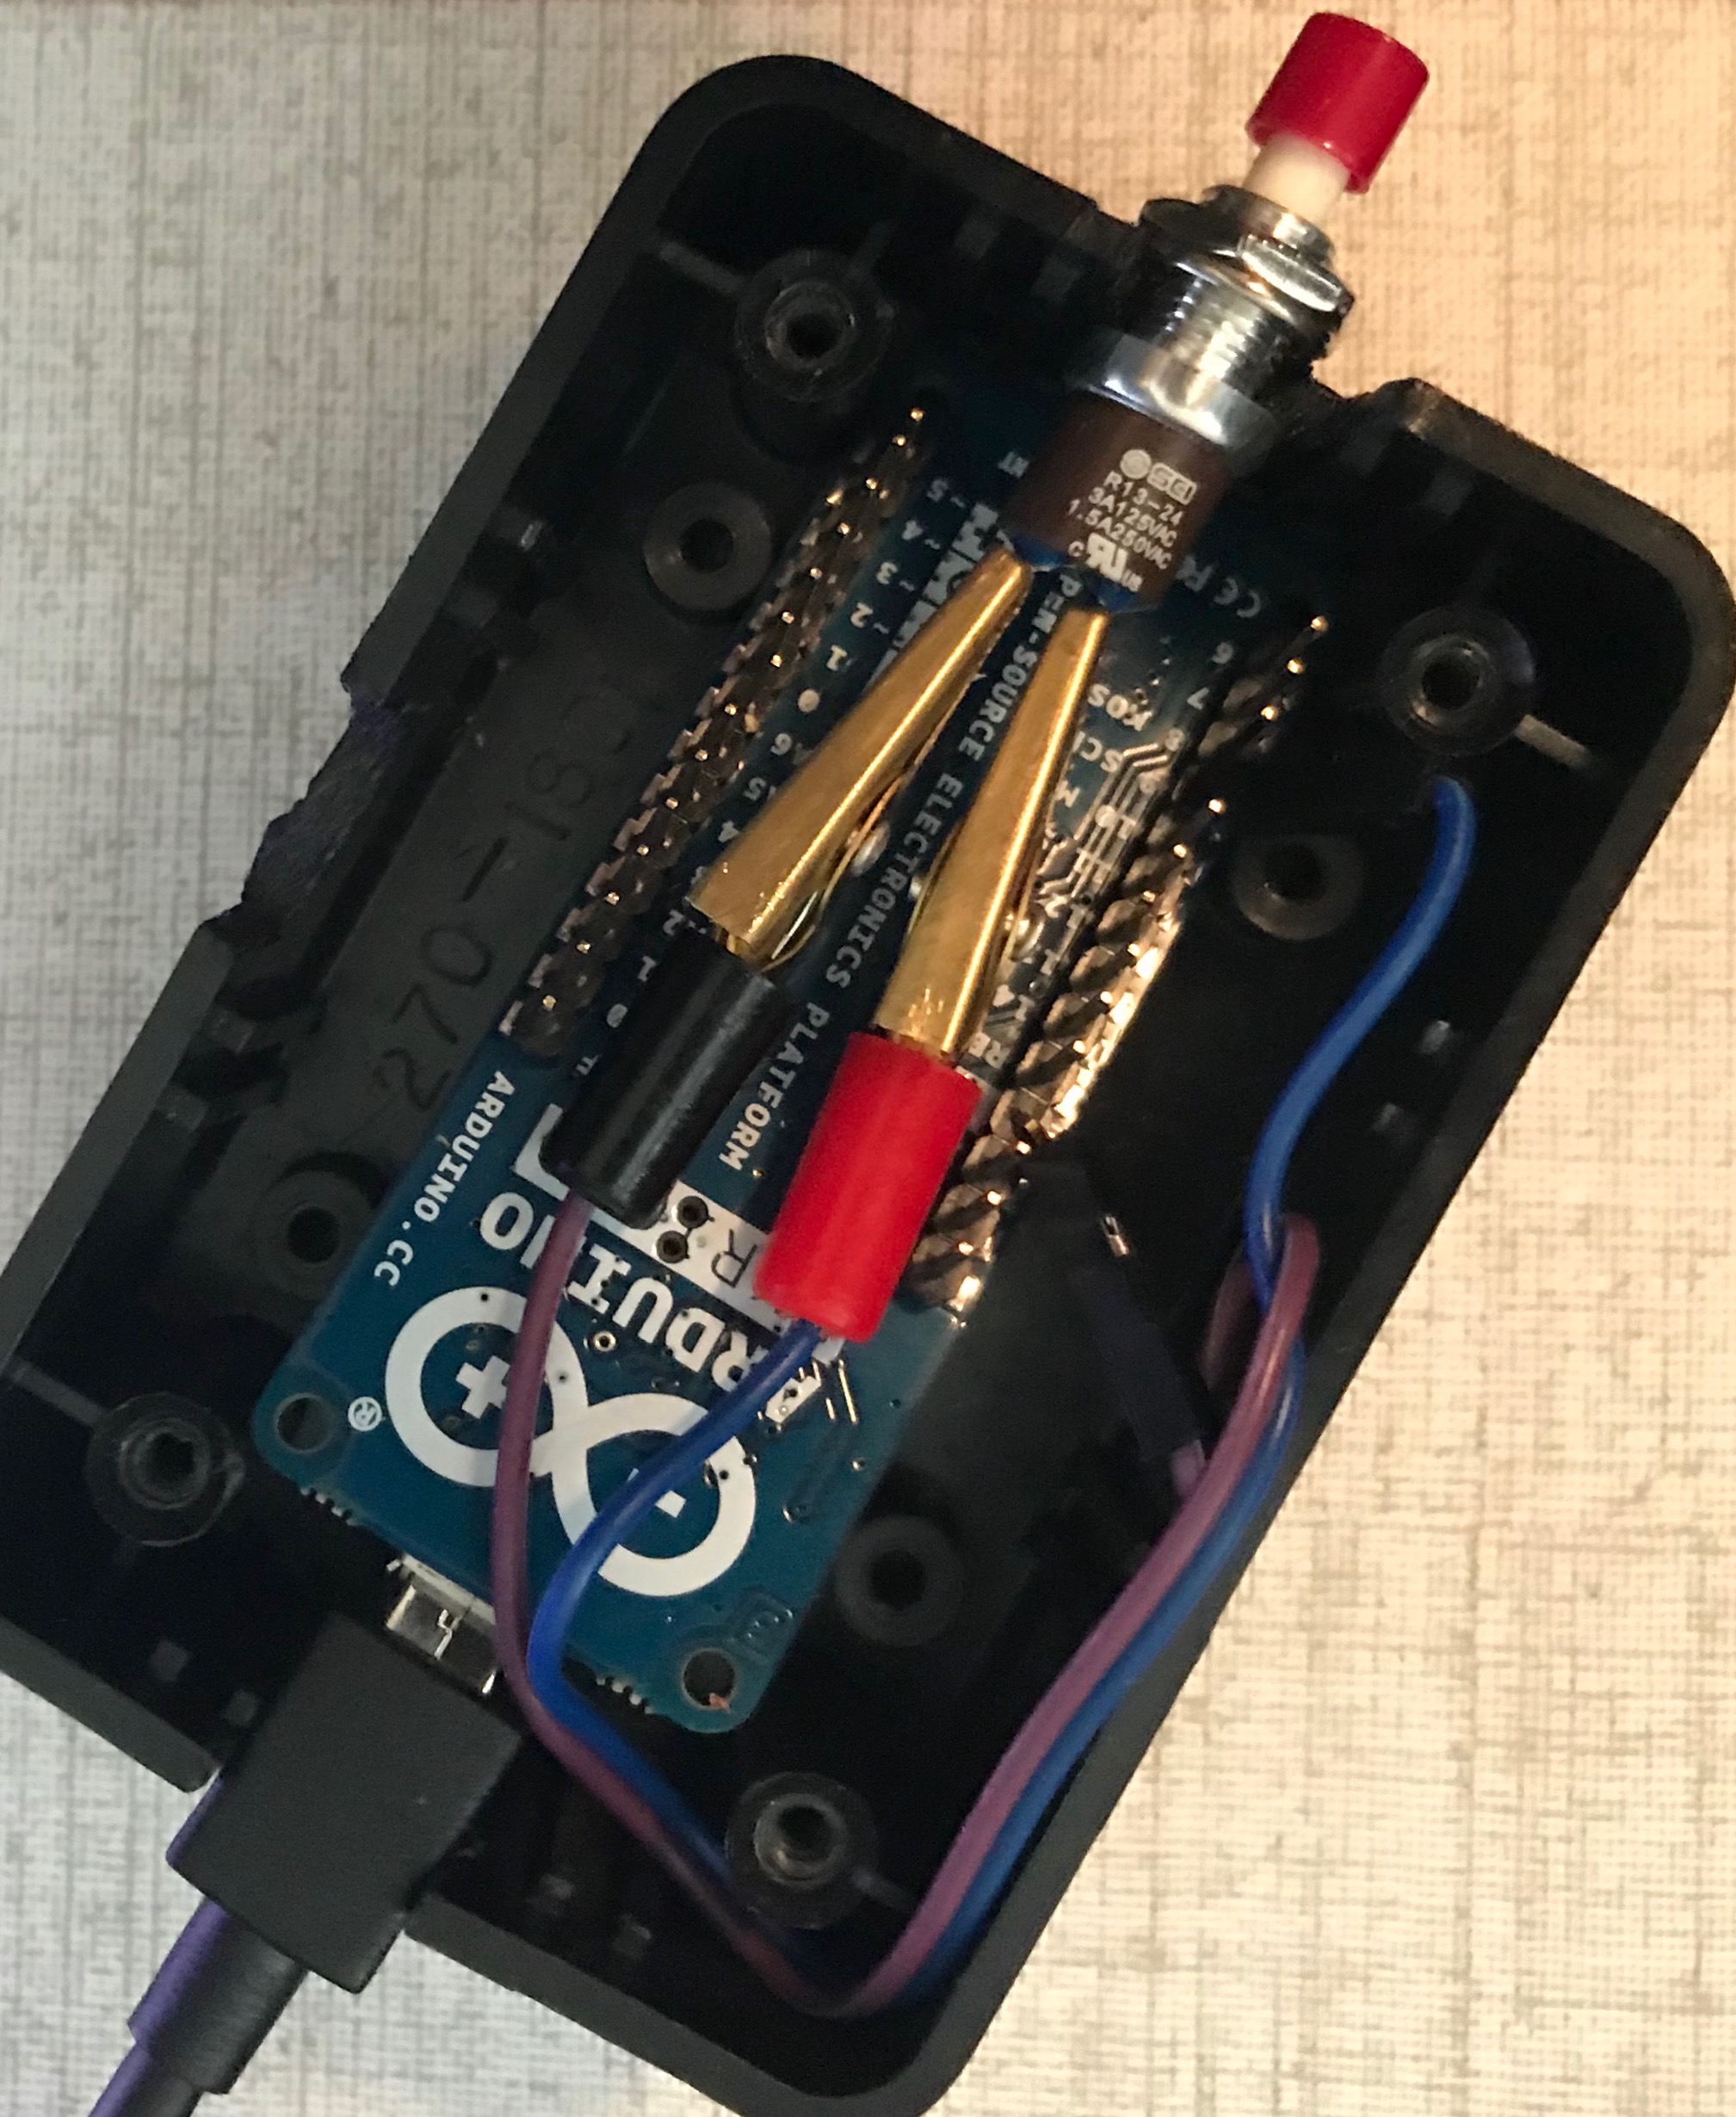
We'll need to modify the sketch that our IoT smart button uses to trigger push notifications to registered devices.
Replace the existing message:
char msg[] = "{\"event\":{\"button\":\"pressed\"}}";
With a new message containing keys to trigger push notifications from PubNub:
char msg[] = "{\"event\":{\"button\":\"pressed\"},\"pn_apns\":{\"aps\":{\"alert\":\"Someone is at the door.\"}},\"pn_gcm\":{\"notification\":{\"body\":\"Someone is at the door.\"}}}";
Now when you press the button you'll get a push notification from the Smart Doorbell app!
What's Next?
Next, we'll mitigate if someone repeatedly presses our Smart Doorbell by using Functions to debounce events.
What else can I do with my Smart Button?
- Control your lights.
- Link with an IFTTT recipe.
- Build your own Amazon Dash Button.
What else can I do with Mobile Push Notifications?
- Alert users of delivery driver location.
- Push deals and offers to loyal customers.
- Notify of weather events.
Have suggestions or questions about the content of this post? Reach out at devrel@pubnub.com.
