Remote Control Raspberry Pi LEDs from a Web Browser UI
One function that makes the Internet of Things the Internet of Things is remote control of devices, being able to trigger action from a remote location. This is otherwise known as remote configuration. Whether it's a home, an office, or an industrial site, connected devices rely on some form of automation through sensors or machines and need a mechanism to control their operation remotely.
In this blog post, we'll build and demonstrate a simple remote configuration application, controlling a device from a web browser. We will build a small IoT simulation using Raspberry Pi and showcase the most common operation, switching on and off a remote device (in this case, Raspberry Pi LEDs).
Though this tutorial is simple, the core design pattern can be extended to large scale implementations, where you can trigger multiple devices simultaneously.
The full code repository is available here.
Hardware Requirements
For this demonstration, we will use the following hardware:
- Raspberry Pi Model B+ (with Raspbian OS)
- 1 LED and 1 490 Ohm Resistor
Software Requirements
We will use the following sdks and tools
Project Design
We will create two subsystems. One will be the controller, a basic web application in the form of a web page which can display the current status of device and send control messages to it, and the second one is the actual device simulated as an LED, and controlled via Raspberry Pi.
Web Application
The web interface will look something like this:
This is a very simple web page with a visual indicator for the device and a button to toggle the on/off state of LED.
Behind the scenes, we have the PubNub Javascript API that performs two operations upon receiving certain events.
- Sends a request message to toggle the state of the device.
- Receives response with the current state of the device.
Button Click Event
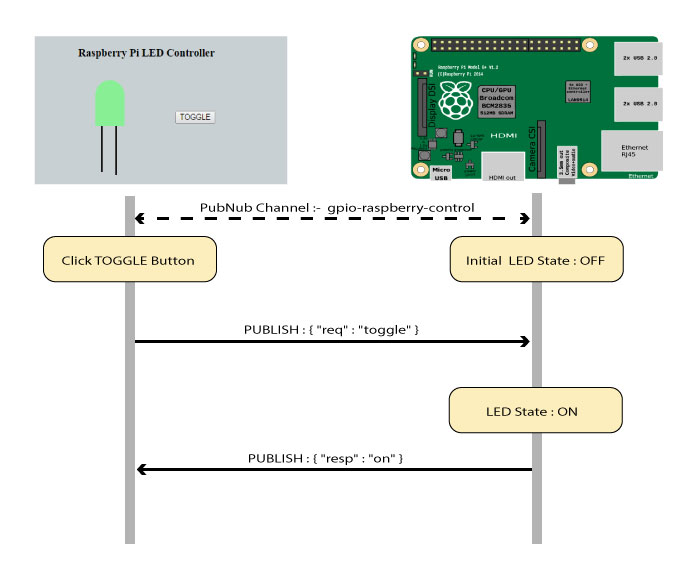
When the TOGGLE button is clicked, the webpage sends a Toggle request message to the device via ‘gpio-raspberry-control’ channel.
PubNub Channel Subscribe Callback Event
On receiving the toggle request, the Raspberry Pi toggles the state of the LED and sends a response back to the web page with the current state. Web page updates the visual indicator for the LED based on the received state information.
Raspberry Pi and LED
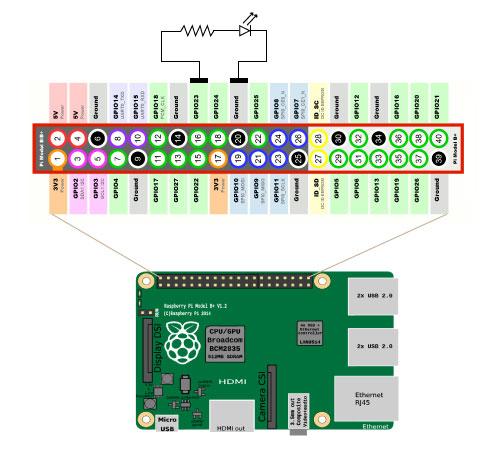
Here is the schematic for the raspberry Pi connections to be used in this application.

We are going to use the Raspberry Pi GPIO Python library to send the control messages to Raspberry Pi GPIO ports. This library works well with the python environment available by default with Raspbian OS.
The python code for driving the LED is executed as part of the PubNub callback on ‘gpio-raspberry-control’ channel
When a toggle request is received, the application checks the current state of the GPIO driving pin of the LED, toggles its state and then sends the new state back to the web application as a response message.
The exchange of messages between the web application and Raspberry Pi can be visualized as follows.

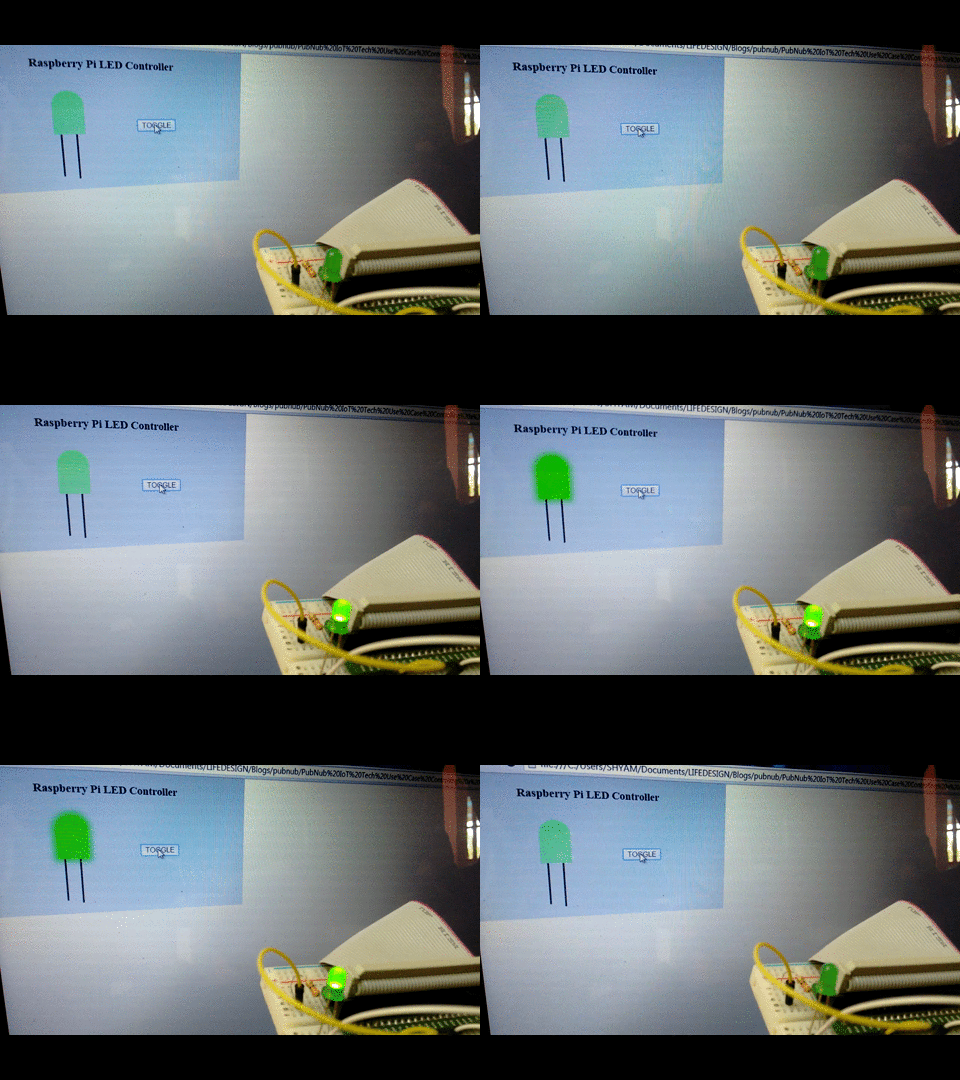
And here is how the entire system works:

Wrapping Up
This demonstration can be generalized as application layer service which sits on the top of an IoT stack. PubNub’s APIs can provide the middleware to manage the communication primitives of an IoT stack, while various such applications can be deployed on top to monitor & control the devices and visualize and analyze the data generated from them.
We've got you covered when it comes to embedded board remote configuration. Check out our big lot of tutorials around Raspberry Pi, Arduino, Texas Instruments, Atmel, and more!
