Setting up Your Automated Spam Detection and Prevention

How to easily stop chat flooding and cross-posting spam
This is the second part of our two-part blog on detecting and preventing chat flooding and cross-posting spam with PubNub Illuminate. If you haven’t read Part One, we recommend starting there—it covers the types of spam and best practices for handling them.
Quick recap on Illuminate and spam detection use case
Before diving into the setup, here’s a brief overview of the solution we’ll use. PubNub Illuminate is a real-time decisioning and analytics solution that enables you to automate decisions based on live data—without writing code. One of the many use cases Illuminate supports is spam detection. With it, you can:
Detect spam instantly by tracking message frequency and cross-posting behavior
Notify moderators in real time when suspicious activity is detected
Take automated actions like warnings, mutes, or bans based on user behavior
In the next section, we’ll walk through how to set up Illuminate to automatically notify moderators when chat flooding or cross-posting spam is detected.
Setting up Illuminate for spam detection
Step 1: Define and capture the data
To start capturing the data, create a Business Object named Spam Detection and define the required data fields. At a minimum, you will need the User ID, Channels, and Message Type data fields. It is advisable to have the User Type so you can have separate rules for hosts and VIP guests.
All of these are available in your publishes or messages. To map them correctly, click Map and select message, then: userId for the user, channel for the channels or room, and body for the message type. If you have a user type field to manage who to include and exclude in your decision rule, then select body, message, and enter userType.

Activate the Business Object to start capturing data.
Step 2: Create your spam metrics
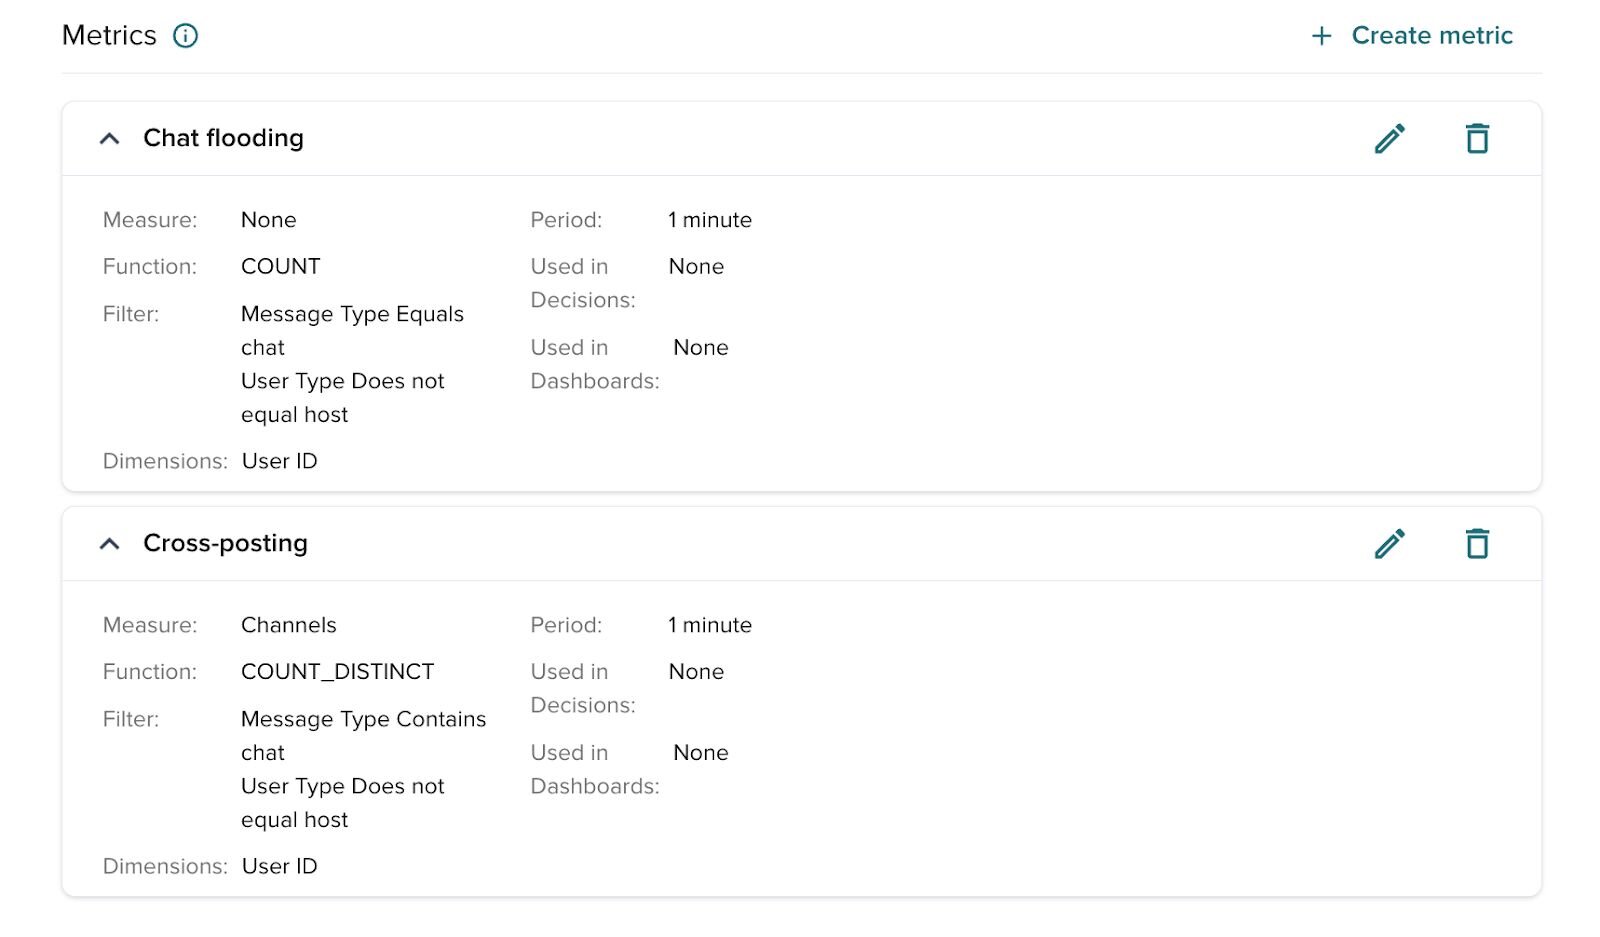
In the Spam Detection Business Object, create two metrics—one for chat flooding and one for cross-posting—with a short aggregation window (e.g., 1 minute) to catch spam in real time. You can select a longer aggregation window that best fits your needs.
Add two filters to each of the metrics created:
Message Type
EQUALSchatUser Type
DOES NOT EQUALhost
Step 3: Set up the data fields as conditions for detecting spam
Like the metrics, you’ll need to create two decisions – one for chat flooding and one for cross-posting. We’ll walk through setting up chat flooding, and you can do the same steps when creating the cross-posting decision.
Note that this step only defines the conditions you want to use. Adding threshold values for the conditions is at a later step.
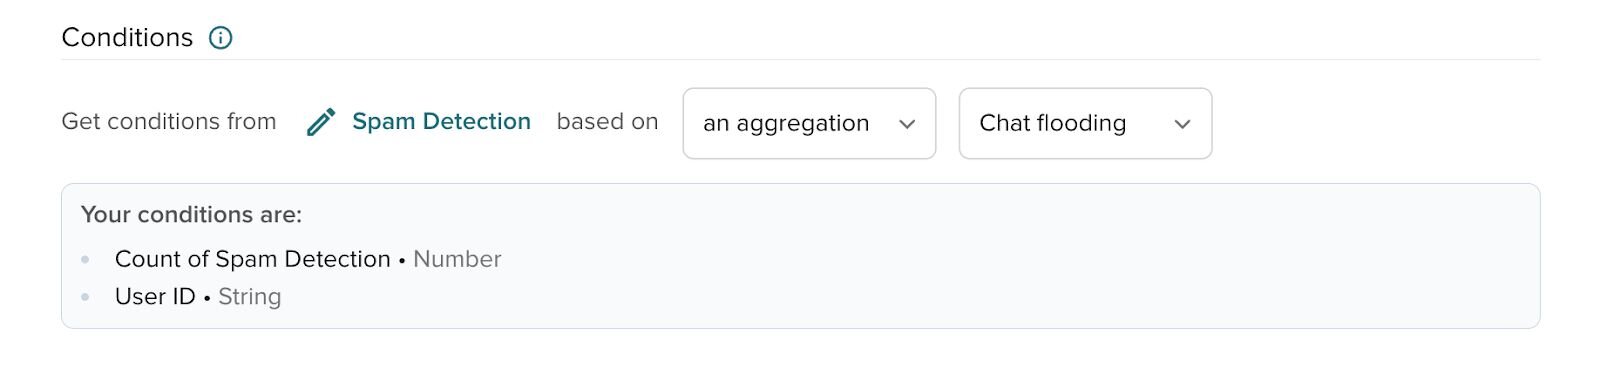
In Create Decision, select the Spam Detection business object, then choose the chat flooding metric you created. This will automatically display the data fields used in the metric, which serves as the conditions for your decision.
Step 4: Configure the action(s) you want to trigger
Now, we set up how to automatically notify the moderator to mute or ban users when conditions are met.
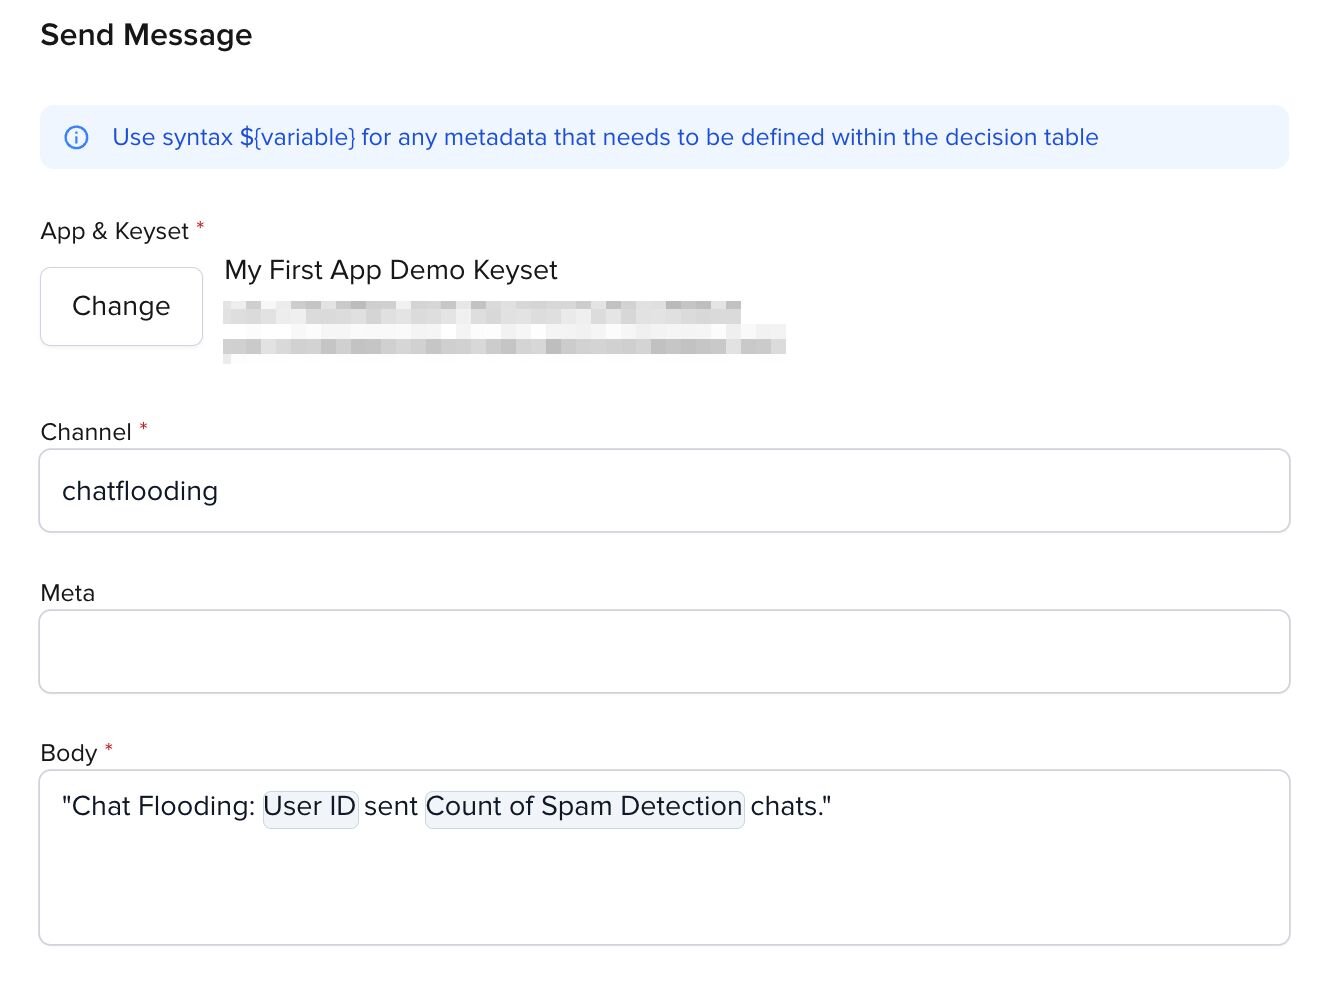
Add an action and name it Notify Moderator. Click Configure, select Send Message (Publish), and set up your publish as shown. You’ll see that we use dynamic variables (e.g., User ID, Count of Spam Detection), which are populated in real time when the action is executed. To add dynamic variables, enter a dollar sign $ followed by a left curly bracket {. This will display the available variables, which are the data fields in your conditions. You can create a new variable by typing its name inside curly brackets {} and selecting New.
Step 5: Set up your decision rules
Before activating your decision, you need to set up decision rules, as shown below. You can adjust the threshold values to best suit your scenario.
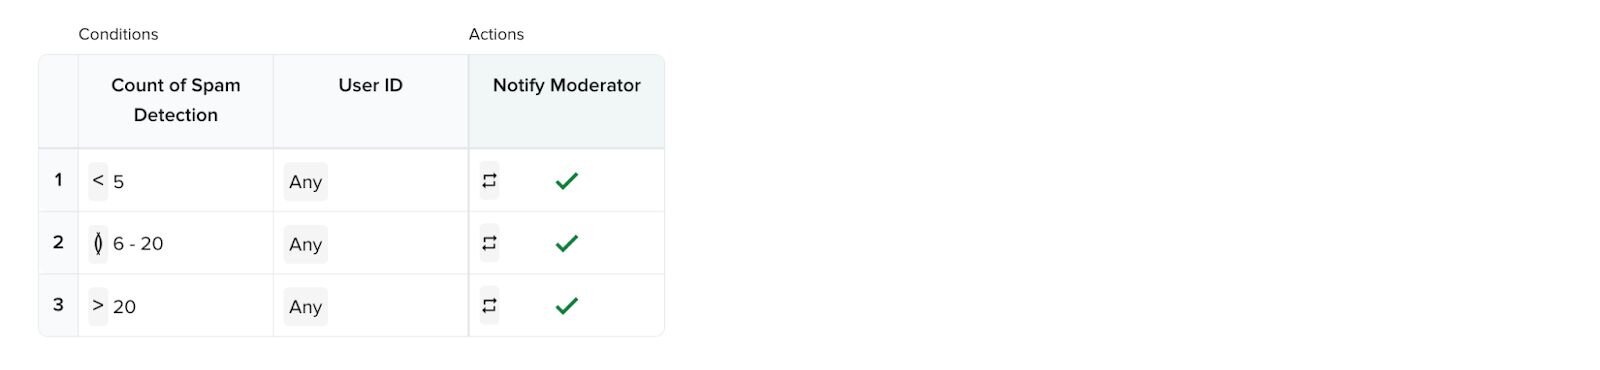
With each decision rule, you can control how often an action executes using the action execution limit feature, which is the icon you see to the left of the check mark. In this example, we’ve set it to trigger once per interval per condition to prevent excessive notifications or actions.
Step 6: Set up your dashboard so you can monitor and iterate
Now, let’s see it all in action with charts! Create a new dashboard and add each metric one at a time. Set the default date range to the last 30 minutes. The top charts are your spam metrics, while the red bar charts are the actions executed when conditions are met.
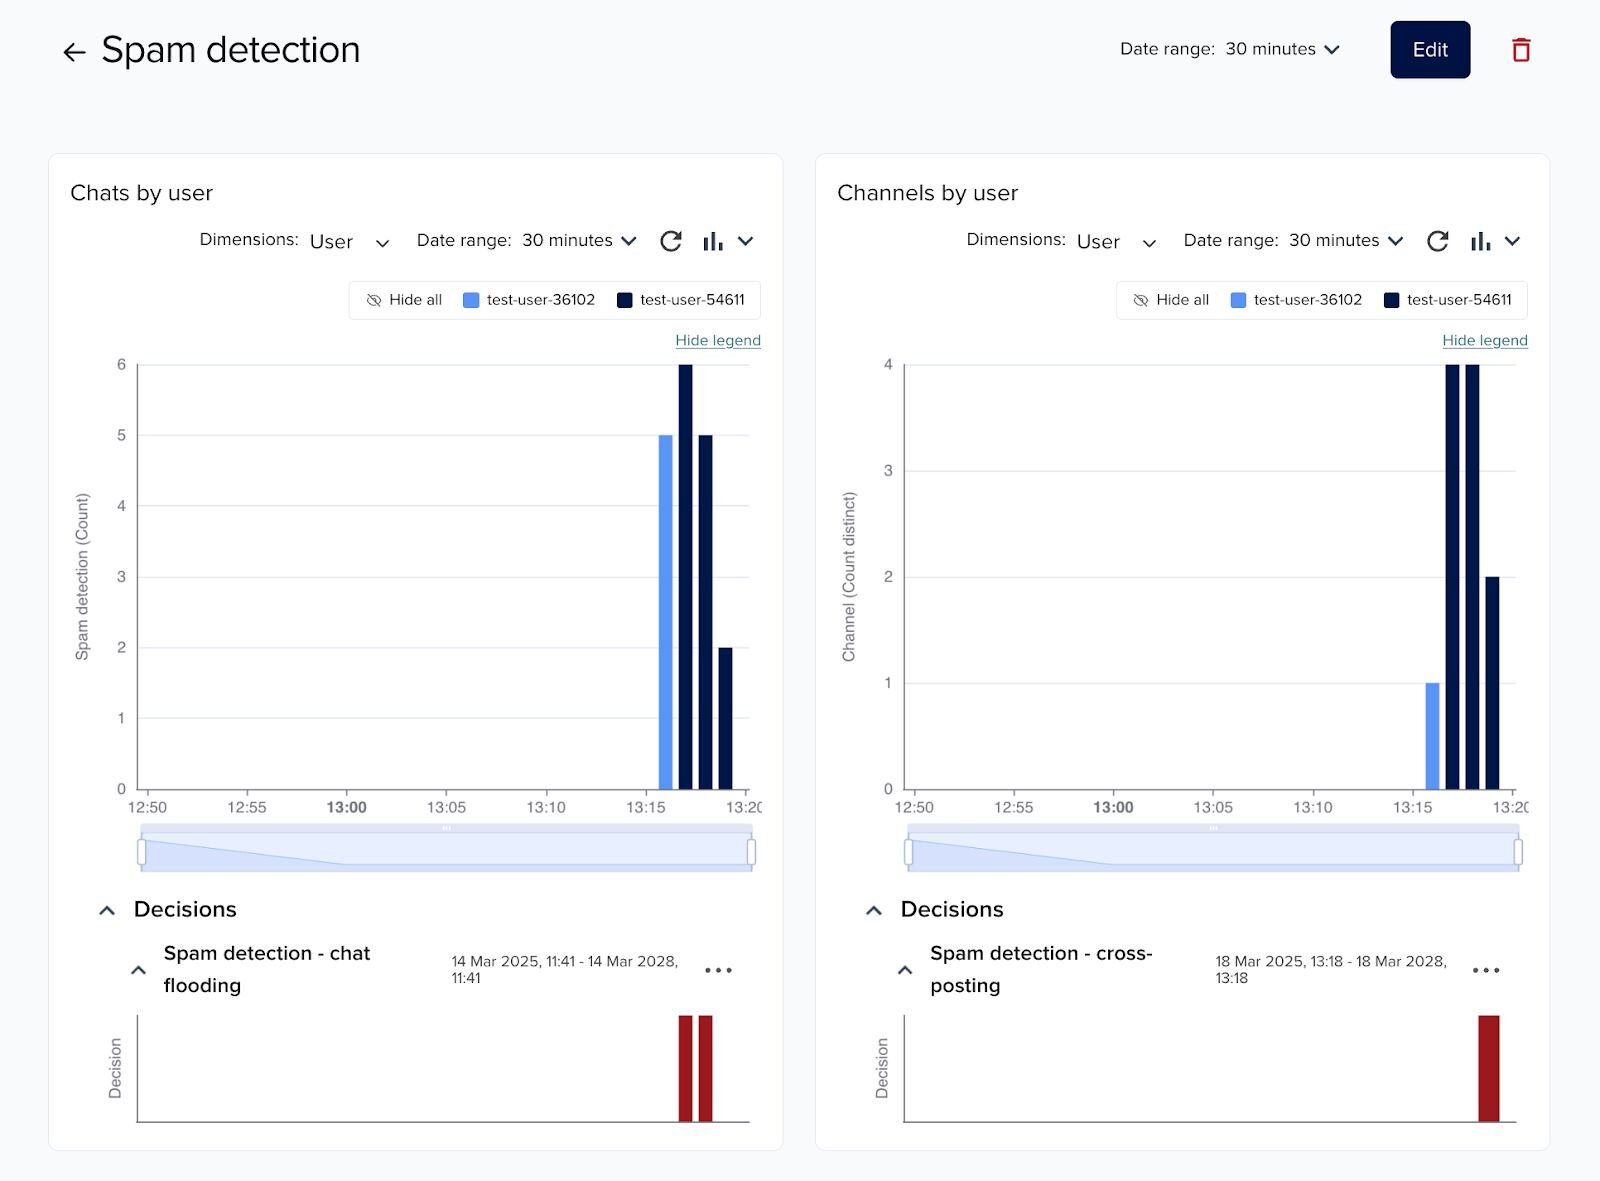
If messages are already in production, you’ll immediately see the metric and decision charts populate. If you're still building, you can test your setup by sending publishes via the PubNub Debug Console or Postman to see it working in real time.
It’s that easy to automate spam detection and response!
With PubNub Illuminate, you can set up automation to detect and prevent spam in minutes, not hours or days. Let us know how it works out by getting in touch with us anytime. Be sure to check out third post in this series by learning how you can automatically mute and ban harmful behavior instantly.