iOS Mobile Push Notifications
HTTP/2-based APNs
This APNs tutorial uses the HTTP/2-based Apple Push Notification service (APNs), not the legacy APNs binary interface, to send notifications.
PubNub Mobile Push Notifications bridges native message publishing with third-party push services, including Apple Push Notification service (APNs) and Firebase Cloud Messaging (FCM). This tutorial shows how to register for remote notifications, receive the device token, and add the device token to a PubNub channel.
Push notifications are channel‑specific. A user receives pushes for channels where push is enabled. In‑app messages still require a channel subscription.
Step 1: Configure account settings
Follow these steps to configure APNs Mobile Push Notifications for your app.
Step 1a: Create an APNs authentication token
Log in to your Apple Developer account.

Go to Certificates, IDs & Profiles, and select Keys.

Create and obtain a valid APNs Authentication Token (.p8 file extension).

After downloading, the Auth Key filename will look like this AuthKeyABCD1234.p8, the ABCD1234 is the Key ID for this key, we will need this Key ID later. You can also find the Auth Key ID by selecting your push token from your list of available Apple Developer Account Keys.

Step 1b: Configure mobile push notifications in the Admin Portal
In the Admin Portal, open your app’s keyset.
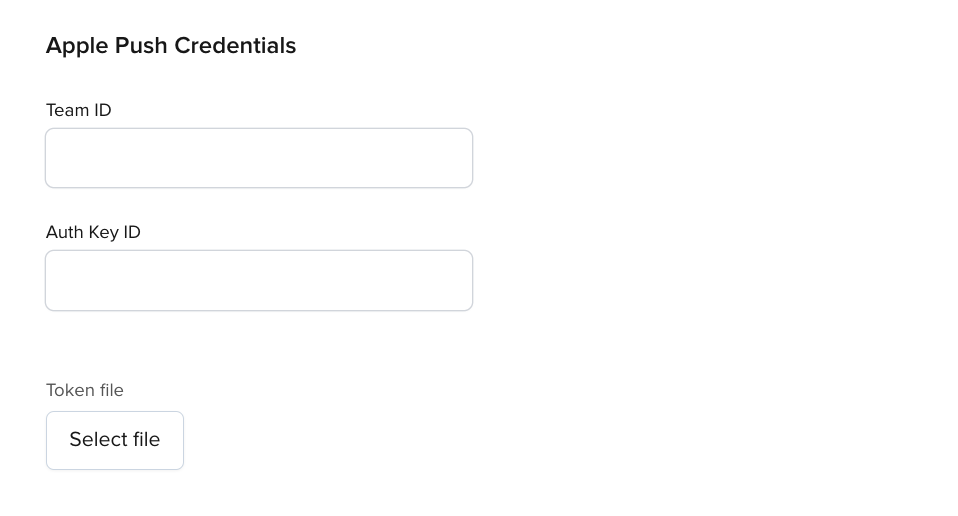
Enable Mobile Push Notifications and provide values for the Team ID and Auth Key ID (Apple's key identifier) fields.
Then, upload your APNs Authentication Token through the Token File option.
Step 2: Request device token
Enable the Mobile Push Notifications capability in your Xcode project.

For this example, place the code in the AppDelegate. Any globally accessible object works for non‑system logic.
Import PubNub into your project:
- Swift
- Objective-C
1import UserNotifications
2import PubNubSDK
1#import <UserNotifications/UserNotifications.h>
2#import <PubNub/PubNub.h>
When the app launches, or any time it makes sense, use UNUserNotificationCenter to request notification permissions.
Inside the completion block, request the device token for your app.
- Swift
- Objective-C
For more information regarding requesting tokens, go to Apple Docs.
1func application(
2  _ application: UIApplication,
3  didFinishLaunchingWithOptions launchOptions: [UIApplication.LaunchOptionsKey : Any]? = nil
4) -> Bool {
5

6  UNUserNotificationCenter.current().delegate = self
7

8  UNUserNotificationCenter.current().requestAuthorization(options: [.badge, .alert, .sound]) { (granted, err) in
9    DispatchQueue.main.async() {
10      UIApplication.shared.registerForRemoteNotifications()
11    }
12  }
13

14  return true
15}
For more information regarding requesting tokens, go to Apple Docs.
1- (BOOL)application:(UIApplication *)application didFinishLaunchingWithOptions:(NSDictionary *)launchOptions {
2
3 [self registerCustomDispatchQueues];
4
5 UNUserNotificationCenter *center = [UNUserNotificationCenter currentNotificationCenter];
6
7 center.delegate = self;
8
9 [center requestAuthorizationWithOptions:(UNAuthorizationOptionSound | UNAuthorizationOptionAlert | UNAuthorizationOptionBadge)
10 completionHandler:^(BOOL granted, NSError * _Nullable error) {
11 dispatch_async(dispatch_get_main_queue(), ^{
12 [[UIApplication sharedApplication] registerForRemoteNotifications];
13 });
14 }];
15
Refer to the Apple Developer documentation for more information on how to register your app and obtain an APNs Authentication Token.
Step 3: Receive & monitor device token
Calling registerForRemoteNotifications() initiates registration with Apple Push Notification service (APNs).
The system provides a token via UIApplicationDelegate by calling the following method. After initial registration, APNs may deliver new (sometimes duplicate) tokens. Update your PubNub channel registrations when the token changes.
- Swift
- Objective-C
For more information on receiving token, go to Apple Docs.
1func application(_ application: UIApplication, didRegisterForRemoteNotificationsWithDeviceToken deviceToken: Data) {
2  let oldDeviceToken = self.cachedToken
3  guard deviceToken != oldDeviceToken else { return }
4  self.cachedToken = deviceToken
5

6  updateAPNSDevicesOnChannels(
7    pushChannels.allObjects, newDevice: deviceToken, oldDevice: oldDeviceToken,
8    on: "com.mycompany.mybundleid",  environment: .production
9  ) { result in
10    switch result {
11    case .success: print("Successfully updated channels with new token")
12    case let .failure(error): print("Failed to update device token due to: \(error)")
13    }
14  }
15}
For more information on receiving token, go to Apple Docs.
1- (void)application:(UIApplication *)application didRegisterForRemoteNotificationsWithDeviceToken:(NSData *)deviceToken {
2 NSData *oldDevice = self.cachedToken;
3 if ([deviceToken isEqualToData:oldDevice]) { return; }
4 self.cachedToken = deviceToken;
5
6 [self updateAPNSDevicesOnChannels:[self.pushChannels allObjects]
7 withDevicePushToken:deviceToken
8 replacingDevicePushToken:oldDevice
9 pushType:PNAPNS2Push
10 environment:PNAPNSProduction
11 topic:@"com.mycompany.mybundleid"
12 andCompletion:^(PNAcknowledgmentStatus * _Nonnull status) {
13 if (!status.isError) {
14 NSLog(@"Successfully updated channels with new token");
15 } else {
Step 3a: Cache device token & registered channels
To ensure that an application can properly handle adding, updating, and removing registered push channels there are two pieces of information that should be cached to avoid race conditions: the Device Token and the list of registered channels. Not only will properly caching allow for easy access from anywhere inside the application, but it will also prevent race conditions when multiple registration operations are queued at the same time.
UserDefaults provides basic persistent storage; you can replace it with more advanced storage as needed. The following code makes access to cached information thread‑safe.
The system can provide a new device token at any time. Store the token whenever you receive it.
- Swift
- Objective-C
1let tokenDispatch = DispatchQueue(label: "com.pubnub.deviceToken", attributes: .concurrent)
2var cachedToken: Data? {
3  get {
4    var token: Data?
5    tokenDispatch.sync {
6      token = UserDefaults.standard.data(forKey: "com.pubnub.deviceToken")
7    }
8    return token
9  }
10  set {
11    tokenDispatch.async(flags: .barrier) {
12      UserDefaults.standard.set(newValue, forKey: "com.pubnub.deviceToken")
13    }
14  }
15}
1static dispatch_queue_t deviceTokenDispatch;
2static dispatch_queue_t pushChannelsDispatch;
3
4static dispatch_once_t registerCustomDispatchOnceToken;
5- (void) registerCustomDispatchQueues {
6 dispatch_once(®isterCustomDispatchOnceToken, ^{
7 deviceTokenDispatch = dispatch_queue_create("com.pubnub.deviceToken", DISPATCH_QUEUE_CONCURRENT);
8 pushChannelsDispatch = dispatch_queue_create("com.pubnub.pushChannels", DISPATCH_QUEUE_CONCURRENT);
9 });
10}
11
12- (nullable NSData *) cachedToken {
13 __block NSData* token;
14 dispatch_sync(tokenDispatch, ^{
15 token = [[NSUserDefaults standardUserDefaults] dataForKey: @"com.pubnub.deviceToken"];
Cache the list of registered channels the same way as the device token. Update it whenever you add or remove channels. Using a Set helps prevent duplicates.
- Swift
- Objective-C
1let pushChannelDispatch = DispatchQueue(label: "com.pubnub.pushChannels", attributes: .concurrent)
2var pushChannels: Set<String> {
3  get {
4    var channels: Set<String>?
5    pushChannelDispatch.sync {
6      channels = UserDefaults.standard.object(forKey: "com.pubnub.pushChannels") as? Set<String>
7    }
8    return channels ?? []
9  }
10  set {
11    pushChannelDispatch.async(flags: .barrier) {
12      UserDefaults.standard.set(newValue, forKey: "com.pubnub.pushChannels")
13    }
14  }
15}
1- (nullable NSSet<NSString*> *) pushChannels {
2  __block NSSet<NSString*>* channels;
3  dispatch_sync(pushChannelsDispatch, ^{
4    channels = [[NSUserDefaults standardUserDefaults] objectForKey: @"com.pubnub.pushChannels"];
5  });
6  return channels;
7}
8- (void) setPushChannels:(nullable NSSet<NSString*> *) newValue {
9  dispatch_barrier_async(pushChannelsDispatch, ^{
10    [[NSUserDefaults standardUserDefaults] setValue:newValue forKey:@"com.pubnub.pushChannels"];
11  });
12}
Step 3b: Update existing registrations
A simple helper method can be created to consolidate the remove-then-add functionality when updating your existing registered channels.
- Swift
- Objective-C
1func updateAPNSDevicesOnChannels(_ channels: [String], newDevice: Data, oldDevice: Data?,
2  on topic: String, environment: PubNub.PushEnvironment, completion: @escaping ((Result<[String], Error>) -> Void)
3) {
4  if let oldDevice = oldDevice {
5    pubnub.removeAllAPNSPushDevice(for: oldDevice, on: topic, environment: environment) { result in
6      switch result {
7      case .success: print("Successfully removed device token")
8      case let .failure(error): print("Failed to remove device token due to: \(error)")
9      }
10    }
11  }
12  pubnub.addAPNSDevicesOnChannels(
13    channels, device: newDevice, on: topic, environment: environment, completion: completion
14  )
15}
1- (void) updateAPNSDevicesOnChannels:(NSArray<NSString *> *)channels
2 withDevicePushToken:(nonnull NSData *)newDevice
3 replacingDevicePushToken:(nullable NSData *)oldDevice
4 pushType:(PNPushType)pushType
5 environment:(PNAPNSEnvironment)environment
6 topic:(NSString *)topic
7 andCompletion:(PNPushNotificationsStateModificationCompletionBlock)completion {
8 if (oldDevice == nil) {
9 [self.client removeAllPushNotificationsFromDeviceWithPushToken:oldDevice
10 pushType:PNAPNS2Push
11 environment:PNAPNSProduction
12 topic:@"com.mycompany.mybundleid"
13 andCompletion:^(PNAcknowledgmentStatus *status) {
14 if (!status.isError) {
15 NSLog(@"Successfully removed device token");
Step 4: Manage device registrations
Once a Device Token is obtained, it can be registered with a list of channels to allow Mobile Push Notifications to be sent to the device. Channels can be dynamically added and removed based on the use cases of the application, and the current registrations for a Device Token can also be viewed.
Step 4a: Register new channels
When you add channels, read the device token and registered channels from the cache. After registration, add the channels to the cached list.
- Swift
- Objective-C
1if let deviceToken = (UIApplication.shared.delegate as? AppDelegate)?.cachedToken {
2  pubnub.addAPNSDevicesOnChannels(
3    ["ch1", "ch2"],
4    device: deviceToken,
5    on: "com.mycompany.mybundleid",
6    environment: .production
7  ) { result in
8    switch result {
9    case let .success(channelsAdded):
10      channelsAdded.forEach { (UIApplication.shared.delegate as? AppDelegate)?.pushChannels.update(with: $0) }
11    case let .failure(error): print("Failed to add Push due to: \(error.localizedDescription)")
12    }
13  }
14}
1NSData *deviceToken = [(AppDelegate *)[[UIApplication sharedApplication] delegate] cachedToken];
2if (deviceToken == nil) { return; }
3

4[self.client addPushNotificationsOnChannels:@[@"ch1",@"ch2"]
5                        withDevicePushToken:deviceToken
6                                   pushType:PNAPNS2Push
7                                environment:PNAPNSProduction
8                                      topic:@"com.mycompany.mybundleid"
9                              andCompletion:^(PNAcknowledgmentStatus *status) {
10  if (!status.isError) {
11    NSSet* cachedChannels = [(AppDelegate *)[[UIApplication sharedApplication] delegate] pushChannels];
12    [(AppDelegate *)[[UIApplication sharedApplication] delegate] setPushChannels:[cachedChannels setByAddingObjectsFromArray:@[@"ch1",@"ch2"]]];
13  } else {  NSLog(@"Failed to add Push due to: %@", status); }
14}];
Step 4b: List registered channels
After you add registrations, confirm APNs registrations by listing all channels for the device. The server list is the source of truth. Update the cached list to match the server.
- Swift
- Objective-C
1guard let deviceToken = (UIApplication.shared.delegate as? AppDelegate)?.cachedToken else { return }
2

3pubnub.listAPNSPushChannelRegistrations(
4  for: deviceToken,
5  on: "com.mycompany.mybundleid",
6  environment: .production
7) { result in
8  switch result {
9  case let .success(channelsRegistered):
10    (UIApplication.shared.delegate as? AppDelegate)?.pushChannels = Set(channelsRegistered)
11  case let .failure(error): print("Failed to add Push due to: \(error.localizedDescription)")
12  }
13}
1NSData *deviceToken = [(AppDelegate *)[[UIApplication sharedApplication] delegate] cachedToken];
2if (deviceToken == nil) { return; }
3

4[self.client pushNotificationEnabledChannelsForDeviceWithPushToken:deviceToken
5                         pushType:PNAPNS2Push
6                      environment:PNAPNSDevelopment
7                            topic:@"com.mycompany.mybundleid"
8                    andCompletion:^(PNAPNSEnabledChannelsResult *result, PNErrorStatus *status) {
9  if (!status.isError) {
10    NSSet* registeredChannels = [NSSet setWithArray:result.data.channels];
11    [(AppDelegate *)[[UIApplication sharedApplication] delegate] setPushChannels:registeredChannels];
12  } else {
13    NSLog(@"Failed to add Push due to: %@", status);
14  }
15}];
Step 4c: Remove existing registrations
When you remove channels, read the device token and registered channels from the cache. After removal, also remove those channels from the cache.
- Swift
- Objective-C
1if let deviceToken = (UIApplication.shared.delegate as? AppDelegate)?.cachedToken {
2  pubnub.removeAPNSDevicesOnChannels(
3    ["ch1", "ch2"],
4    device: deviceToken,
5    on: "com.mycompany.mybundleid",
6    environment: .production
7  ) { result in
8    switch result {
9    case let .success(channelsRemoved):
10      channelsRemoved.forEach { (UIApplication.shared.delegate as? AppDelegate)?.pushChannels.remove($0) }
11    case let .failure(error): print("Failed to add Push due to: \(error.localizedDescription)")
12    }
13  }
14}
1NSData *deviceToken = [(AppDelegate *)[[UIApplication sharedApplication] delegate] cachedToken];
2if (deviceToken == nil) { return; }
3

4[self.client removePushNotificationsFromChannels:@[@"ch1",@"ch2"]
5                        withDevicePushToken:deviceToken
6                                   pushType:PNAPNS2Push
7                                environment:PNAPNSProduction
8                                      topic:@"com.mycompany.mybundleid"
9                              andCompletion:^(PNAcknowledgmentStatus *status) {
10  if (!status.isError) {
11    NSMutableSet* cachedChannels = [[(AppDelegate *)[[UIApplication sharedApplication] delegate] pushChannels] mutableCopy];
12    for (NSString *channel in @[@"ch1",@"ch2"]) { [cachedChannels removeObject:channel]; }
13    [(AppDelegate *)[[UIApplication sharedApplication] delegate] setPushChannels:cachedChannels];
14  } else { NSLog(@"Failed to remove devices due to: %@", status); }
15}];
Step 5: Construct the push payload
On iOS, APNs is the push provider PubNub uses to relay Mobile Push Notifications to your app. To send a push, include the APNs payload when you publish. PubNub parses the message and forwards it to Apple.
The pn_apns payload is required for all APNs notifications. It tells PubNub that the payload should be forwarded to Apple.
pn_apns consists of:
1{
2  "pn_apns": {
3    "aps": {
4        // necessary items
5    },
6    "pn_push": {
7       // necessary items
8    },
9  "pn_debug": true,
10  "pn_ttl": 60
11  }
12}
aps
The aps payload is entirely managed by Apple. It's a dictionary that contains the keys used by Apple to deliver the notification to the user's device. The keys specify the type of interactions that you want the system to use when alerting the user. Depending on your use case, providing content for this payload may be required. For example, if you decide to instruct the system to handle the notification in the background, you must add the content-available key, set it to 1, and not include any visual or audio keys. Refer to the Payload Key Reference section in the Apple Developer documentation for this and other examples.
pn_push
The pn_push object contains the configuration of the push message. PubNub uses this payload to set such values as request headers in APNs notifications sent to Apple. This payload is required for all APNs notifications.
| Key | Type | Required | Default | Description |
|---|---|---|---|---|
push_type | String | No | alert | A type of notification sent to Apple. Available values: alert, background, voip, complication, fileprovider, or mdm. The value you set for this key should always align with the payload values you set inside your aps payload. Refer to the apns_push_type header field in the Apple Developer documentation for more information. |
auth_method | String | No | token | Available values: token, cert, or certificate |
targets:environment | String | No | development | An Apple environment for the certificate associated with the PubNub key-set in use. Available values: development or production. |
targets:topic | String | Yes | A Bundle ID of your target application | |
targets:excluded_devices | [String] | No | A list of device tokens that should be excluded from receiving the notification. Typically, you can add your own device so you don't get a notification you publish. | |
version | String | Yes | Set to v2. | |
pn_collapse_id | String | No | An identifier to join multiple notifications into a single notification. |
Additional parameters
| Key | Type | Required | Description |
|---|---|---|---|
pn_debug | boolean | No | A flag that enables publishing push debugging info to the pndebug channel. For more information, refer to Mobile Push Troubleshooting. |
pn_ttl | int | No | A PubNub push property. It represents the number of seconds the notification is valid for from the time the notification is published to PubNub until the push server processes the publish. This flag only determines if PubNub forwards the notification to APNS, there is no consideration of a user device state. The default value for this parameter is 3600 seconds (1 hour). You don't have to set it if you provide expirationDate (used in an APNS POST request as the apns-expiration header value) in the push notification configuration. |
In the code sample below, the message includes a pn_apns payload to trigger APNs notifications on iOS devices:
- JSON
- Swift
- Objective-C
For more information on generating notification, go to Apple Docs.
1{
2 "text": "John invited you to chat",
3 "pn_apns": {
4 "aps": {
5 "alert": {
6 "title": "Chat Invitation",
7 "body": "John invited you to chat"
8 }
9 },
10 "pn_push":[
11 {
12 "push_type": "alert",
13 "auth_method": "token",
14 "targets":[
15 {
1let message = ["text": "John invited you to chat"]
2

3let pushPayload = PubNubPushMessage(
4  apns: PubNubAPNSPayload(
5    aps: APSPayload(alert: .object(.init(title: "Chat Invitation", body: "John invited you to chat"))),
6    pubnub: [.init(targets: [.init(topic: "com.mycompany.mybundleid", environment: .production)])],
7  ),
8  additional: message
9)
1NSDictionary *message = @{
2 @"text": @"John invited you to chat"
3};
4
5PNNotificationsPayload *pushData = [PNNotificationsPayload
6 payloadsWithNotificationTitle:@"Chat Invitation"
7 body:@"John invited you to chat"];
8
9// create the APNs target with topic and environment
10PNAPNSNotificationTarget *target = [PNAPNSNotificationTarget
11 targetForTopic:@"com.mycompany.mybundleid"
12 inEnvironment:PNAPNSProduction
13 withExcludedDevices:nil];
14
15// create the APNs config object and add the target
Metadata in message payloads
You can provide custom information to the app when it receives the notification by adding metadata to the message payload. For Apple Push Notification Service (APNs), include metadata as key-value pairs outside the aps dictionary in custom fields.
{
  "aps": {
    "alert": {
      "title": "New Message",
      "body": "You have received a new message."
    }
  },
  "customData": {
    "chatId": "78910",
    "notificationType": "messageReceived"
  }
}
Prevent self-notifications
Exclude the sender’s device token so they don’t receive a push for their own message. Add the token(s) to targets.excluded_devices in the pn_push entry:
1{
2 "pn_apns": {
3 "aps": {
4 "alert": {
5 "title": "Chat Invitation",
6 "body": "John invited you to chat"
7 }
8 },
9 "pn_push": [
10 {
11 "push_type": "alert",
12 "auth_method": "token",
13 "targets": [
14 {
15 "environment": "production",
Step 6: Publish the push notification
Once the push payload is ready, use the publish method to publish the message on a channel. When PubNub finds the pn_apns and/or pn_fcm payloads, it will retrieve all device tokens that are associated with the push payload on the target channel and forward a push notification request to the appropriate push service for those associated devices.
- Swift
- Objective-C
- JavaScript
1pubnub.publish(channel: "ch1", message: pushPayload) { result in
2  switch result {
3  case let .success(timetoken):
4    print("Successfully published message at: \(timetoken)")
5  case let .failure(error):
6    print("Failed to publish due to: \(error)")
7  }
8}
1[self.pubnub publish:message toChannel:@"ch1" mobilePushPayload:pushPayload
2      withCompletion:^(PNPublishStatus *status) {
3  if (!status.isError) {
4    NSLog(@"Successfully published message");
5  } else {
6    NSLog(@"Failed to publish due to: %@", status);
7  }
8}];
1//publish on channel
2pubnub.publish(
3  {
4    channel: "ch1"
5    message: pushPayload
6  },
7  function (status, response) {
8    console.log(status);
9    console.log(response);
10  }
11);
For more information about push troubleshooting, refer to Mobile Push Troubleshooting.