About Decisions
Once you create a Business Object, you can evaluate data, monitor trends, and act on results.
Illuminate includes the Decisions module. Decisions can be based on a query, a metric or the events from a Business Object. You define what to act on by choosing metrics, queries or events, configuring actions, and adding rules that control when actions run.
When creating a Decision, you:
- Choose a Query or a Business Object along with a linked metric or event if a Business Object is selected. For asset tracking, use Hours since order (Number) and Trailer ID (String).
- Define actions. For example, notify a transportation manager when a delivery is delayed.
- Set rules with conditions and actions. For example, trigger a notification only when goods are 2 hours late or more.
Decisions help product managers test engagement and monetization strategies before deployment. With Illuminate, you use real data instead of assumptions and act through automated conditions and actions.
Decision structure
A Decision consists of three elements: actions, conditions, and rules.
Actions
Actions define what happens when conditions are met.
In each action, add variables you control during setup. Create new variables or reuse ones from your conditions. For event-based decisions, you can also use all of the data fields directly from your business object.
To add a variable, type ${. Select a suggestion, or type ${Variable name} and choose Create new variable: Variable name.
Available action types:
| Action Type | Purpose |
|---|---|
| Send Message | Sends a message to a user or channel using the PubNub Publish API. In Body, enter the quoted message. Optionally add variables ( ${variable}); you can also use variables in Channel and Meta. Example: "Welcome to ${levelName}, enter discount code ${discountCode} within the first 5 minutes to buy ${purchaseItem}." |
| Webhook | Sends a request to a URL for a third-party service. In Payload, enter the quoted message. Optionally add variables ( ${variable}); you can also use variables in Webhook URL and in Headers (Key, Value). Example: "${message}. Use ${discountCode}" |
| Update User | Sets predefined or custom user metadata as key/value pairs. You can use variables in all fields. Used with PubNub App Context user. |
| Update Channel | Sets predefined or custom channel metadata as key/value pairs. You can use variables in all fields. Used with PubNub App Context channel. |
| Update Membership | Sets predefined or custom membership metadata as key/value pairs. You can use variables in all fields. Used with PubNub App Context membership. |
Facilitating collaboration
Use each action type’s Documentation / Notes section to collaborate. For example, add an action as an analyst and ask a developer to validate a webhook URL or payload.
Action execution limit
Control how often an action runs when conditions are met.
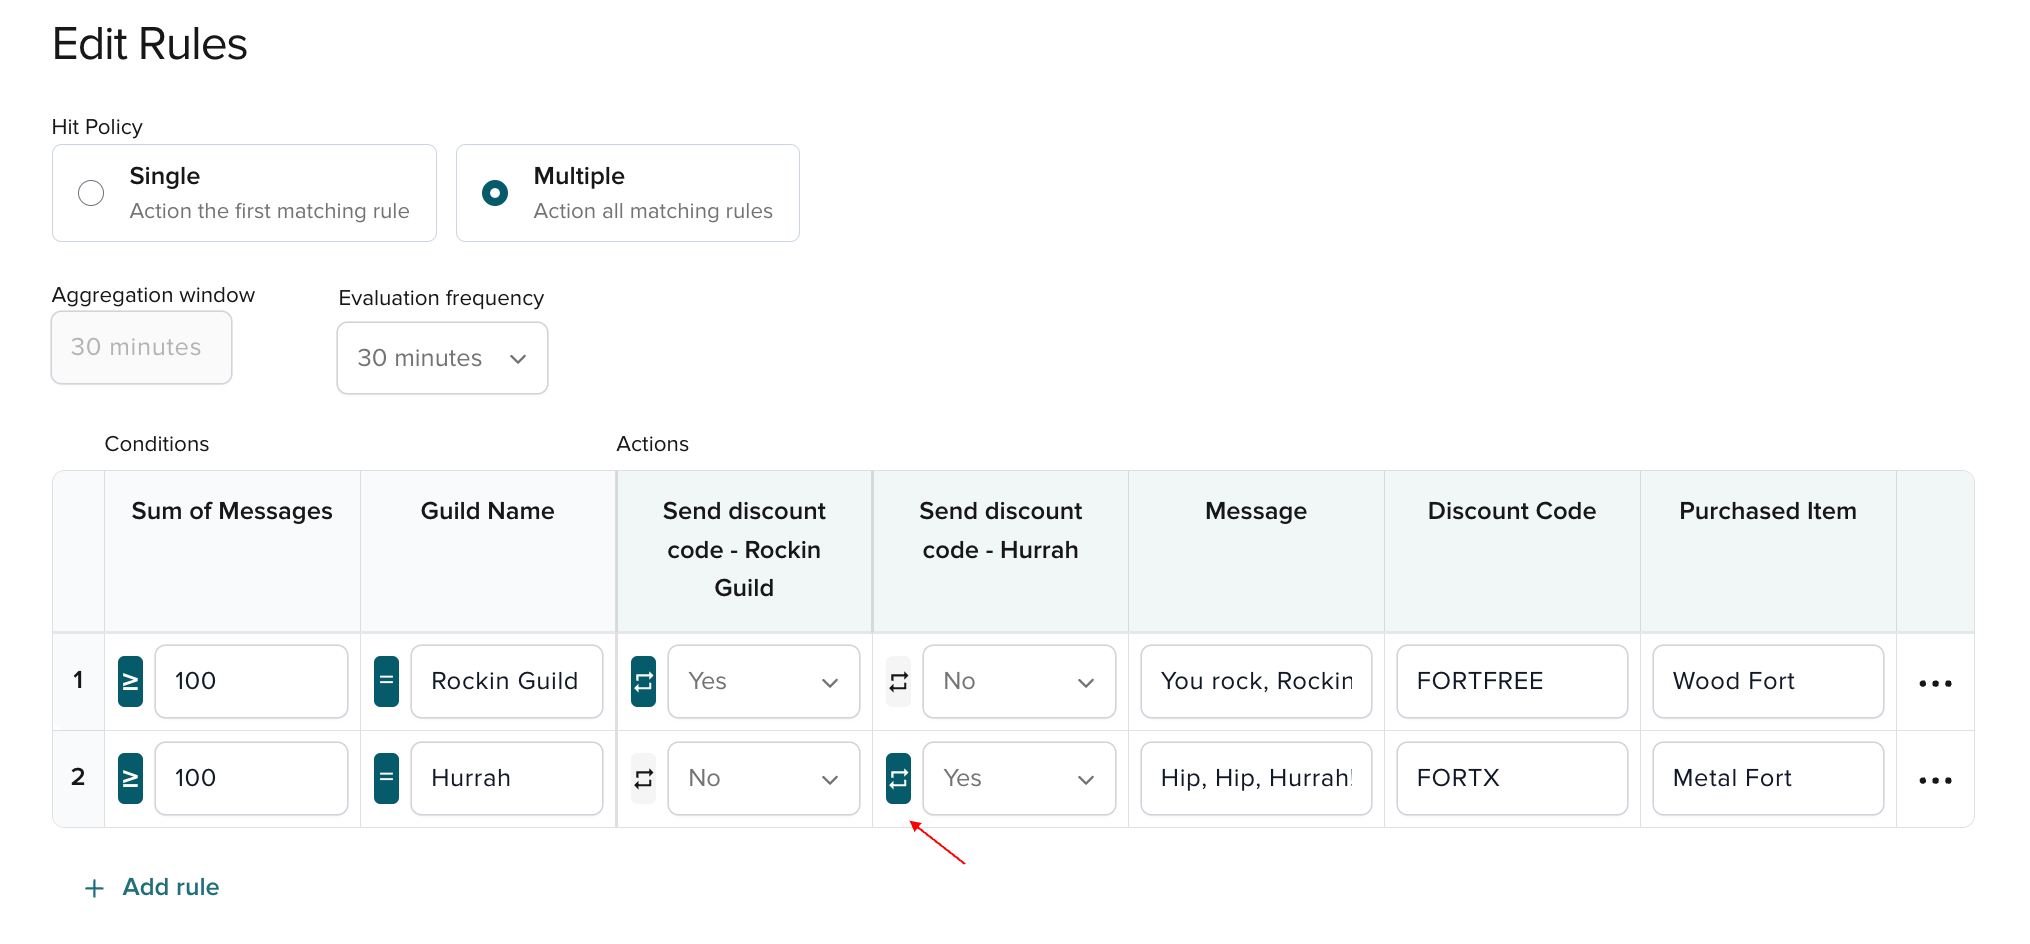
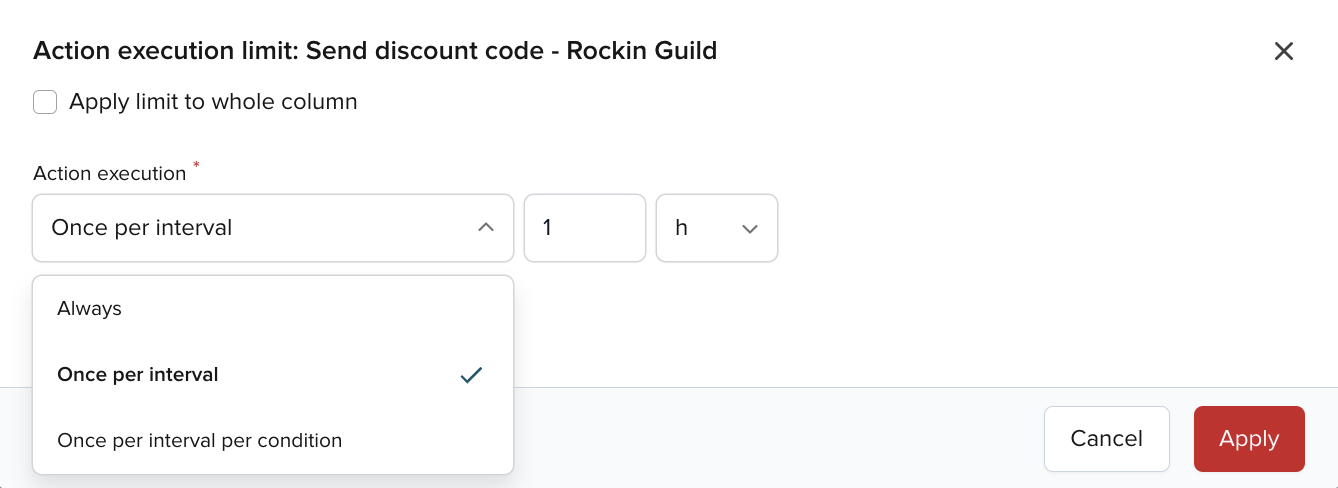
For each action in your decision rules, you can select one of the following options:
- Always (default) – Execute the action whenever the conditions are met.
- Once per interval – Execute the action once within a specified time interval whenever the conditions are met.
- Once per interval per condition – Execute the action once for each unique condition value within a specified time interval whenever the conditions are met.
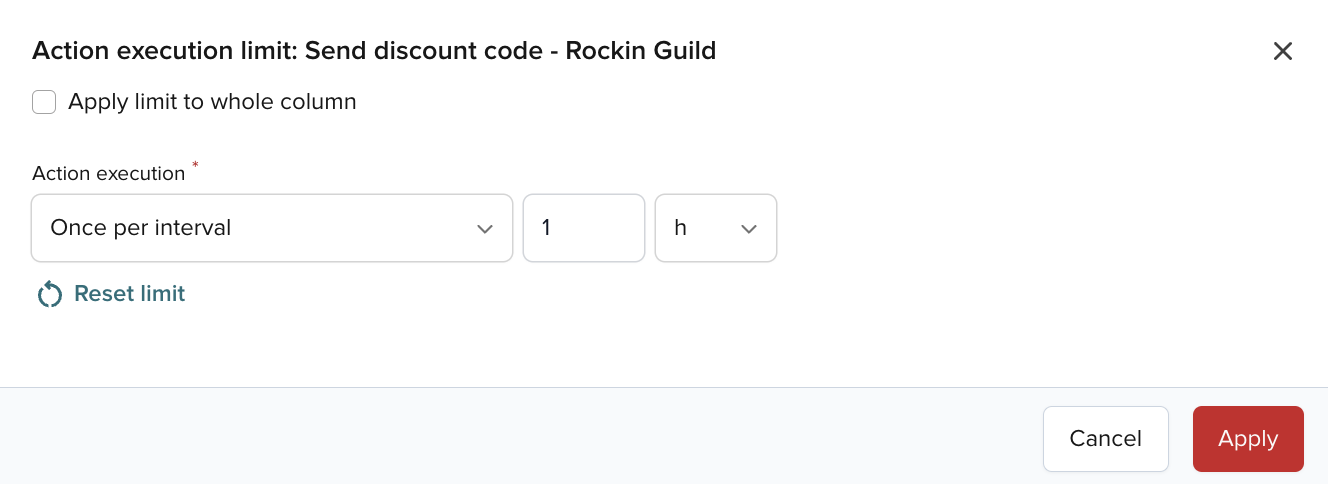
Reset action execution limit
The limit resets when you deactivate a Decision. After a reset, past executions are not considered. You can also click Reset limit while a Decision is active.
Action history
Track action history from the Ellipsis (...) menu in:
- Each Decision chart on a dashboard
- Each Decision on the Decisions home page
- The Decision table in view mode
The Action history page shows the 50 most recent actions for a Decision. Use it to verify actions run.
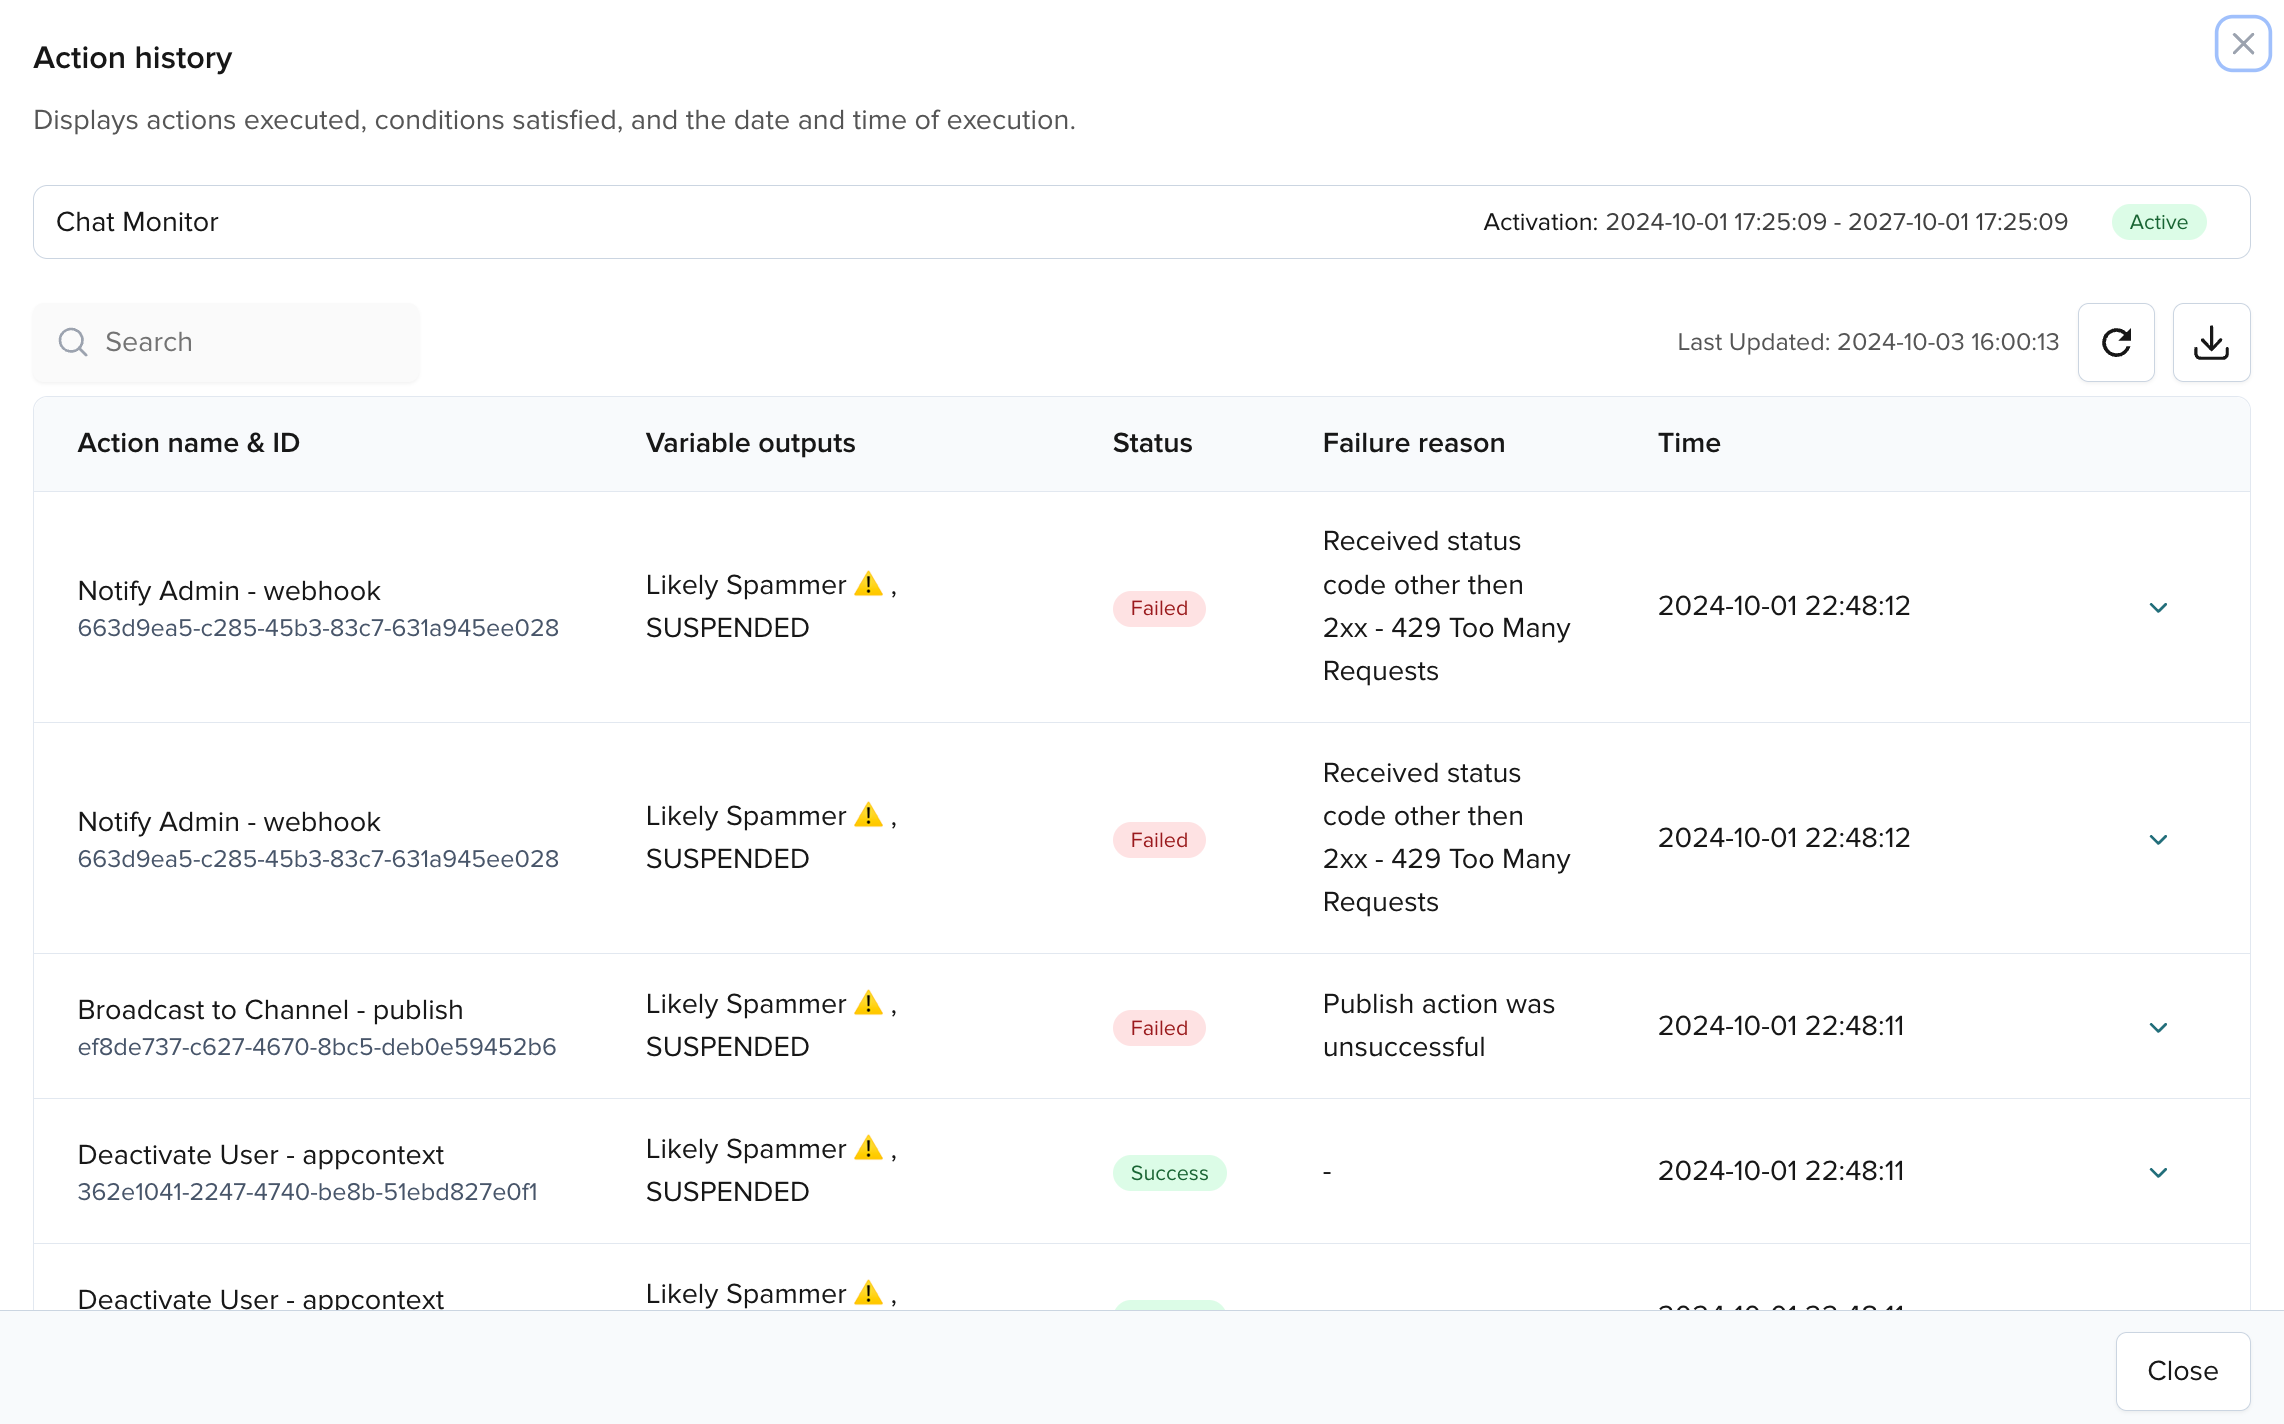
Filter by any table value, such as status, trigger value, or failure reason. Expand a row to see what conditions triggered an action. The condition, threshold, and actual trigger value appear.
For example, Max of Minutes waiting ≥ 1 (6) means the condition is Max of Minutes waiting, the threshold is ≥ 1, and the value that triggered the action is 6.

An action can fail for one of the following reasons:
- Action configuration is invalid
- HTTP timeout error during dispatch
- Publish action was unsuccessful
- App Context action was unsuccessful
- Webhook action was unsuccessful
- Received status code is other than 2xx
Conditions
Conditions are criteria that must be met to trigger an action. For example, notify a transportation manager when goods arrive two hours late. Use a rule with the Send Message action type and a delay condition. Choose how often to evaluate it.
Conditions can be based on data fields in a metric, query, or Business Object:
-
Metric: To use the data fields in a metric as your conditions, select the Business Object, then
aggregationand the desiredmetric.
-
Events: To use the data fields in a Business Object as events happen, select Business Object, then
eventsand select the desired data fields available.
-
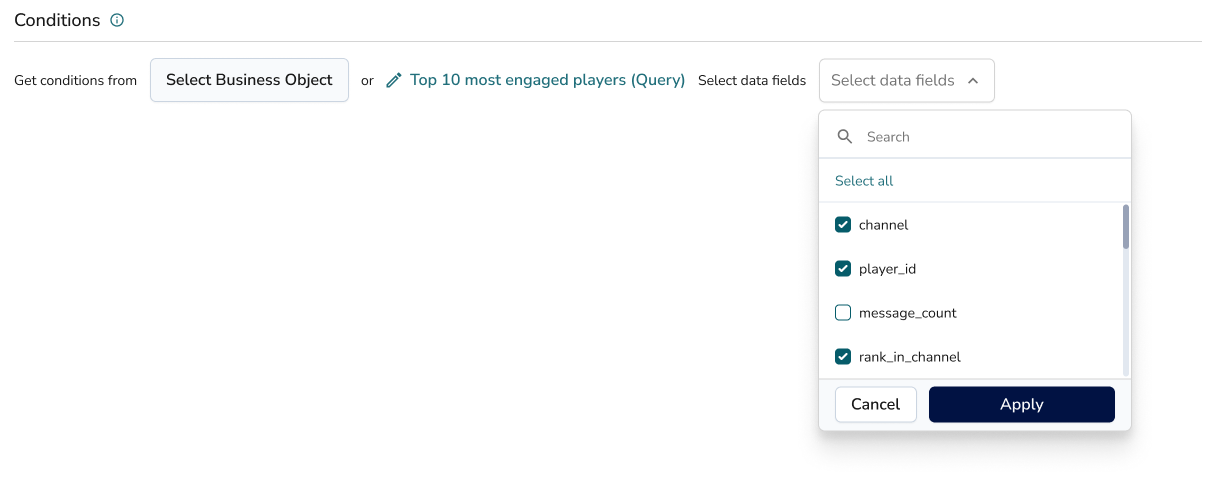
Query: To use the data fields in a query, click Select Query and select the desired data fields available with the query.
Rules
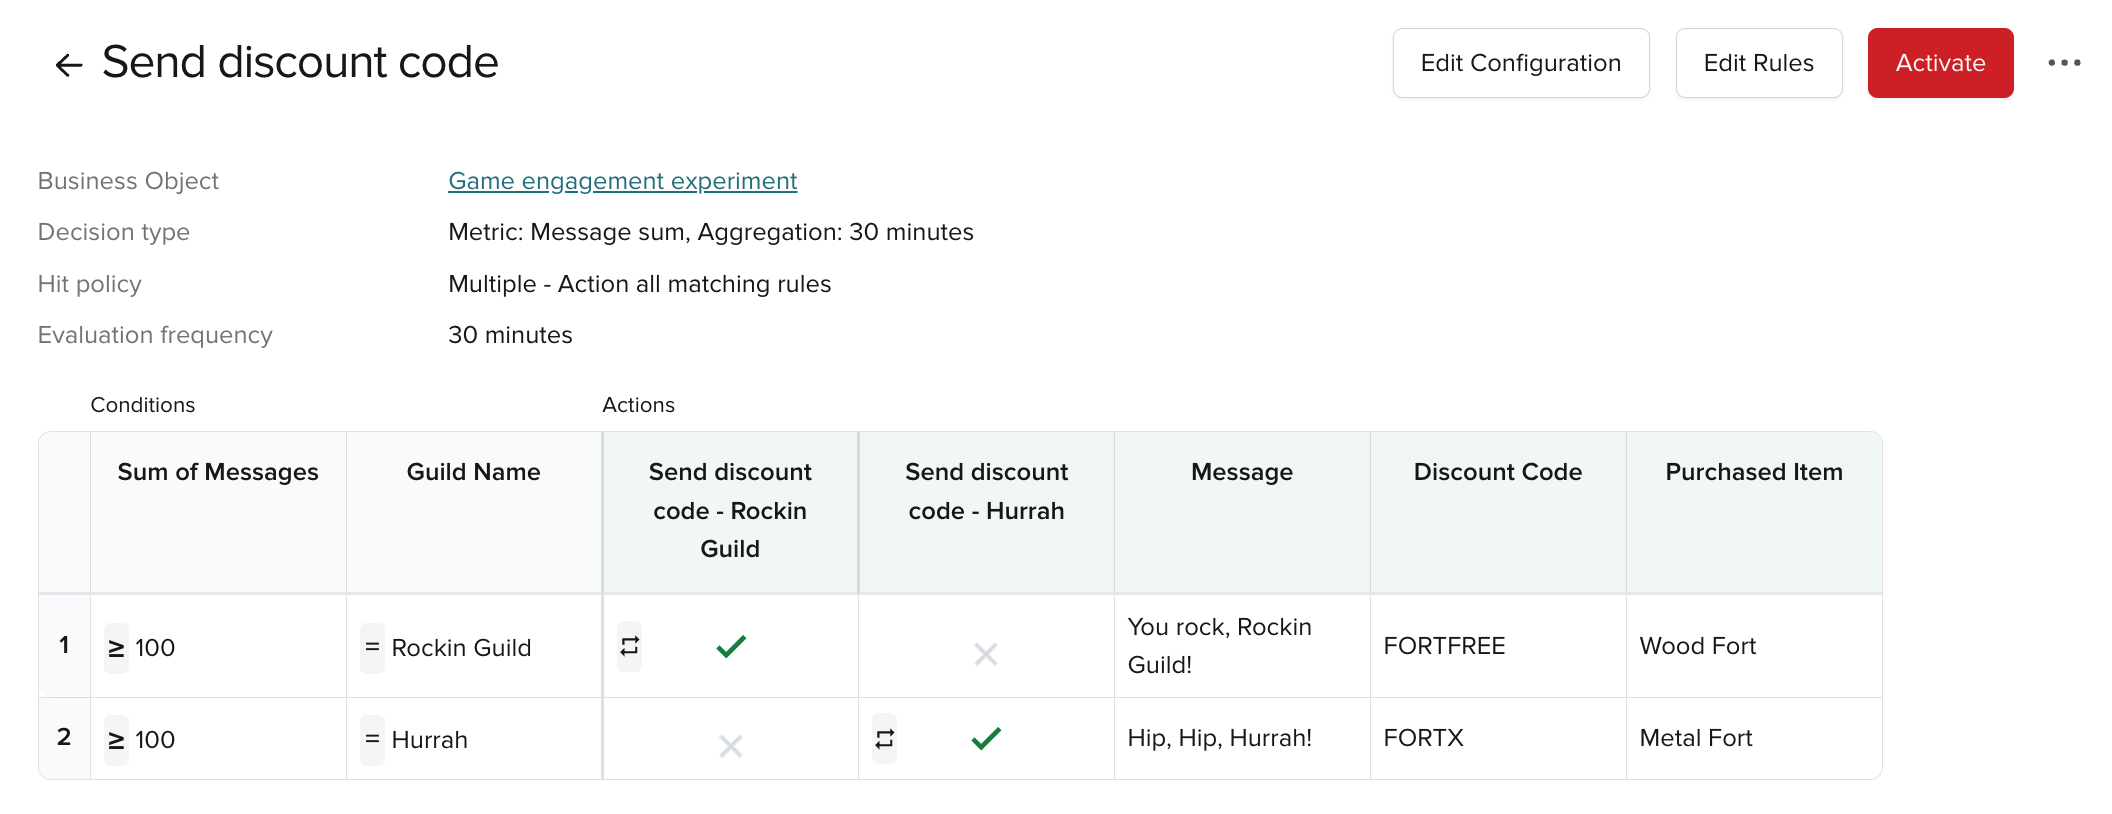
Rules evaluate conditions and run actions when conditions are met. Each rule is a row in the Decision table. You can save a Decision without a rule. When you save, you can create a rule now or later by selecting the Decision and clicking Edit Rules. You need at least one rule to activate a Decision.
Each Decision has configuration that controls which rules run and how often:
| Action Type | Purpose |
|---|---|
| Hit policy | Triggers the first matching rule (Single) or all matching rules (Multiple). |
| Aggregation window | Auto-populated from the metric’s Period for Function. Shows how often the metric runs the function for data fields. |
| Evaluation frequency | Lookback window that sets how often Illuminate runs rules in this Decision. |
| Conditions | Requirements you define in the table. Specify thresholds that trigger actions. Up to 40 conditions per decision. |
Decision rules order
Each row in the Decision table is a separate Decision rule with conditions and actions. The order of rules determines execution order. To change it, select Edit Rules and use Move up or Move down under the Ellipsis (...) menu next to each rule.
Additional details
To work effectively with Decisions, keep the following in mind:
- When a Decision is based on a metric or a query, conditions come from data fields in the selected metric or query.
- If the metric aggregates data (for example,
CountorSum), the condition reflects that. - For a query, you can select the data fields you want to use in your condition.
- If the metric aggregates data (for example,
- To create or save a Decision, select a query or a metric or events from a Business Object. You can add actions and rules, then activate the Decision.
- To activate a Decision:
- Have at least one action and one rule.
- Ensure the related Business Object is active.
- After activation:
- Rules run and actions execute.
- You can edit the Decision (Edit Configuration) and rules (Edit Rules).
- You can add rules and actions.
- The metric used in this Decision stays fixed.
- You can add the Decision to a Dashboard.
- To stop evaluation and execution, deactivate the Decision.
Home page
The Decisions home page lists your Decisions and shows:
- Type: indicates if the Decision is based on
events, ametric, or aquery - Business Object: the data source for the Decision
- Actions: shows the number of configured actions compared to the total actions added
- Status: indicates if a Decision is active or inactive
- Updated: the date the Decision was last updated and the user who made the change
- Created: the date the Decision was created and the user who created it
Use the Ellipsis (...) menu to edit configuration or rules, view action history, activate or deactivate, or delete a Decision.

Settings
On a Decision page, you can edit configuration and rules, activate or deactivate, or delete the Decision.
