Sample chat app
This sample 1:1 chat app demonstrates the Chat SDK's core features: initialization, user creation, channel creation, and messaging.
Run the app to see how the SDK works, then review the code to understand each step.
Tech stack
Prerequisites
| Requirement | Version |
|---|---|
| yarn | >=1.22.19 |
| Node.js | >=18.10.0 |
| Code editor | Any (for example, VS Code) |
| PubNub keys | Publish and Subscribe keys from Admin Portal |
Get your keys
Sign in or create an account on the Admin Portal. The Demo Keyset in My First App has App Context enabled and works for this guide. See this video for help creating keys.
Run the chat app
Check how to set up a 1:1 chat app by running a ready sample React app or adding the Chat SDK to your own app.
- Run a sample React app
- Add Chat SDK to your app
-
Clone the
js-chatrepo. -
Open the terminal, navigate to the
/examples/js-chat/getting-startedroot folder. -
Add required configuration to the
.envfile by specifying the values for your publish and subscribe keys from your app's keyset on the Admin Portal.1VITE_PUBNUB_PUB_KEY=
2// for example: VITE_PUBNUB_PUB_KEY=pub-c-jbgh67-a796-c36-z81-17dvbf4
3VITE_PUBNUB_SUB_KEY=
4// for example: VITE_PUBNUB_SUB_KEY=sub-c-jb46h67-z796-g36-z91-19vdfb1 -
Install the dependencies.
1yarn -
Once the dependencies are installed, build and run the app.
1yarn build
2yarn dev -
When the app compiles successfully, you will see the link to the localhost in the terminal.
-
You can open the app in two separate browser windows - if you get randomly assigned two different users, simulate a real-life chat conversation.
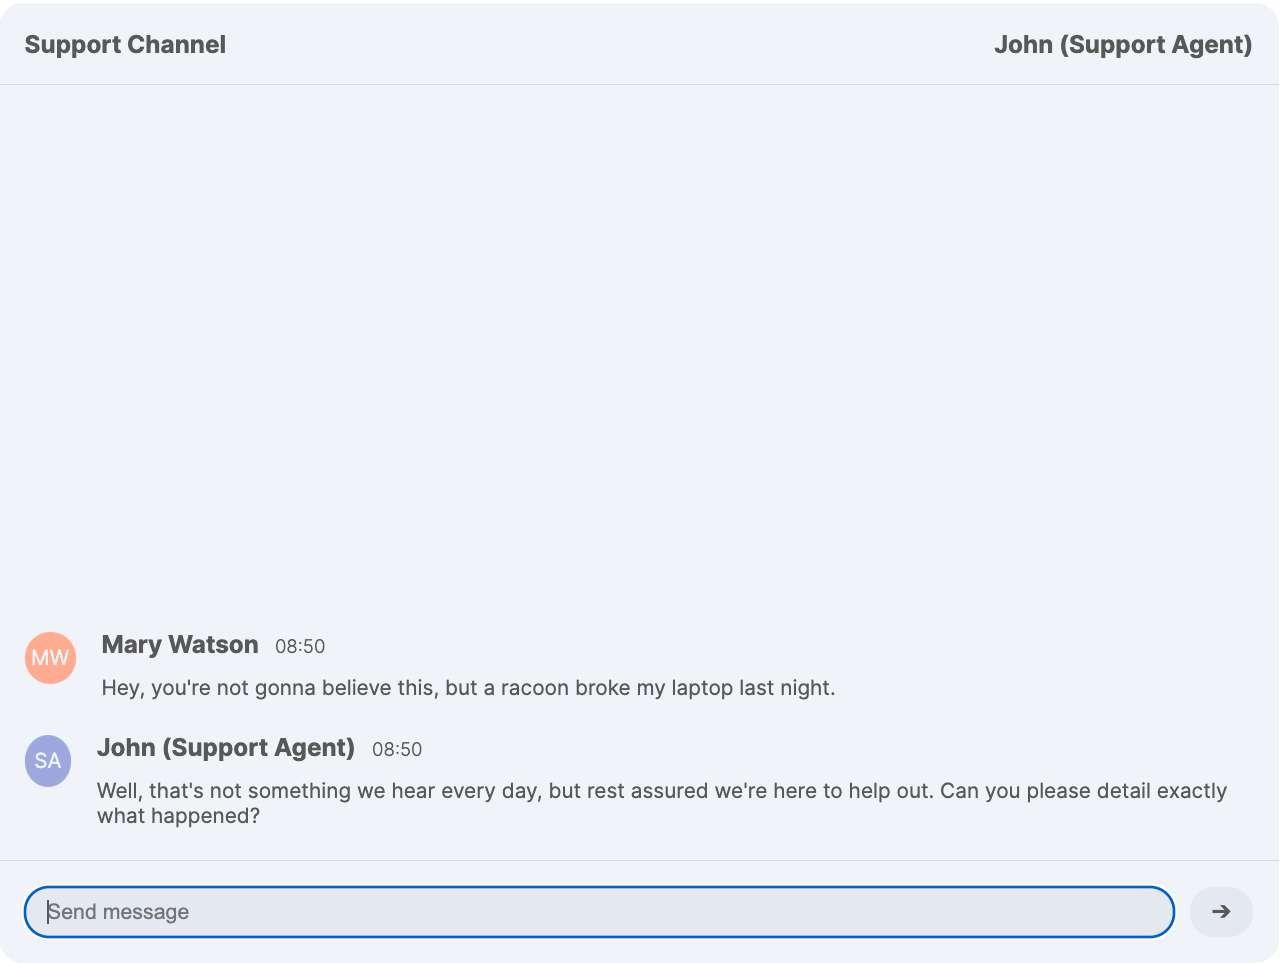
A sample conversation between a support agent and a customer may look as follows:
-
Open the terminal in the location of your app files and add the Chat SDK package.
1yarn add @pubnub/chat -
Open your application source files in your favorite code editor. Copy the snippet below into your app source file (for example,
src/App.tsx). To set the placeholder values forsubscribeKeyandpublishKeywith your publish and subscribe keys from the keyset on the Admin Portal, copy the.env.examplefile and rename it to.env. Then use the copy to set values forVITE_PUBNUB_SUB_KEYandVITE_PUBNUB_PUB_KEY.
Source code
-
Add the app's CSS styles, for example, in
src/App.css.CSS styles
-
Run the app in the terminal.
1yarn dev -
When the app compiles successfully, you will see the link to the localhost in the terminal.
-
You can open the app in two separate browser windows - if you get randomly assigned two different users, simulate a real-life chat conversation.
A sample conversation between a support agent and a customer may look as follows:
Code walkthrough
This section explains the Chat SDK methods in src/App.tsx.
Initialize the SDK
Create a Chat instance with your keys from the Admin Portal:
1const chat = await Chat.init({
2  subscribeKey: import.meta.env.VITE_PUBNUB_SUB_KEY,
3  publishKey: import.meta.env.VITE_PUBNUB_PUB_KEY,
4  userId: randomizedUsers[0].id,
5})
For this app, you must set these envs for VITE_PUBNUB_SUB_KEY and VITE_PUBNUB_PUB_KEY in the separate .env file (copy of the .env.example file).
Set up users
This sample app uses two hardcoded sample users - a support agent and a customer.
1const userData = [
2  {
3    id: "support-agent",
4    data: { name: "John (Support Agent)", custom: { initials: "SA", avatar: "#9fa7df" } },
5  },
6  {
7    id: "supported-user",
8    data: { name: "Mary Watson", custom: { initials: "MW", avatar: "#ffab91" } },
9  },
10]
When you run the app, you get randomly assigned an ID of one of these two users (support-agent or supported-user). Based on the provided details, the user metadata gets created (createUser()), updated (update()), and retrieved (getUser()) from PubNub's App Context.
1const randomizedUsers = Math.random() < 0.5 ? userData : userData.reverse()
2...
3const currentUser = await chat.currentUser.update(randomizedUsers[0].data)
4const interlocutor =
5  (await chat.getUser(randomizedUsers[1].id)) ||
6  (await chat.createUser(randomizedUsers[1].id, randomizedUsers[1].data))
The advantage of having that random logic here is that if you open the app in another browser window and get assigned another user, you can simulate a real-life discussion.
For production apps, you would assign a fixed User ID that becomes the app's current user. User ID identifies your client when communicating with PubNub and is used by PubNub to calculate pricing.
Create channel
Now, you need a channel where these two users can talk and receive messages from each other.
The Chat SDK supports the following channel types:
To simulate a conversation between two users, you'll need a direct channel type.
The ID of the communication channel is hardcoded to Support Channel. When you run the app for the first time, you create the direct (1:1) channel (createDirectConversation()) on the PubNub server.
1const { channel } = await chat.createDirectConversation({
2        user: interlocutor,
3        channelData: { name: "Support Channel" },
4      })
To receive messages from another user, you must be subscribed to the channel, or "connected," as we call it. This guide uses the Chat SDK onMessageReceived() method to listen for messages, called by the Getting Started app within useEffect() to update its messages state.
1useEffect(() => {
2  if (!channel) return
3  return channel.onMessageReceived((message) => setMessages((messages) => [...messages, message]))
4}, [channel])
Send messages
The app handles:
- Incoming messages through the
setMessages()function that uses theonMessageReceived()method to receive messages from another user and then add these messages to the collective message list. - Outgoing messages through the
handleSend()function that uses thesendText()method to publish messages on the channel.
1  useEffect(() => {
2    if (!channel) return
3    return channel.onMessageReceived((message) => setMessages((messages) => [...messages, message]))
4  }, [channel])
5

6...
7

8async function handleSend(event: React.SyntheticEvent) {
9  event.preventDefault()
10  if (!text || !channel) return
11  await channel.sendText(text)
12  setText("")
13}
The Getting Started app that this guide is based on only supports sending text messages. The Chat SDK, however, also supports files and rich message features like links, @user mentions, or channel references that are similar in logic to @user mentions.
Show time indicator
Another addition to the basic setup is the time indicator in the app. The Chat SDK comes with utility methods handling Unix timestamp to PubNub message timetoken conversion (and vice versa). Our sample chat app converts a message timetoken to a "short" time style, like 08:25.
1<time>
2    {TimetokenUtils.timetokenToDate(message.timetoken).toLocaleTimeString([], {
3    timeStyle: "short",
4    })}
5</time>
Add look and feel
The UI for the app is completely customized, and it's up to you to decide what you want your chat to look like. Check the CSS styles used to beautify this sample chat app if interested.
CSS styles
Next steps
You can extend this basic chat app by adding other features, like message reactions, typing indicator, mentions, and many more.
You can also try running another sample and see what a group chat in React Native can look like.
Head to the Features section to explore everything the Chat SDK offers.