Presence Management
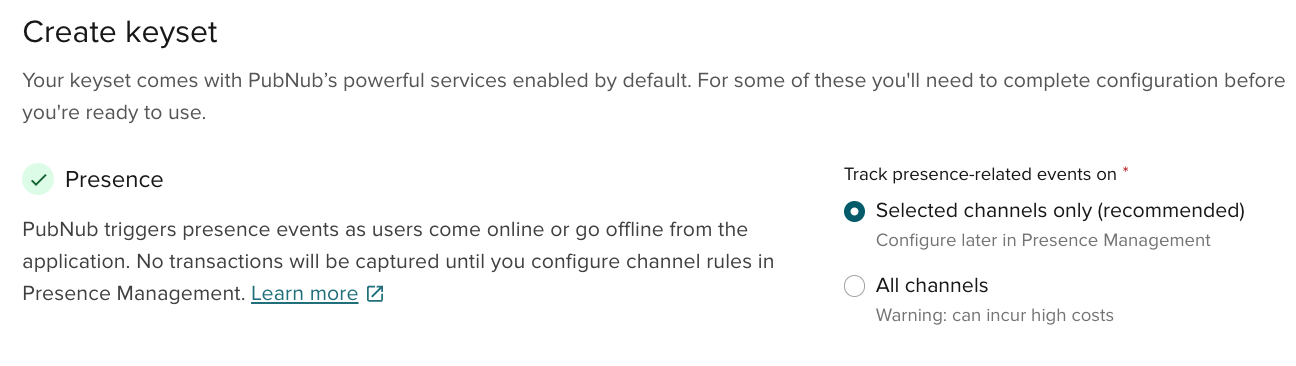
When you create a new keyset in the Admin Portal, Presence is enabled by default.
You must decide, however, how you want to configure Presence:
-
Selected channels only (recommended) — turns off all Presence events.
You won't monitor members' subscription status or track Presence events, such as joins, leaves, or presence state changes, until you add rules in Presence Management.
-
All channels — tracks all Presence events. Consider costs.
Subscription with Presence
To receive Presence events, you subscribe with Presence and have Presence enabled on your keyset. Make sure you configure Presence to track Presence-related events for all or selected channels (through Presence Management rules).
If you track Presence only on selected channels, you can use Presence Management to create rules defining which events to track on which channel patterns.
Existing Presence rules
If you already have Presence rules created by PubNub support, they remain valid and will be visible on the Admin Portal.
To start managing Presence rules, follow these steps:
-
Log in to the Admin Portal.
-
In the left sidebar, go to BizOps Workspace.
-
Select Presence Management.
-
Choose an app and keyset.
-
If Presence isn't enabled on your keyset, enable it when prompted.
Choose the default setup: track all Presence events on all channels (
*pattern) or disable all by default.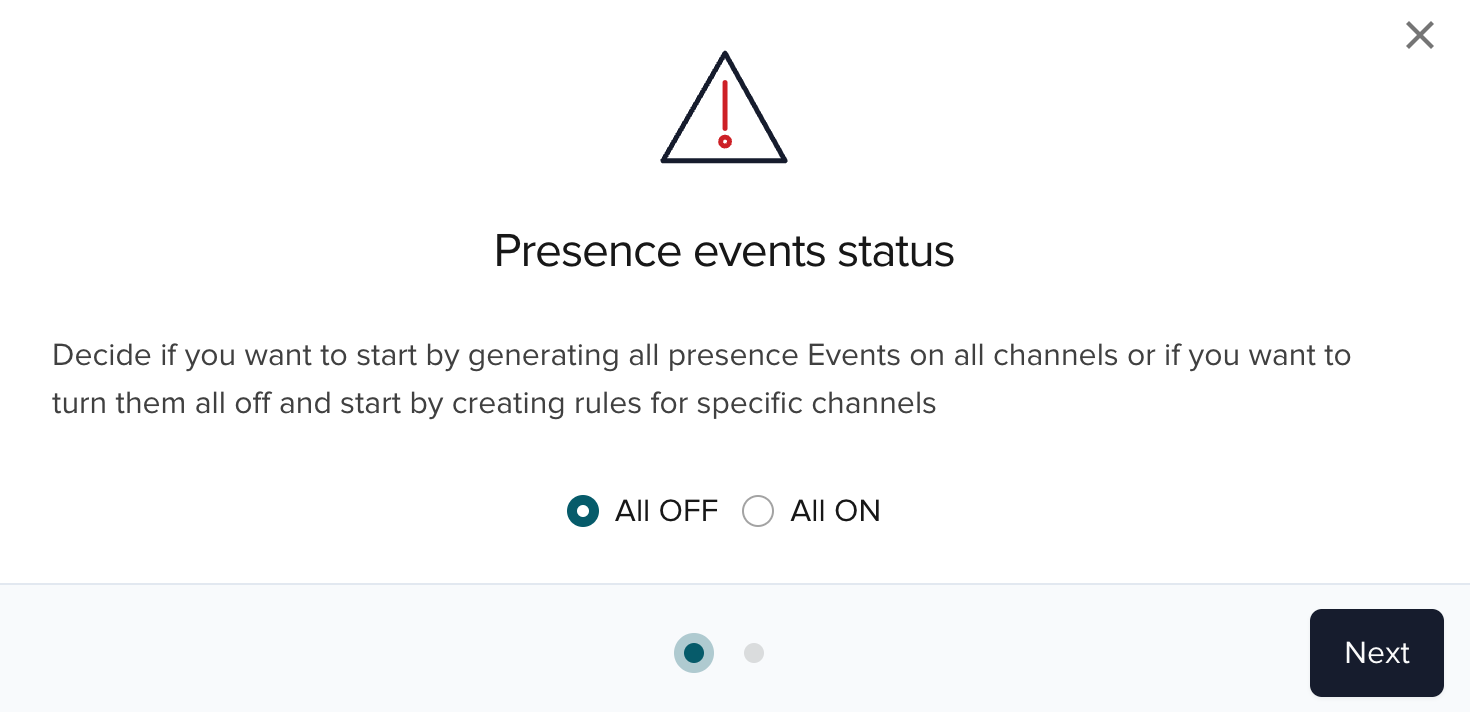
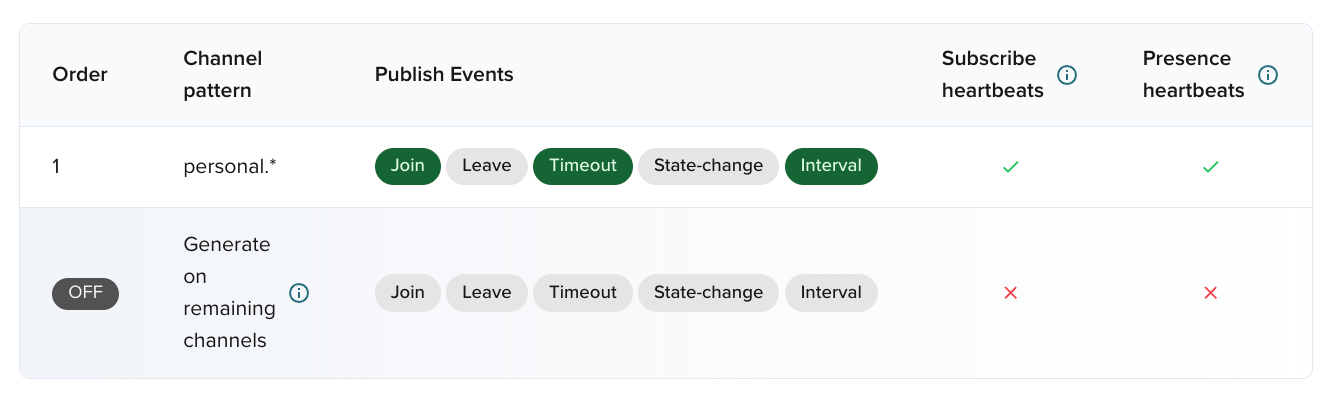
If you choose ALL OFF, this general setup appears as a row on the Presence rules list.
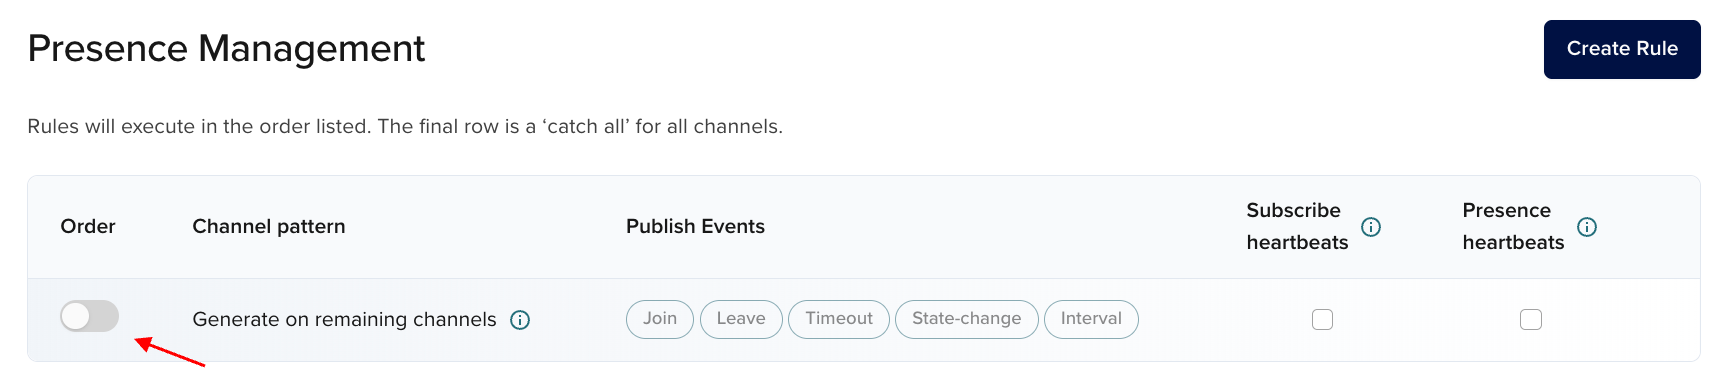
You can change this setting at any time. Click Edit Rules and toggle the slider.
You can also create channel‑ and event‑specific Presence rules. These rules take precedence over the generic setup.
Create Presence rules
Presence rules let you define which channels trigger Presence events. Follow these steps to create rules.
-
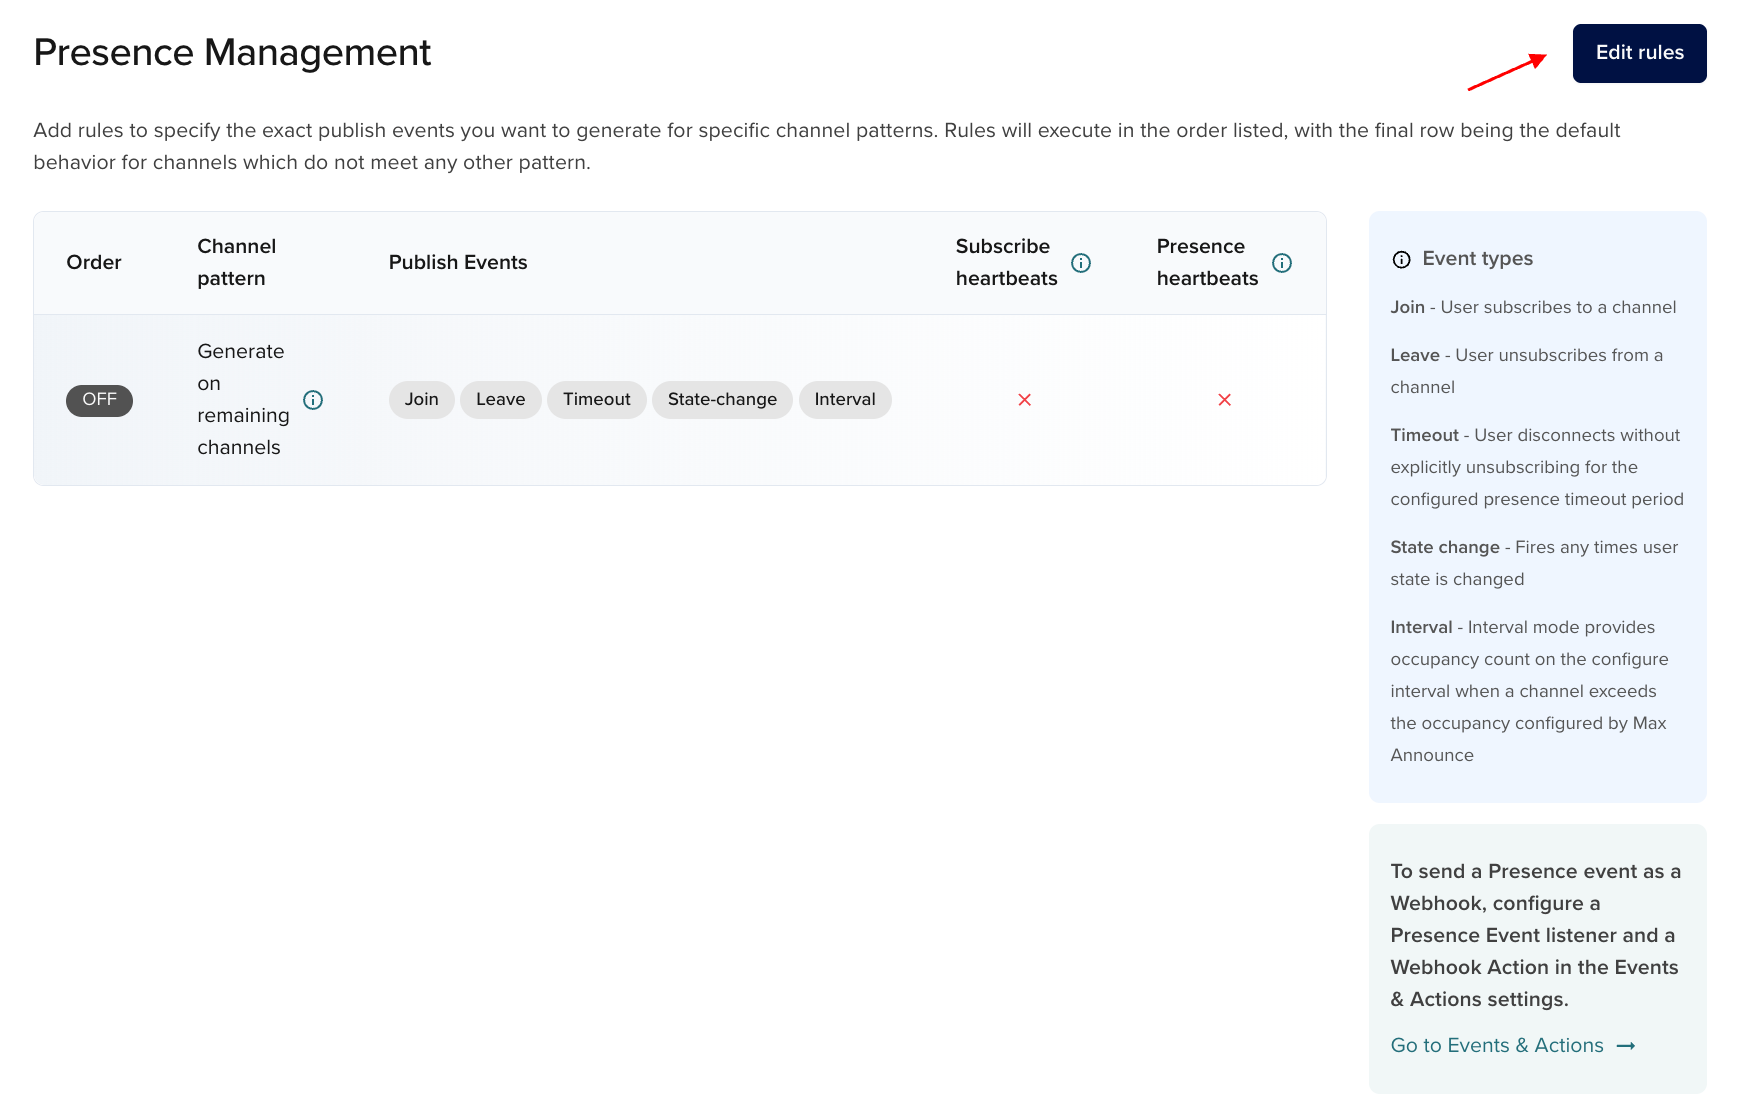
In Presence Management, click Edit Rules to switch to configuration mode.
-
Click the Create rule button.
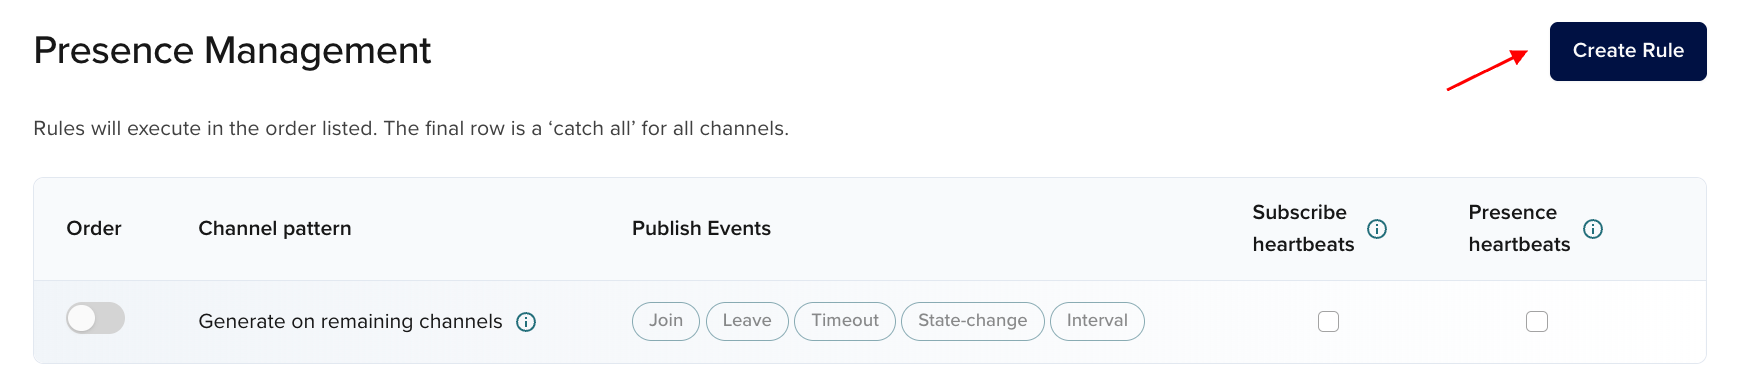
A new rule placeholder will appear as a row at the top of the list.
-
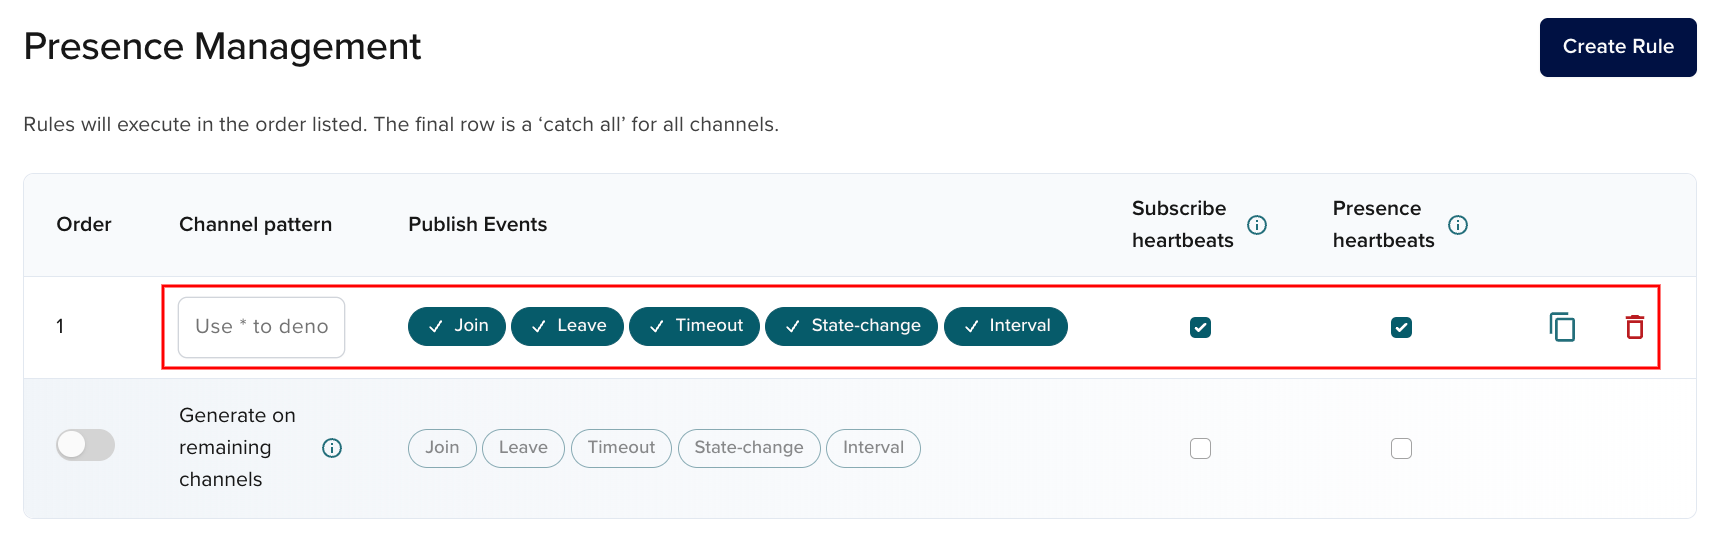
In the Channel pattern column, enter the channel name or a wildcard pattern. For example, enter
personal-*to track Presence on all channels with thepersonalprefix.Rule pattern scope
Create one rule per allowlist pattern. To include multiple patterns, add additional rules.
-
In Publish Events, select event types to track on the channels or patterns you defined.
Events Description JoinFires when a user subscribes to a channel. LeaveFires when a user unsubscribes from a channel. TimeoutFires when a connection to a channel is lost and the subscriber hasn't been seen in 300 seconds. State-changeFires whenever the user's state changes. IntervalFires in interval mode to provide an occupancy count and optionally include delta changes. -
For Subscribe heartbeats and Presence heartbeats, choose how often the client announces its presence to PubNub.
By default, both settings are enabled. Only one is required to track events for a rule.
Timeout events Description Required client configuration Cost efficiency Subscribe heartbeats Periodic requests that keep the client active on subscribed channels. The default interval varies by SDK (for example, 300 seconds). If no heartbeat arrives within the timeout, a timeout event fires. Enabled by default. Configure during client initialization (parameter name varies by SDK, for example, presenceTimeout).Billed separately from Presence heartbeats. Presence heartbeats Finer control than subscribe heartbeats. Use when you need a shorter Presence timeout. Set the interval during client initialization. Recommended: (presenceHeartbeatValue / 2) - 1.Configure during client initialization (parameter name varies by SDK, for example, heartbeatInterval).Billed separately from subscribe heartbeats. -
By default, a new rule is created at the bottom of the list with the lowest priority. To increase priority, hover and move it up.
-
When you're done, click Save to finish.
The new rule will appear on the rules list.
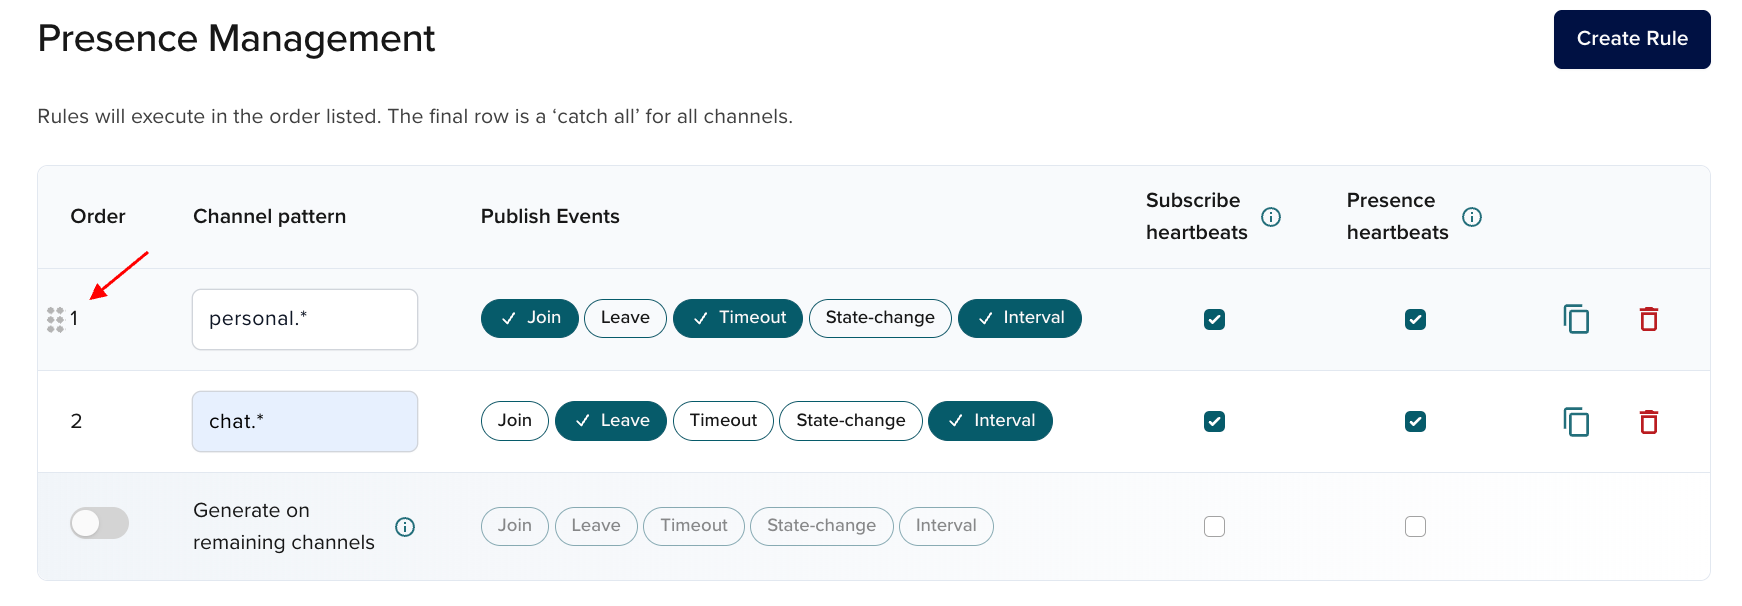
Change rules order
Each rule has a unique number that defines execution order. Rules at the top take precedence. If rules conflict, the higher rule applies.
You can change the order of rules by clicking the Edit Rules button to switch to the configuration mode, hovering over a given rule, moving it up or down the list, and clicking Save.
Edit rules
To edit a rule, click the Edit Rules button, change the settings, and Save the configuration.
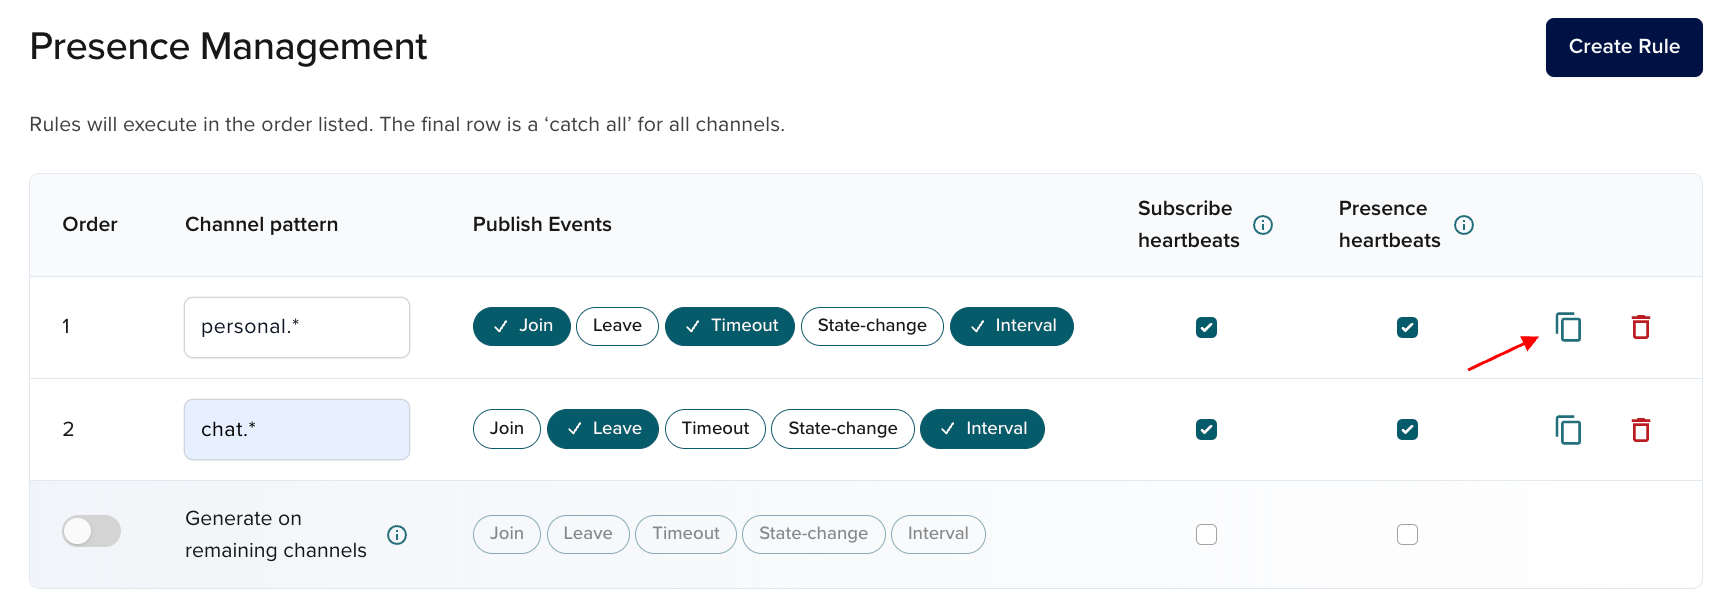
Copy rules
To create similar rules quickly, click the Copy icon. It creates a copy under the original with a blank channel pattern.
Click the Edit Rules button to switch to the configuration mode, copy a given rule, complete the rule setup, and Save the configuration.
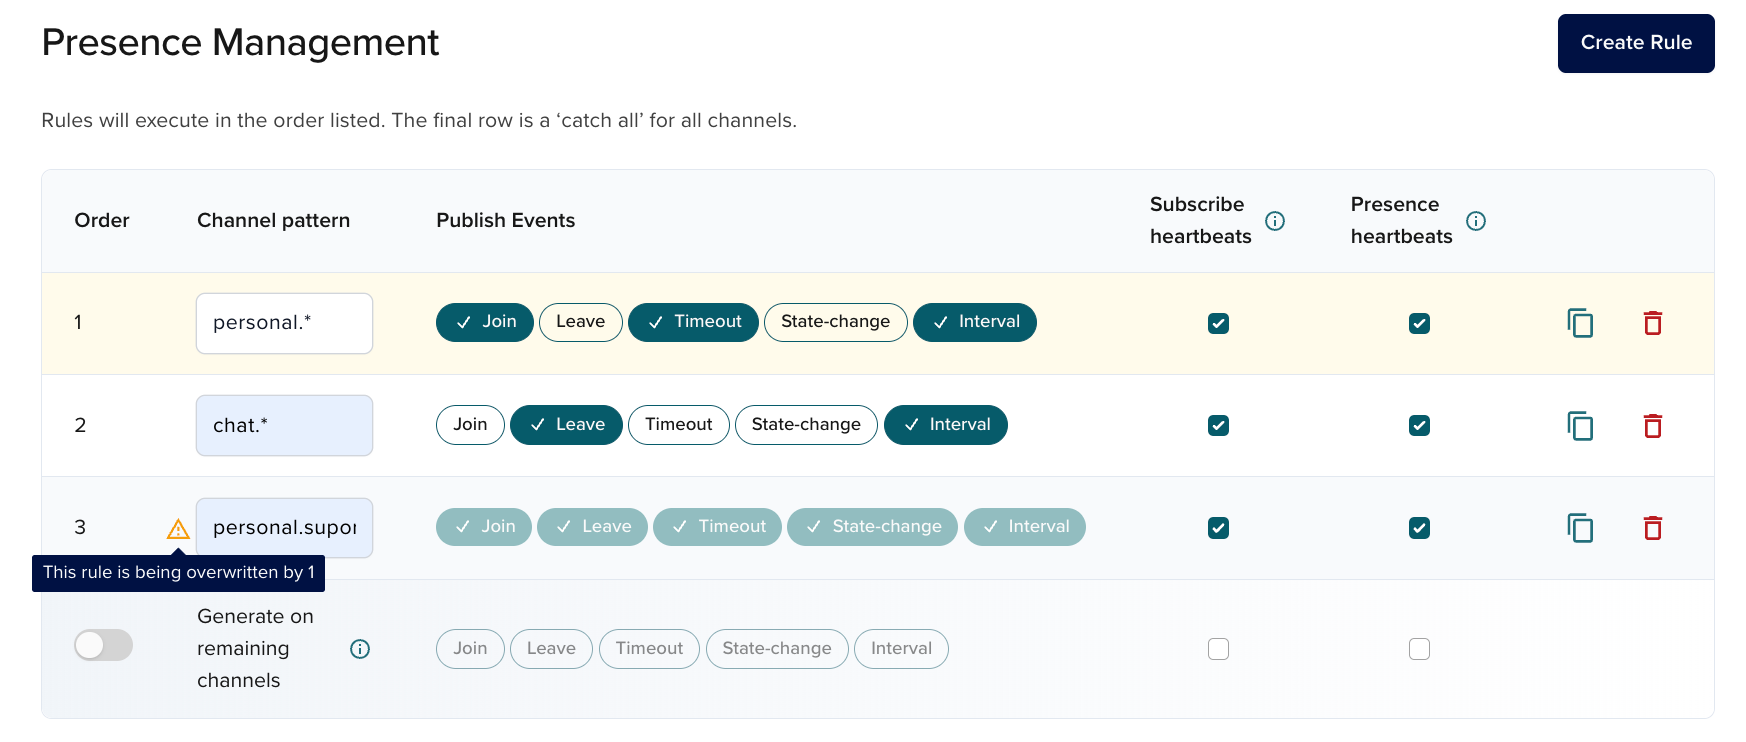
If a new rule uses a pattern already covered by another, you'll see a note about an overlapping pattern.
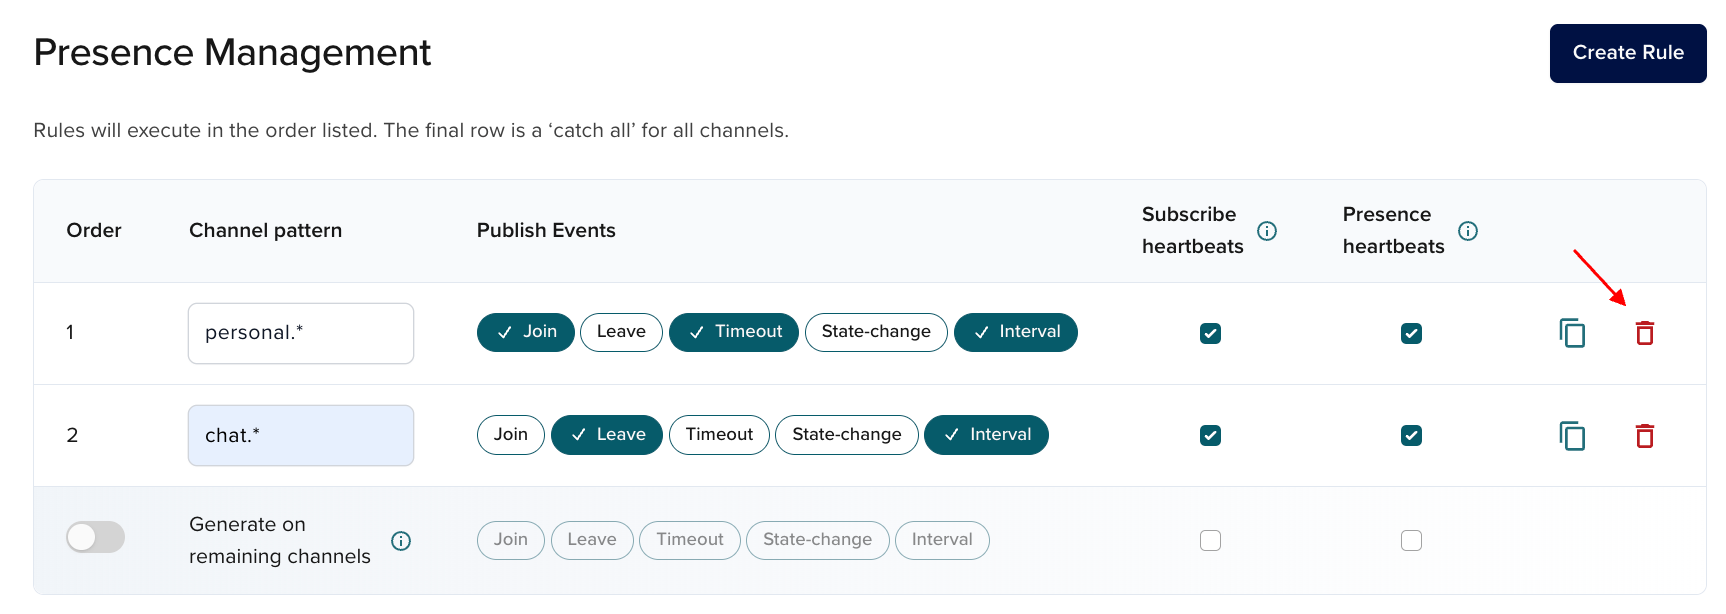
Delete rules
To delete a rule, click the "Bin" icon next to the rule and Save the configuration.
Presence APIs and excluded channels
Presence Management rules only affect real-time subscriber tracking. If a channel is excluded from Presence tracking, querying it with hereNow() returns zero occupancy and an empty user list, the same as a channel with no active subscribers. Other Presence APIs such as WhereNow, SetState, and GetState are not affected by Presence Management rules.
Configure webhooks for rules
Once you have created Presence rules, you can configure webhooks for them using Events & Actions. This way, you can decide what will happen when chosen Presence events occur. For example, you can configure Events & Actions to send e-mail notifications each time a new member joins a channel.